Forum Replies Created
- AuthorPosts
 YegonParticipant
Always welcome
YegonParticipantTo improve print quality consider doing the following
- Use genuine cartridge or toner.
Original cartridge always prints quality work. Other available cheap cartridges normally has poor print performance especially when it comes to images. Buying genuine cartridge will save you if quality is of concern to you.
- Buy quality printing papers.
printing papers affects the quality of images. Use the recommended printing papers for specific purposes. Photos requires high quality printing papers and buying low quality papers will compromise the final output.
- Apply the correct settings for your printer.
Use the factory settings in your printer. If you changed the settings, consider restoring it back to default. Those settings were set by the manufacturer to produce the best quality thus making a slight configuration change will definitely affect the final quality.
- Always allow automatic servicing to complete.
Printers has inbuilt automatic cleaning servicing. Run it on regular basis to improve on print quality.
- Regular maintenance is essential.
Consider cleaning the printer on regular basis to clean nozzles that might get cloaked over time. This will ensure smooth flow of ink while printing.
- Check printer ink.
Low Ink level brings issues concerning quality. Printers always displays a warning when the cartridge ink level is low.
- Allow printer to rest.
Overworked printer normally prints a lower quality images compared to printer that is not highly used. Consider giving rest at least 30 minutes to the printer to achieve continuous and consistent quality work.
September 22, 2020 at 5:09 pm in reply to: How to Fix Windows 10 Installation Error “The Installation was canceled” #26346YegonParticipantError code: 0x800701B1 is a common problem that shows a specified device is not available when installing windows. Since you are installing it on a new driver, consider checking the disk first to ensure that it was properly Installed and the system can detect it. To confirm that go to bios settings by pressing Esc or F2 key depending on your computer specification then proceed to check in the boot section. If the new drive is working correctly, it should be listed in the list of devices. Solutions for solving the error.
- Make sure you are installing the correct version of windows.
Some people reported this error due to incompatible system architecture. This is about the 32 bit and 64 bit types of windows. Remember you cannot install a 64 bit type on a 32 bit laptop but you can install a 32 bit windows version on a 64 bit laptop or hardware. Before installing make sure you know the architecture of your CPU to ensure the correct matching windows OS is installed.
- Make drive changes in Bios to IDE (integrated development environment)
Most new drives comes with AHCI (Advanced Host Controller Interface) drive type which brings issues while installing windows. Go to Bios settings and change it to IDE type then later you can set back to AHCI.
- Make sure your USB drive or ISO windows files has no errors and adequate space.
USB errors can bring problems while installing. Use a good device that has adequate space and is clean. A small error will prevent windows from installing. I advise you to make a new installation device using a windows media creation tool. This way you are sure of the windows files Integrity and your problem will be solved definitely. To create a new installation media device, visit Microsoft https://www.microsoft.com/en-us/software-download/windows10
- Consider switching between legacy and UEFI settings.
Install windows using the new UEFI mode for newer systems. This settings is available in Bios and in case you need to know more about it, read more here https://docs.microsoft.com/en-us/windows-hardware/manufacture/desktop/boot-to-uefi-mode-or-legacy-bios-mode#:~:text=In%20general%2C%20install%20Windows%20using,mode%20it%20was%20installed%20with.
Let us know if your problem was solved.
YegonParticipant0x80080008 update error is very common when trying to update your windows 10. This error is mostly cause by third party antivirus software so consider disabling it before making an update or manually download the update and install manually, repair disk errors, run update troubleshooter or restart BITS services Etc. Let us fix this step by step
- Disable Third party antivirus software.
If you have any third party antivirus installed in your system then start by disabling it. These include antivirus software such as Avast, Norton, Eset, Karspersky among others. They normally block some windows components from installing correctly thus causing error 0x80080008. In case you are using the inbuilt windows defender security software, go to the next step.
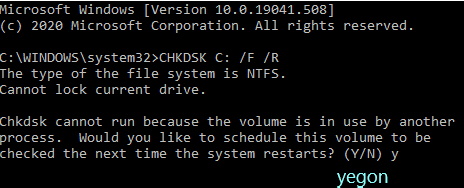
- Check disk for errors by performing a system scan using the command CHKDSK C: /F /R press Y and restart windows to begin scanning.

- Do SFC and DISM scans to correct Errors.
SFC stands for system file checker while DISM stands for Deployment Image Servicing and Management. To perform these commands, open CMD as Administrator by clicking on search button then type CMD then Right-click and choose Run as administrator.

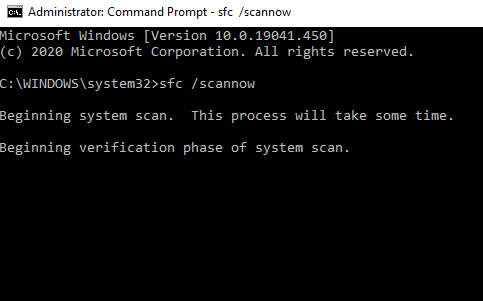
- First we will run SFC command by typing sfc /scannow and hit enter button. It will take some time so be patient while windows scans and repairs corrupt system files. Once done check whether you can do the update if not go to the next step.
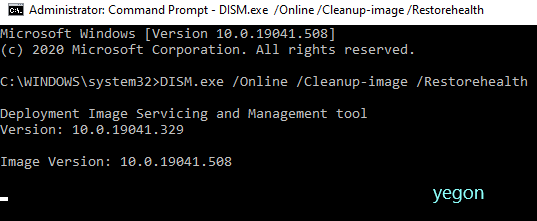
- Run DISM command by typing DISM.exe /Online /Cleanup-image /Restorehealth and hit enter button to begin the process.

Restart your computer and check whether the update is fixed otherwise proceed to the next step.
- Download windows update manually
First note the KB number of your system then go ahead and search for it in the Microsoft website and download the one that suits your computer architecture.
- Restart windows updates components
This applies to cases where the windows components is causing update issues. Use the following commands in the CMD to restore windows system files to original state. Always run CMD as an administrator and also press enter after each command or simply paste it all.
net stop wuauserv
net stop cryptSvc
net stop bits
net stop msiserver
ren C:\Windows\SoftwareDistribution SoftwareDistribution.old
ren C:\Windows\System32\catroot2 Catroot2.old
net start wuauserv
net start cryptSvc
net start bits
net start msiserver
Once it is done try making an update.
- Restarting BITS Services
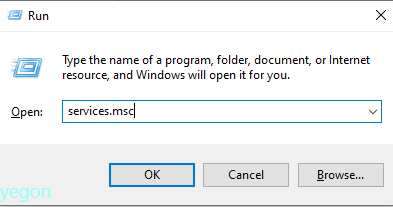
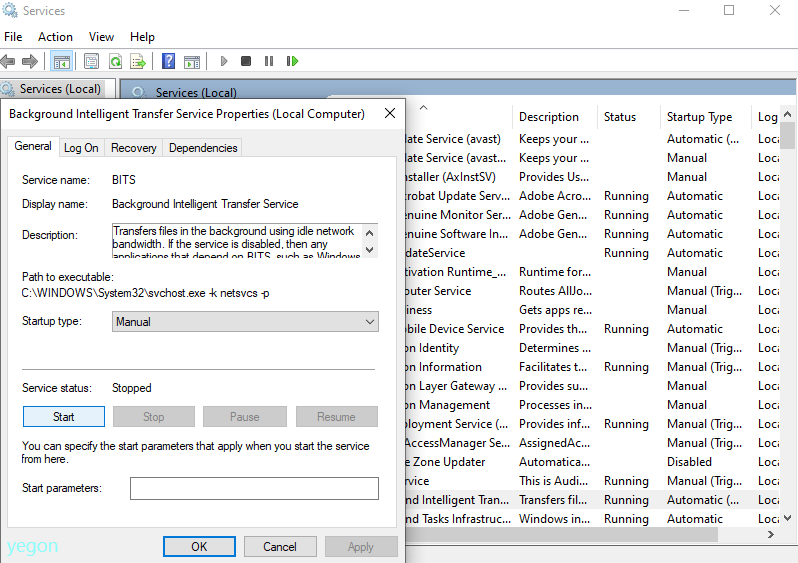
BITS stands for Background Intelligent Transfer service. It is responsible for windows update and if the service stops, you will not be able to make an update and thus giving out errors. Follow this process to restart the BITS service once again. It is found in services so we open Run by pressing Windows+ R combination keys then type services.msc or via task manager and open services. Look for Background Intelligent Transfer service and make sure the service is not stopped in General settings. Also ensure the First failure and Second failure is set to Restart the service in the Recovery settings.

- Do an In-place upgrade
This is the last option if non of the above processes solved your problem. This is where you create a bootable disk matching your system then installing it to upgrade windows to the latest version without losing any data or files. You can use an ISO image or download from Microsoft website. For more, about in-place upgrade, check here https://answers.microsoft.com/en-us/windows/forum/windows_10-windows_install/how-to-perform-an-in-place-upgrade-with-windows-10/7f0b236e-3c6c-4913-9691-c4baa2a6190a
YegonParticipantWhen it comes to choosing between Inkjet verses laser printers, you have to consider many factors such as price, size of printer, maintenance, quality of work, durability Etc.
First lets see the difference between the two printers
- Laser printers uses toner cartridges while inkjet printers utilizes ink cartridges.
- How it works> Laser printer uses electrical mechanism to instruct the toner on where it should dispense while printing a paper while Inkjet dispenses ink directly from the cartridge as it prints on a paper while the cartridge is moving across.
- Cost> Laser printers are expensive both to buy and replace toner while Inkjet printers are relatively cheap in terms of initial cost and maintenance.
- In terms of size> Laser printer requires more space compared to Inkjet printers.
- Speed> Laser printers are faster than Inkjet printers. Laser-15 to 100 pages/min while Inkjet 16 pages/min
- Printing Quality> Both produces high quality work depending on your needs with laser printer having a better quality overall. For black and white text, Laser wins while photos and images, Inkjet wins.
Now that you are not a heavy user, when you need to print from home will be affected by the comparisons above if small details matters to you such as Speed, quality, cost, size Etc.
September 21, 2020 at 9:33 pm in reply to: How to install Ricoh printer driver on windows 10? #26325YegonParticipantInstalling your Ricoh using windows 10 is straight forward. All you need is to connect your laptop to the network or using a USB cable. This will allow you to download and install the correct driver from the printer’s official website. Do not worry about the driver installation CD you can do without it.
There are two options to approach the installation of the printer’s driver.
- Download the driver manually from the website the add the printer.
- Install the printer’s driver automatically through the network.
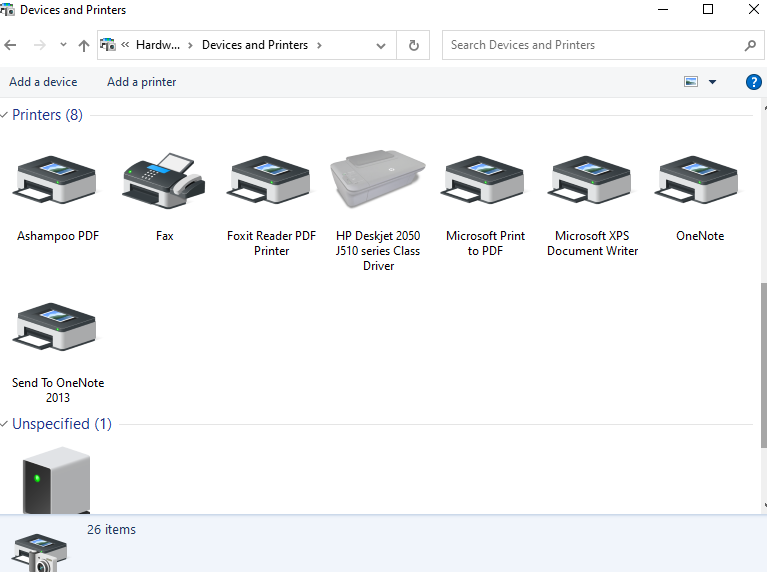
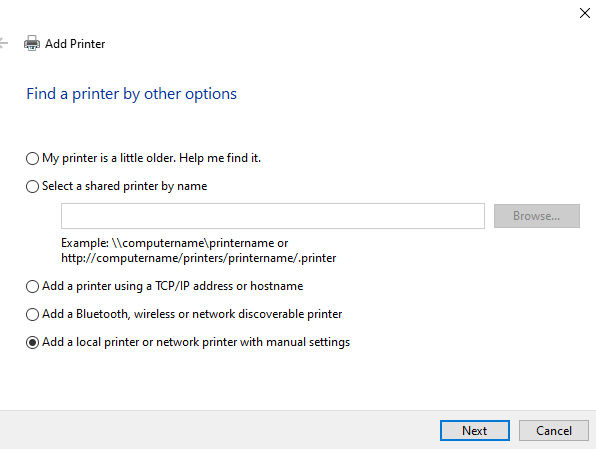
Since you are using a personal laptop, I suggest you connect the printer to the laptop using a USB cable. Once connected, Go to settings-> Devices->printers and devices-> click on add printers and scanners. Make sure you are connected to the internet to download the driver. Once your printer is listed go ahead and add it.

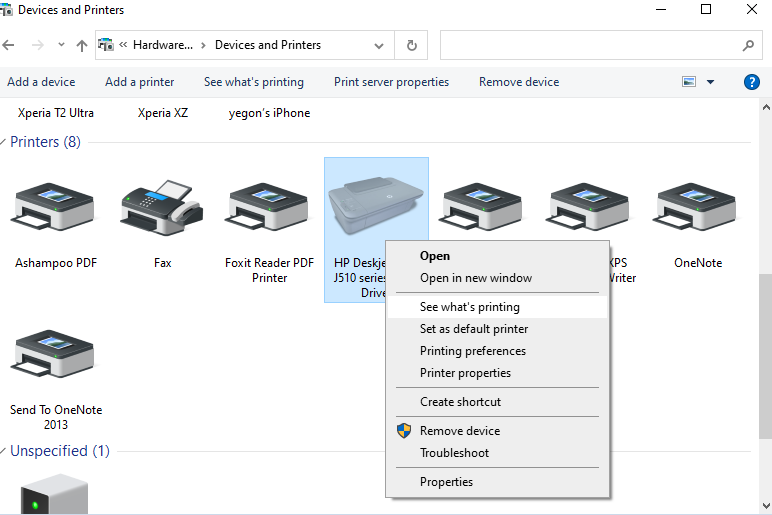
You can see the progress of your driver installation through the Device and printers section as soon as you plug in the USB Cable as shown in the image below.

Alternatively Go to Control Panel\Hardware and Sound\Devices and Printers. Follow the on screen instructions to add your printer device. The process is straight forward and should not take much time.

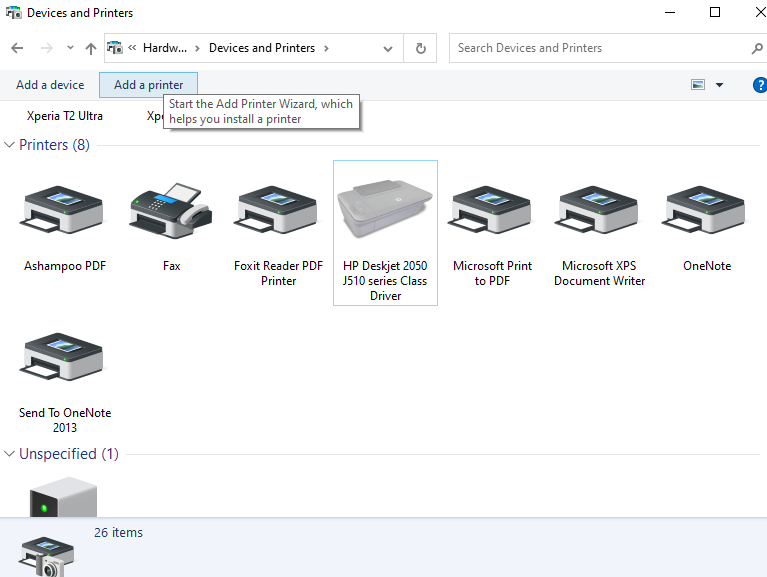
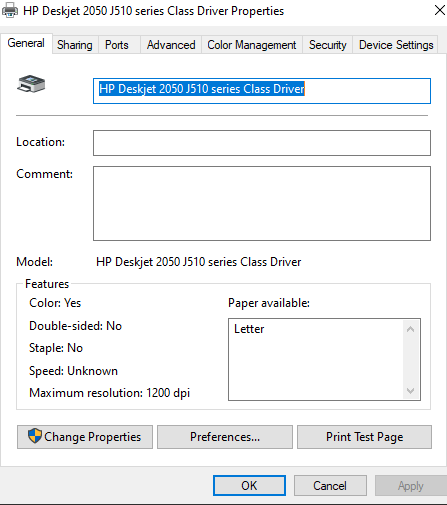
In case the printer was not listed, click on the button below indicating “The printer I want isn’t listed” and go ahead. This mostly works when the printer is connected through the network and being controlled in a domain. Once done, Right click on your printer and click on printer properties then set up your printer to suit your needs and click on Print Test page.

 YegonParticipant
Always welcome
YegonParticipantAlways welcome
YegonParticipantMain signs of Relevant knowledge includes;
- Relevant knowledge advertisements being displays on your google search results.
- Websites being re-directed automatically to totally a different site.
- Pop-up ads while browsing the web which gives you some information not necessary as per your search results.
- Installation of new apps without your consent mostly adware programs.
- Slowing down your browsing experience.
This program normally gets installed in your system with or without your permission since it is mostly attached to other software programs or advertisements. Some sites do not not openly disclose that a given application will be installed including those adware only for you to realize later about it when it is already running in the system. Be careful when installing any free software and do not select to install everything for security purposes.
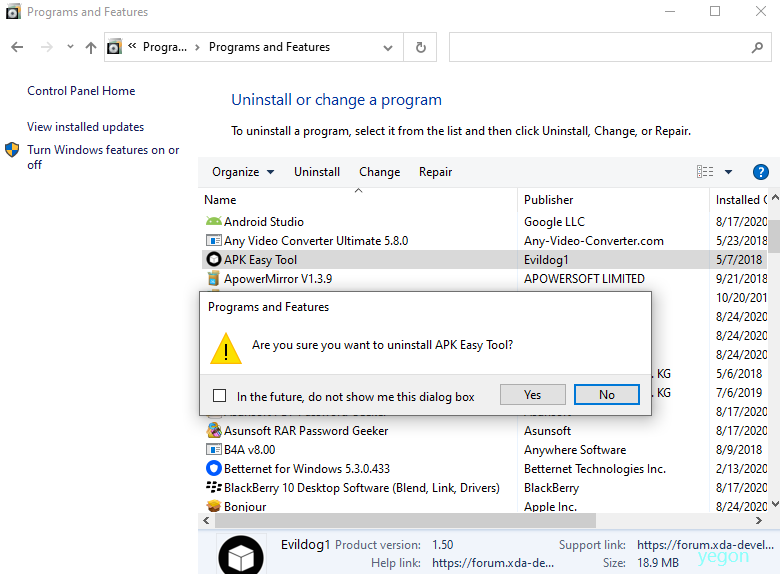
To fully remove Relevant knowledge from your system, use the control panel, Malwarebytes , Hitman pro or use AdwCleaner. In our case we will utilize available inbuilt uninstaller found in windows control panel.
Press Windows + S combination keys and search for Control panel->Control Panel->Programs->Programs and Features scroll down to Relevant knowledge Right-click on it then Uninstall it.
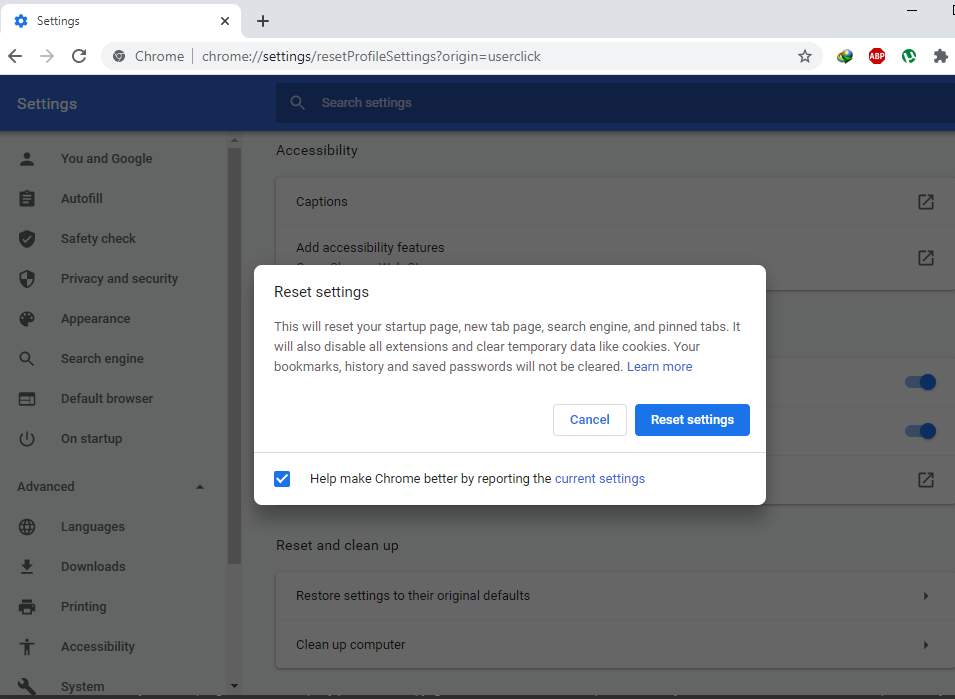
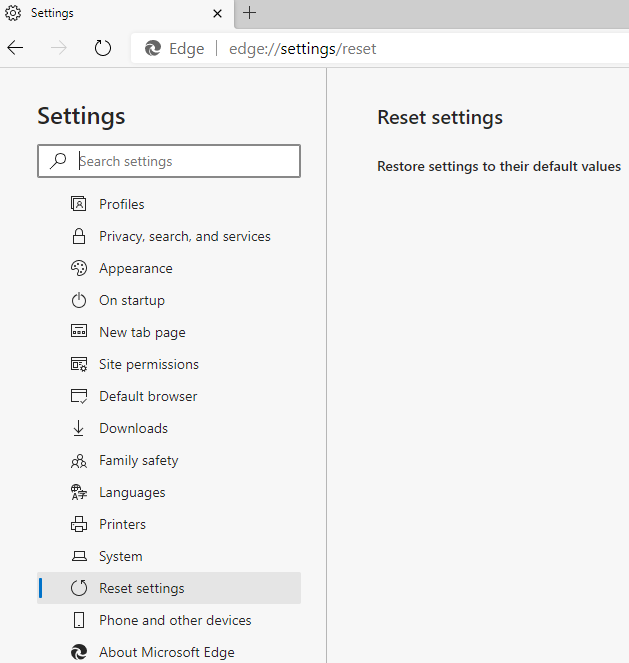
Once the process is complete, go ahead and reset your browsers settings.
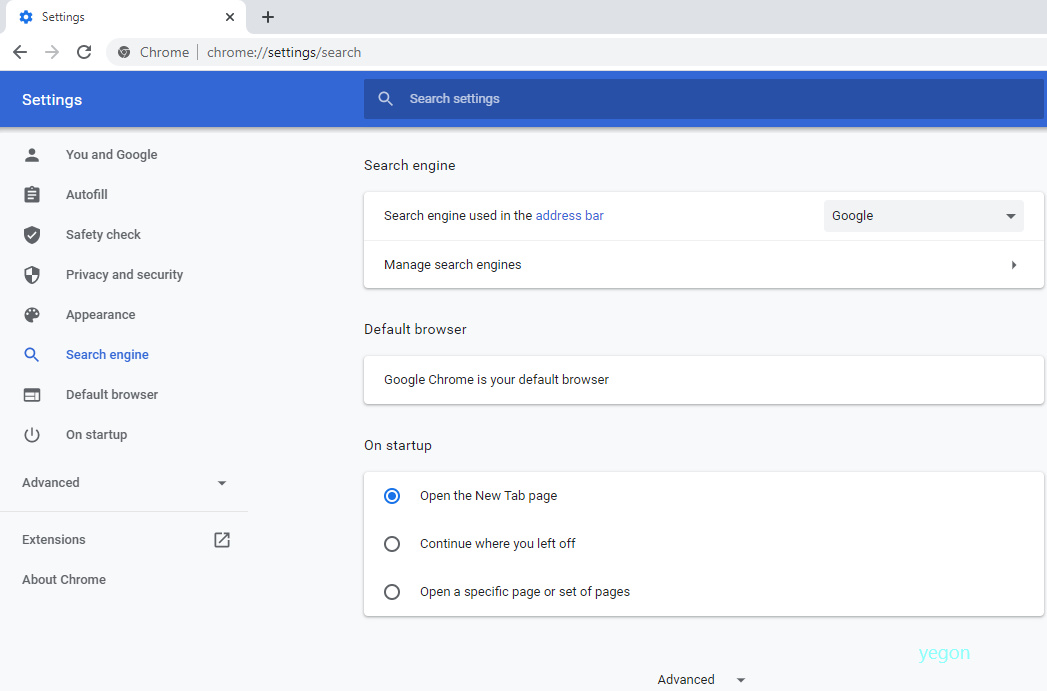
To reset Chrome, Go to settings-> Advanced settings-> click Reset.
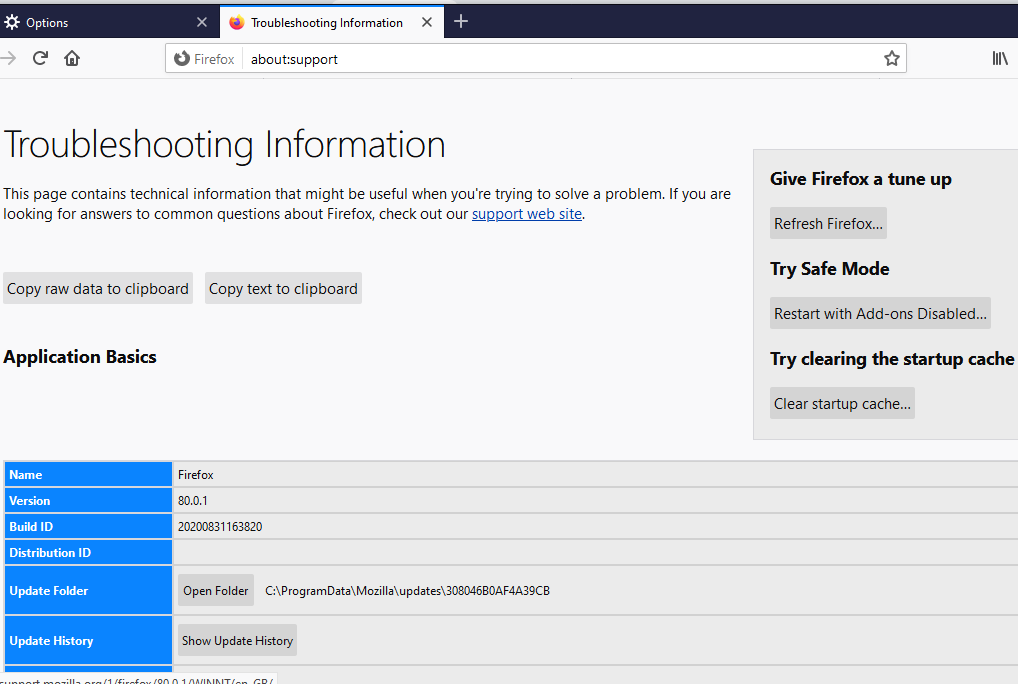
For Firefox , go to settings-> Help->Choose troubleshooting Information-> then click Refresh Firefox
For edge://settings/profiles then Reset settings.


 YegonParticipant
ytmp3.cc is an adware program that redirects websites to ytmp3.cc which is so annoying. It is an advertising service that publishers uses to establish traffic to their site to generate revenue. Normally makes changes to browser’s default settings and change the behavior or the interface settings. The manipulation of the settings makes it behave like a malware program and has to be removed immediately. Over time your PC will run slow and make browsing experience really annoying. Avoid this problem by paying attention while installing a program software and never accept additional software installations normally offered by some programs while installing them.
To remove ytmp3.cc , Press Windows+S combination keys and search for control panel-> Click programs-> then program and features-> scroll down through installed program till you find it then right-click and uninstall it. Also remove any other suspicious programs from the list shown.
 YegonParticipant
SSOption is an adware software program that displays pop-up ads in browser on any site that you visit in your browser. Most of these are unwanted advertisements that is so annoying. This normally consume resources in your computer and is demanding on bandwidth. It can also install other unwanted adware programs so it is necessary to get rid of it mostly affects Chrome, Firefox, Edge e.t.c. To avoid more problem consider checking before installing free Software online since it normally comes with these adware programs.
Make sure you remove it completely from your system by opening the control panel. Tap on search button and type control panel-> open and go to program and features then scroll down SSOption-> right-click and uninstall it. Remove any other suspicious programs from control panel to avoid further problems. Do not forget to reset your browser’s home page and default search engine. See below images for analysis.
 YegonParticipant
To disable incognito mode permanently follow these steps to make changes to registry files.
- Press windows key+R
- In the Run box, type regedit and hit Enter
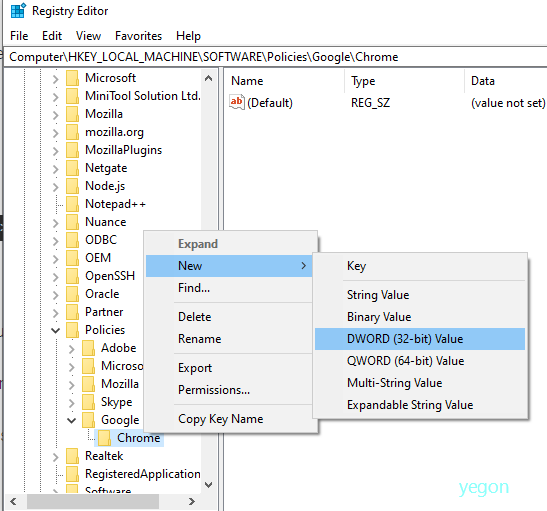
- Go to HKEY_LOCAL_MACHINE\SOFTWARE\Policies\Google\Chrome in some instances you might be forced to create Google and Chrome folders.
- Right click on Chrome, then select New->DWORD 32-bit value
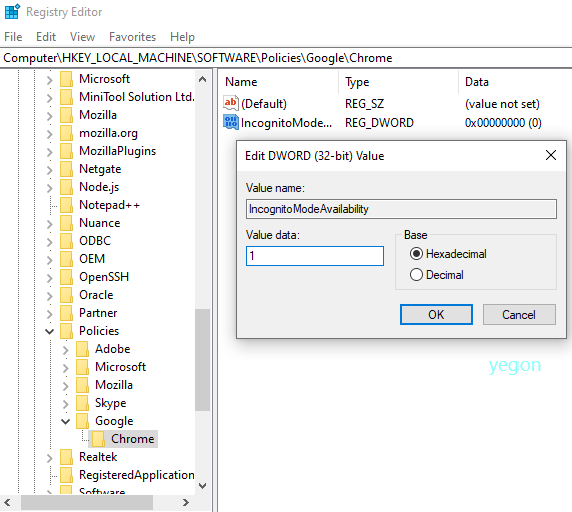
- Name the value as IncognitoModeAvailability then double click it and set the value to 1.
- Restart the computer and that is it Incognito mode is gone.

 YegonParticipant
User Account Control (UAC) is meant for security in windows so that no one interferes with the system files without Admin permissions. These permissions might originate from Apps, virus, malware or users. With UAC enabled there will be no changes to windows without full authorization by the Administrator and thus keeps the Operating system safe.
UAC has Four levels
- Always notify. All changes made by users and software is first notified as long as it requires Admin rights. This is the most secure settings one can have and disturbing at the same time since you have to approve everything each time by entering an admin password.
- Notify me only when apps try to make changes to my computer (default). The most recommended AUC setting since you will not be notified when using apps you are familiar with or when making changes to windows settings. Most preferred settings for all users and the default one.
- Notify me only when apps try to make changes to my computer (do not dim my desktop).With this settings on windows does not notify you when you change some setting in windows settings. It is less secure since it allows most apps and settings to take effect without Admin control. Use it when you are sure of the apps you use and changes you make to the computer.
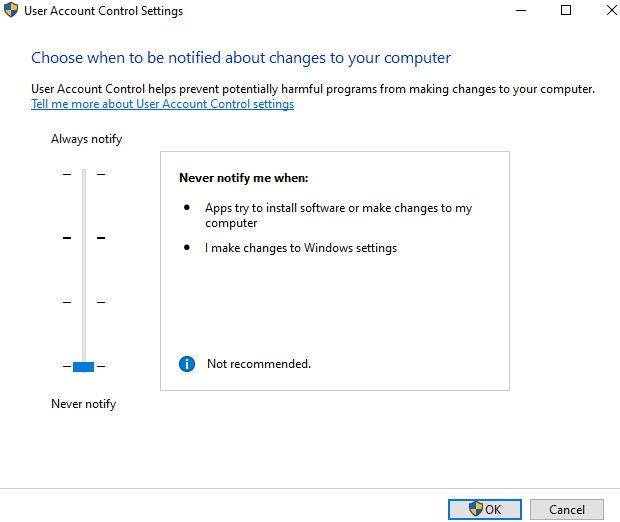
- Never notify. At this level no admin rights is needed to make any changes to windows programs and run apps. Not recommended at any given time.
Now that you know what each mode means, go ahead to select your preferred mode. To disable it select the last option Never notify from UAC settings. To do so, Search for UAC and click on change user account control and adjust the settings to suit your needs and click OK to save settings.
 YegonParticipant
Relevant knowledge software belongs to internet research firms called Comscore, Inc. One of the largest Internet research firms that operates worldwide and relies on the internet and user interaction to seek your opinion on marketing trends. This software collects data from users to see how people interact with content internet and TV for them to make informed marketing strategies. This software works both online and offline while collecting data for the users who installed the software. This software is like a malware for more check here https://www.relevantknowledge.com/home
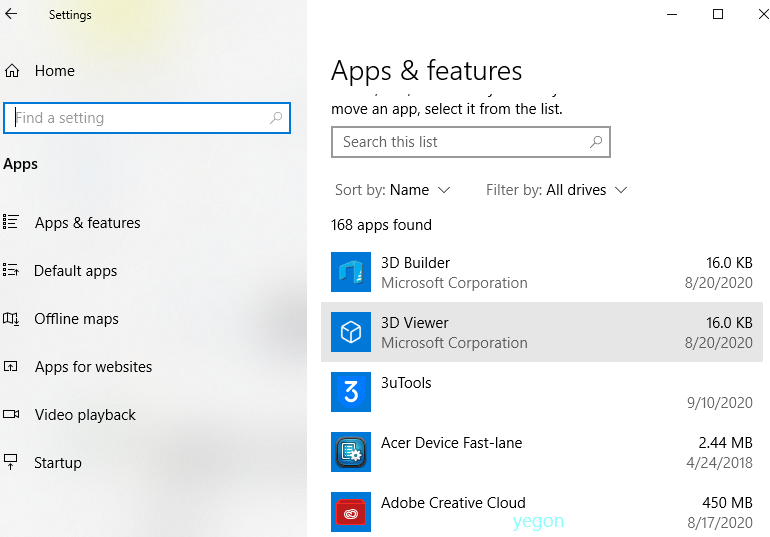
To uninstall the software, Go to settings->Apps-> Then scroll down to Relevantknowledge in apps & features then Uninstall it.
 YegonParticipant
Remote Desktop Connection with Server with the normally occurs when there is an issue with connection, configurations settings, Firewall settings or antivirus software blocking connections.
- Check the Internet connection.
Without internet connection Remote Desktop connection will fail. Ensure you are connected to a stable network connection to avoid interruptions with the connection. At times you might be connected to the network but the internet connection that is essential is not available. use the Bing command to check that.
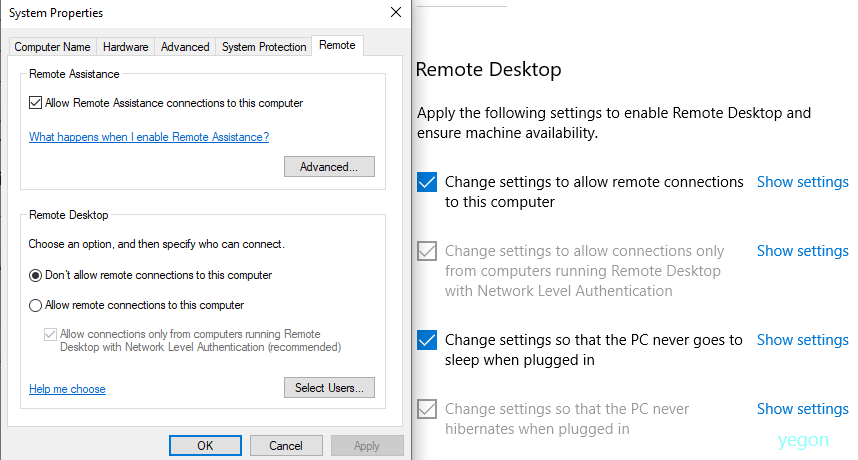
- Ensure remote connections is allowed.
Press Windows+S combination keys and search for allow remote connection to this computer then check the box to allows remote connections to this computer, Apply settings and press OK to save settings.
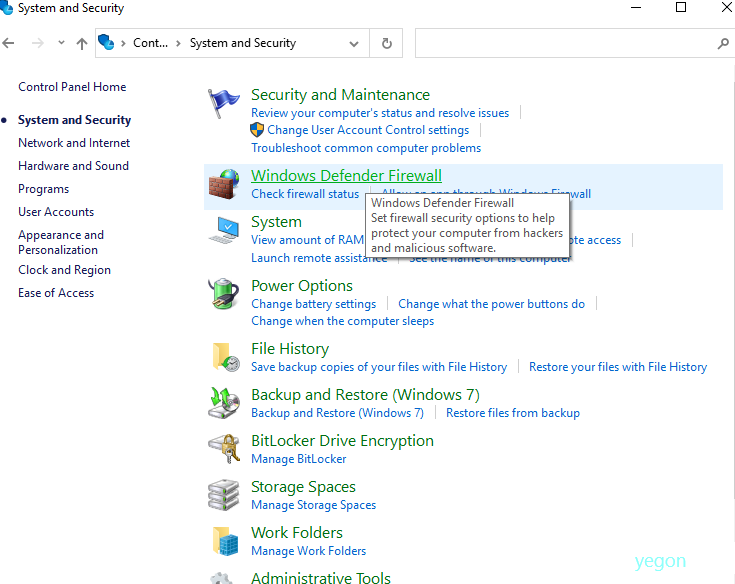
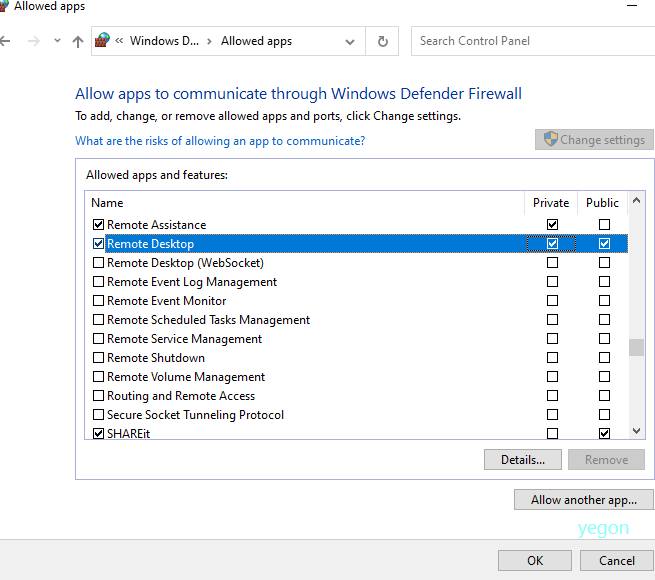
- Configure Firewall settings.
Sometimes your Antivirus software or the inbuilt firewall program is blocking the Remote access. To check these settings Search for windows defender firewall or go Control Panel-> system and security-> Click on windows defender firewall-> then click on allow an app or feature through windows defender firewall-> Change settings-> Navigate to Remote Desktop and check it-> Finally click OK to save settings. In case you have a Third party antivirus software such as Avast, Eset, Norton E.t.c that is managing your firewall settings, open it and enable those settings for remote desktop connection.


For more Information, visit https://docs.microsoft.com/en-us/windows-server/remote/remote-desktop-services/troubleshoot/rdp-error-general-troubleshooting
- AuthorPosts