Forum Replies Created
- AuthorPosts
 YegonParticipant
Hello, This happens at times but it’s not a big issue. Press these combination keys.
Use Ctrl+Alt+ up arrow key for normal screen mode. Try other keys to see the difference.
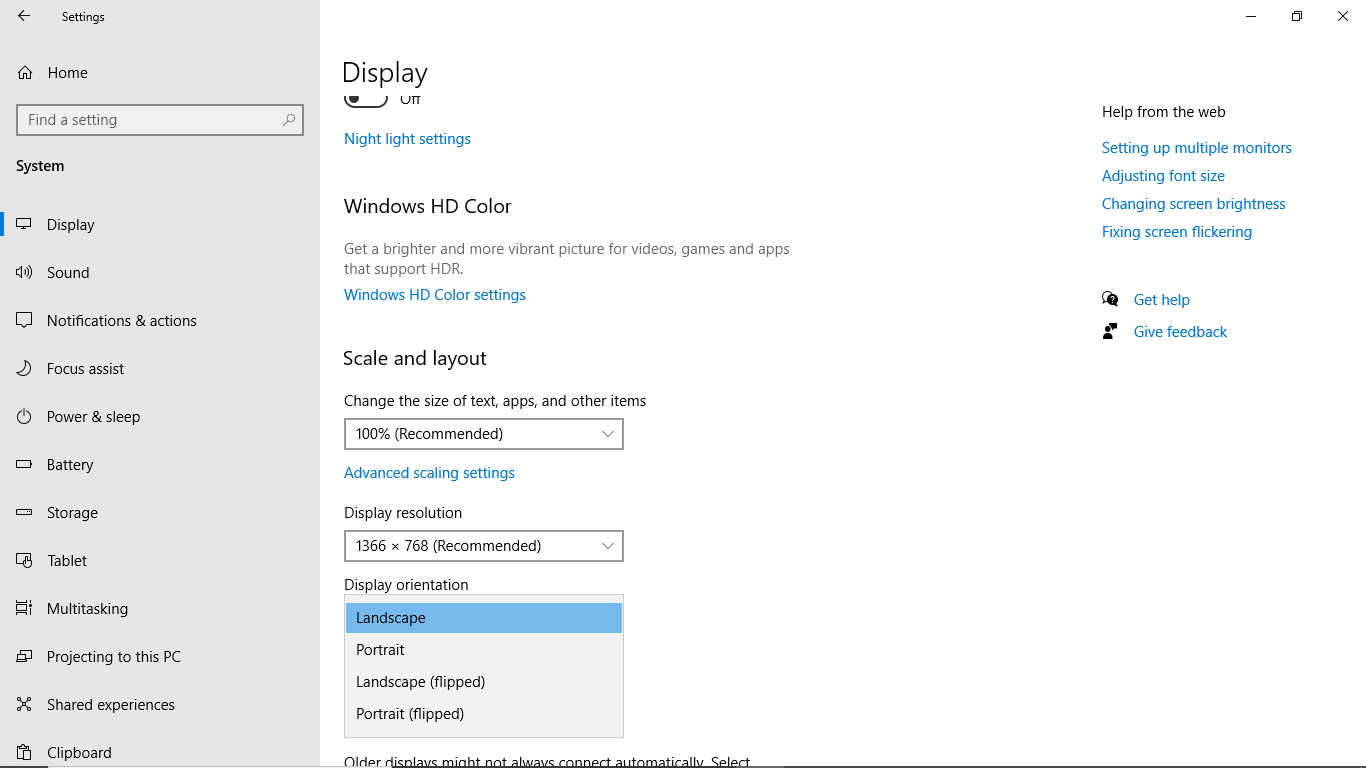
Alternatively , go to settings->choose system-> navigate to Display settings and scroll down to Display Orientation and select from the drop-down menu as shown below.

Nice day
YegonParticipantThe most common reasons responsible for getting the windows update errors 0x80080008 and 0x800705b4 is the antivirus mostly third-party e.g Avast, AVG, Norton etc. Most people who had this problem confirmed that disabling the third-party antivirus on their computer solves the problem of removing the errors. This should always be the first solution if it doesn’t work move to the next solutions.
Perform a System File Checker(SFC) and Deployment Image Servicing and Management(DISM) Scans
This is meant to resolve persistent windows updates errors due to problems with windows installation. This is normally resolved using CMD. Follow the process below
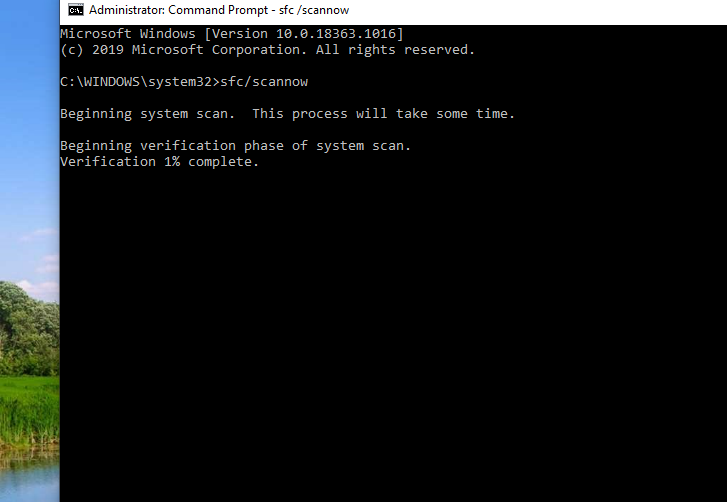
On you windows 10 press Windows Key+S to search->Type command prompt (CMD) ->
Right click on Command Prompt icon-> click Run as Administrator.Inside Command Prompt, type sfc/scannow , then press Enter to execute the command.The process will locate and repair corrupted files. Be patient and wait for the process to complete.

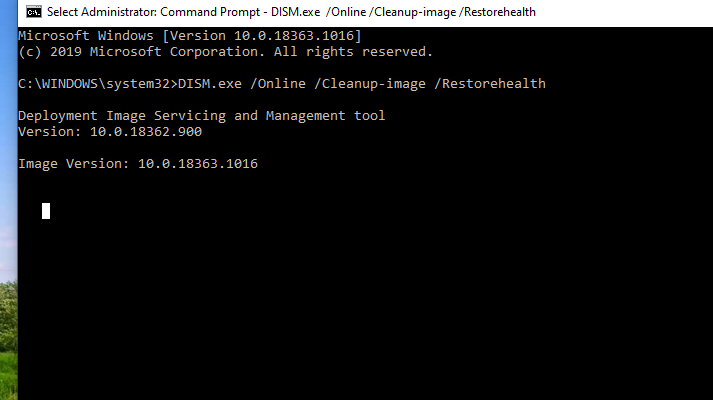
Next type DISM.exe /Online /Cleanup-image /Restorehealth /. The process takes some time to complete.

Download the update Manually
This is an alternative way to resolve the issue but make sure you record the KB number of the update you want to download, open your browser and navigate to Microsoft Update Catalog website then enter the KB number you recorded from a list of results as displayed. Search for the right update version that matches your system specifications and download the executable file and install.
If not successful go to the next step
Restarting the Background Intelligent Transfer Service (BITS)
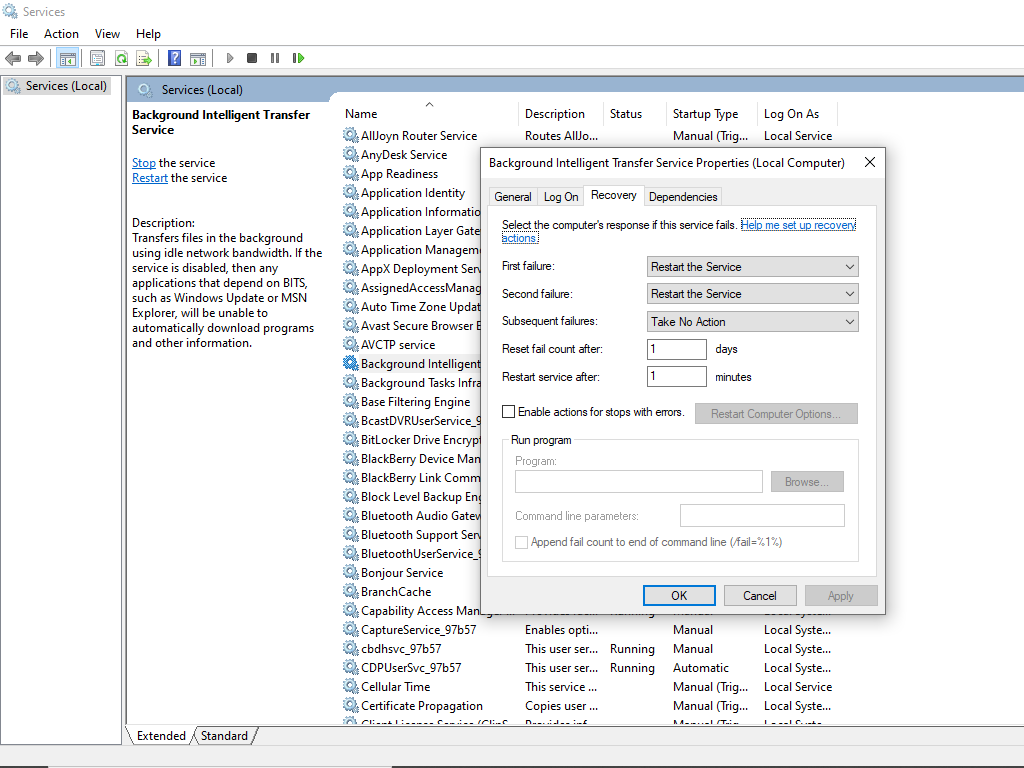
To do this follow these steps;Press Windows Key+R combination keys to execute the Run dialog box-> Type services.msc press Enter button then navigate to the Background Intelligent Transfer Service (BITS) and Double-click to open.
If the service is set to Stopped, click the Start button to resume the services next proceed to the Recovery tab and ensure the First and Second Failure are set to Restart the Service respectively. See the screenshot below

If not successful go to the next step
Restart the components of your Windows update service
Run CMD as an administrator then enter the following commands one by one pressing enter key after each command.
Type net stop wuauserv->net stop cryptSvc->net stop bits->net stop msiserver->ren C:\Windows\SoftwareDistribution SoftwareDistribution.old->ren C:\Windows\System32\catroot2 Catroot2.old->net start wuauserv->net start cryptSvc->net start bits->net start msiserver
That should solve your windows 10 Update errors for good.
YegonParticipantMicrosoft gave a free upgrade to all windows 7 users offer which ended four years ago. Whoever, to this date, Microsoft’s free upgrade tools is still working in installing Windows 10 on an old PC that runs Windows 7 or later Windows 8 without the need of the product key for activation.
Before making the upgrade, first check the minimum hardware requirement needed to confirm whether it can handle windows 10 OS and make a complete backup of the OS just in case you need to rollback. Make sure you are running the latest version of your current windows 7 operating system in this case, Windows 7 Service Pack 1. In case you don’t have one find it online at the Microsoft site. https://www.microsoft.com/en-us/download/default.aspx
Also uninstall any software that might not be compatible with windows 10 to avoid upgrade errors, these include antivirus, Office, and any other old programs that may bring issues while you are upgrading to Windows 10. Disconnect hardware peripherals connected to the PC such as USB drives, printer, mouse, camera, keyboard, external hard drive to avoid problems.
Making an upgrade is very important since the support for Windows 7 officially ended in Jan 2020.The best part is that you can always make the upgrade without need to loose your data.
Follow this link for detailed information https://www.microsoft.com/en-us/search?q=windows+7+upgrade+to+windows+10
YegonParticipantMany users who recently upgraded to windows 10 experience this problem. Let’s go through the following troubleshooting processes to solve those issues.
- Restart your device. Restarting the OS helps to make the system stable by refreshing applications that have a tendency of running in background.
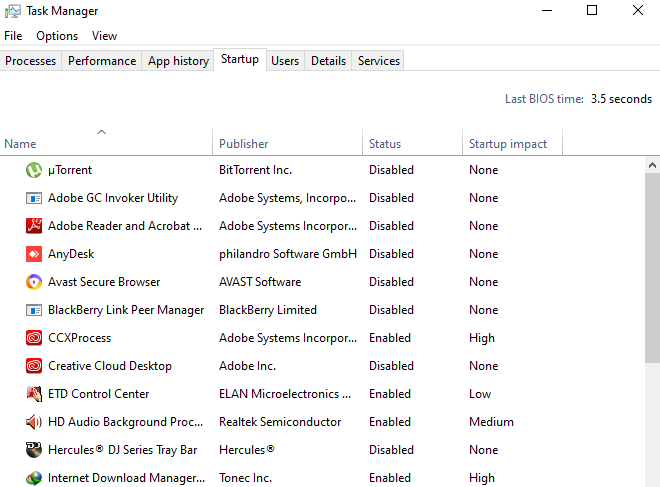
- Manage startup programs . Go to task manager and navigate to startup tab.

- Make an update of the operating system to ensure you get the latest updates. Go to Settings->Update and Security settings->Windows Update
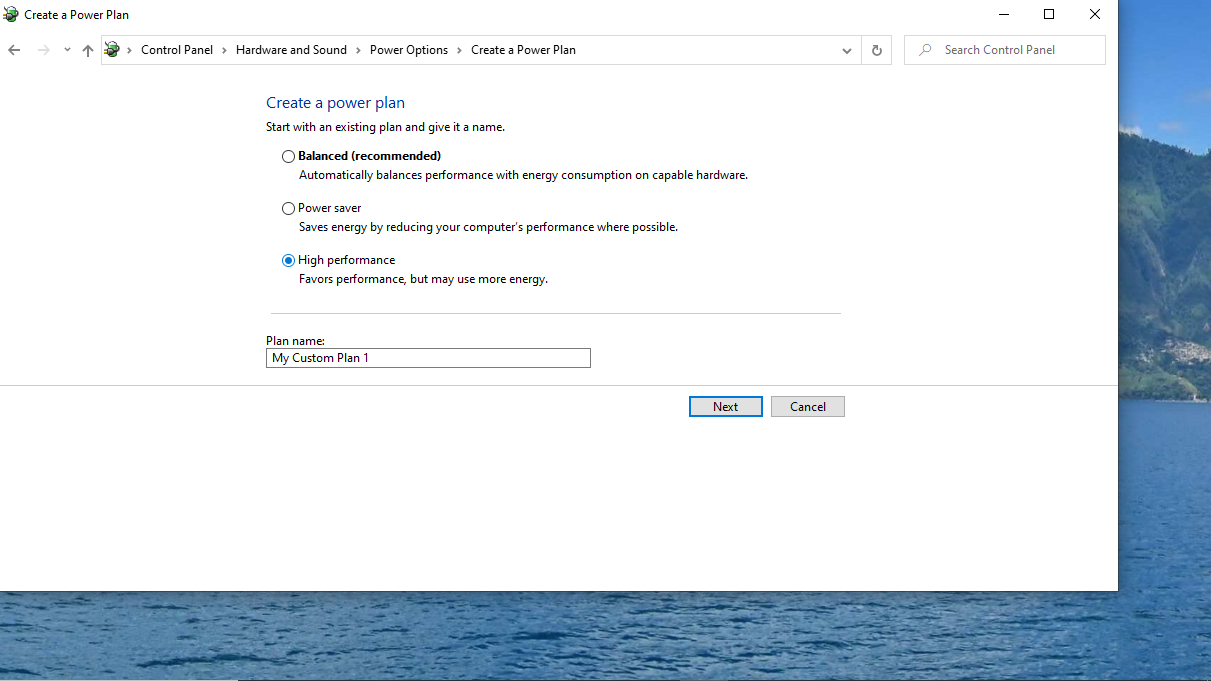
- Change power options settings to favor high performance. To do so right click on battery icon ->click power options->change power plan settings->Then create power plan or Control Panel\Hardware and Sound\Power Options\Create a Power Plan.

- Stop Superfetch service. This is a good feature in windows but sometimes it uses too much resources. Open Cmd as admin and enter the following command net.exestopsuperfetch.

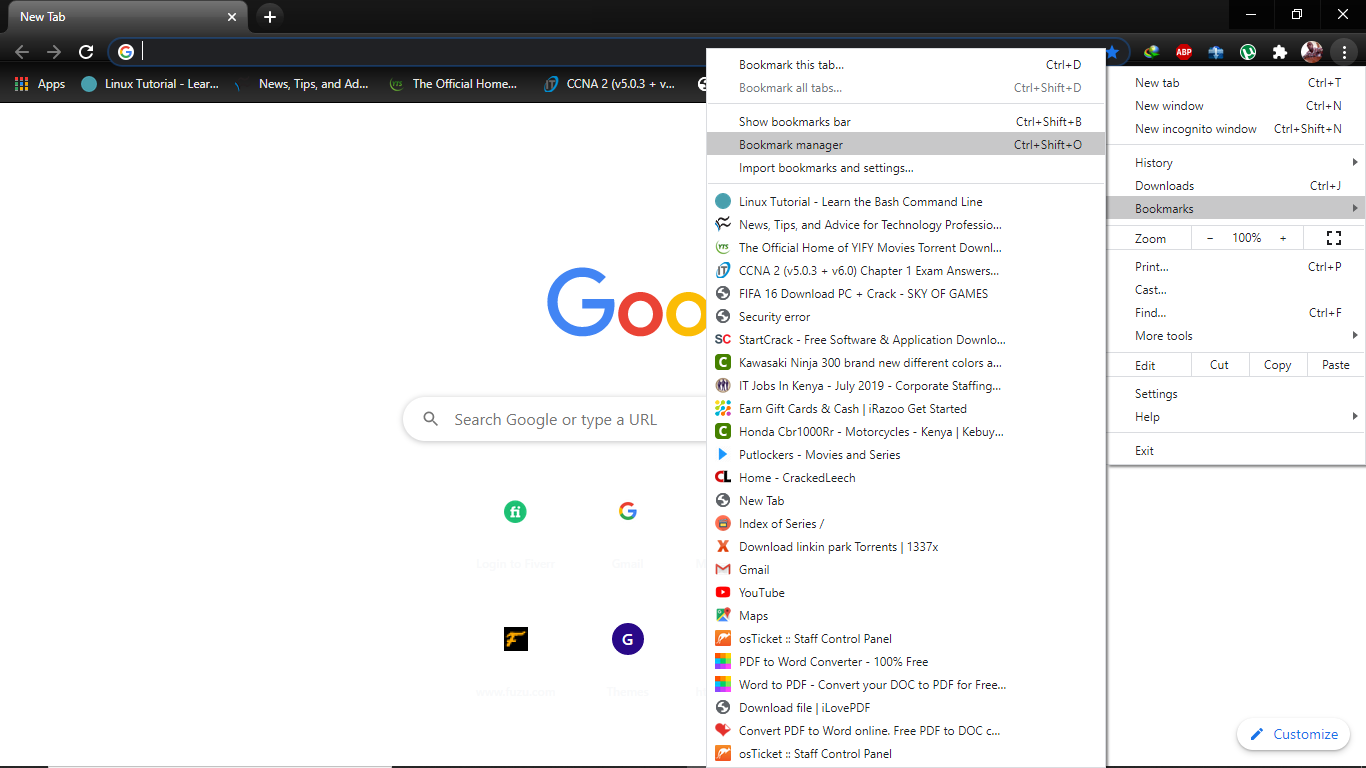
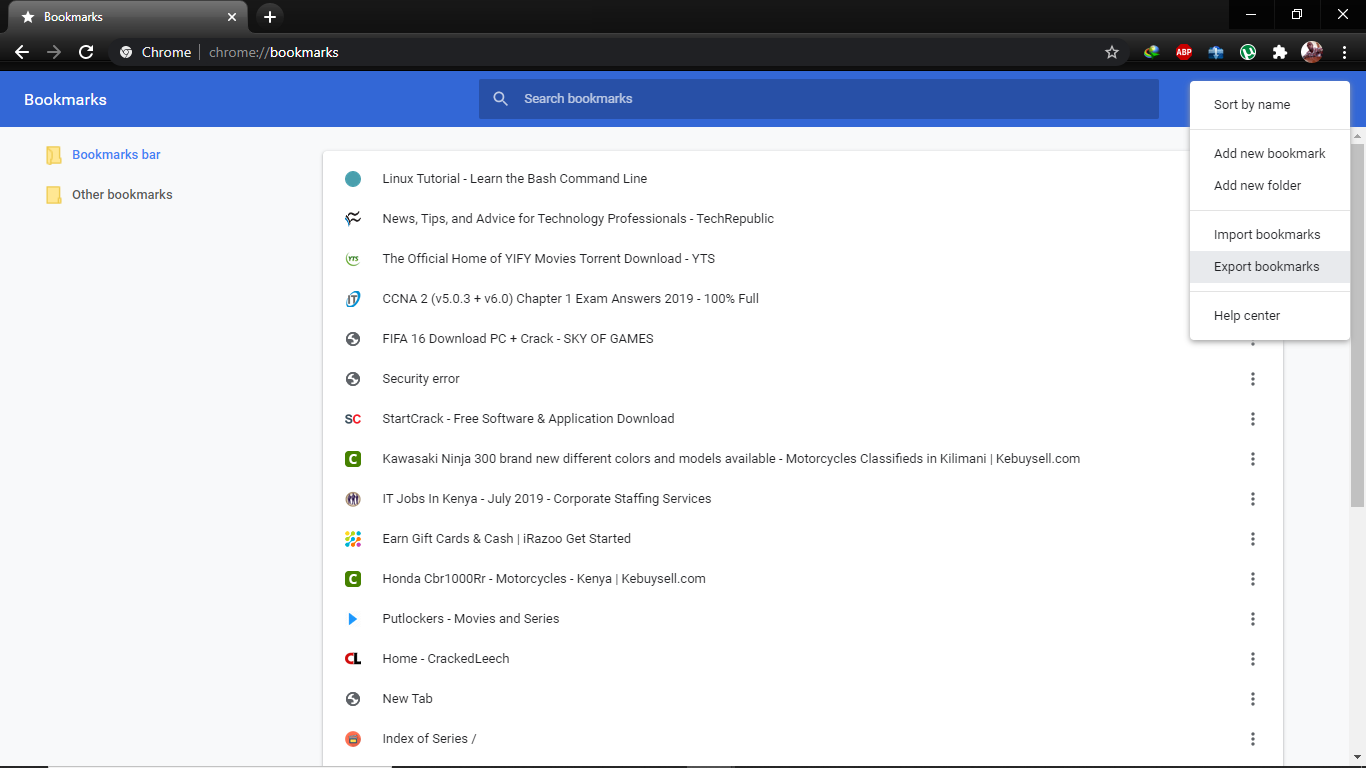
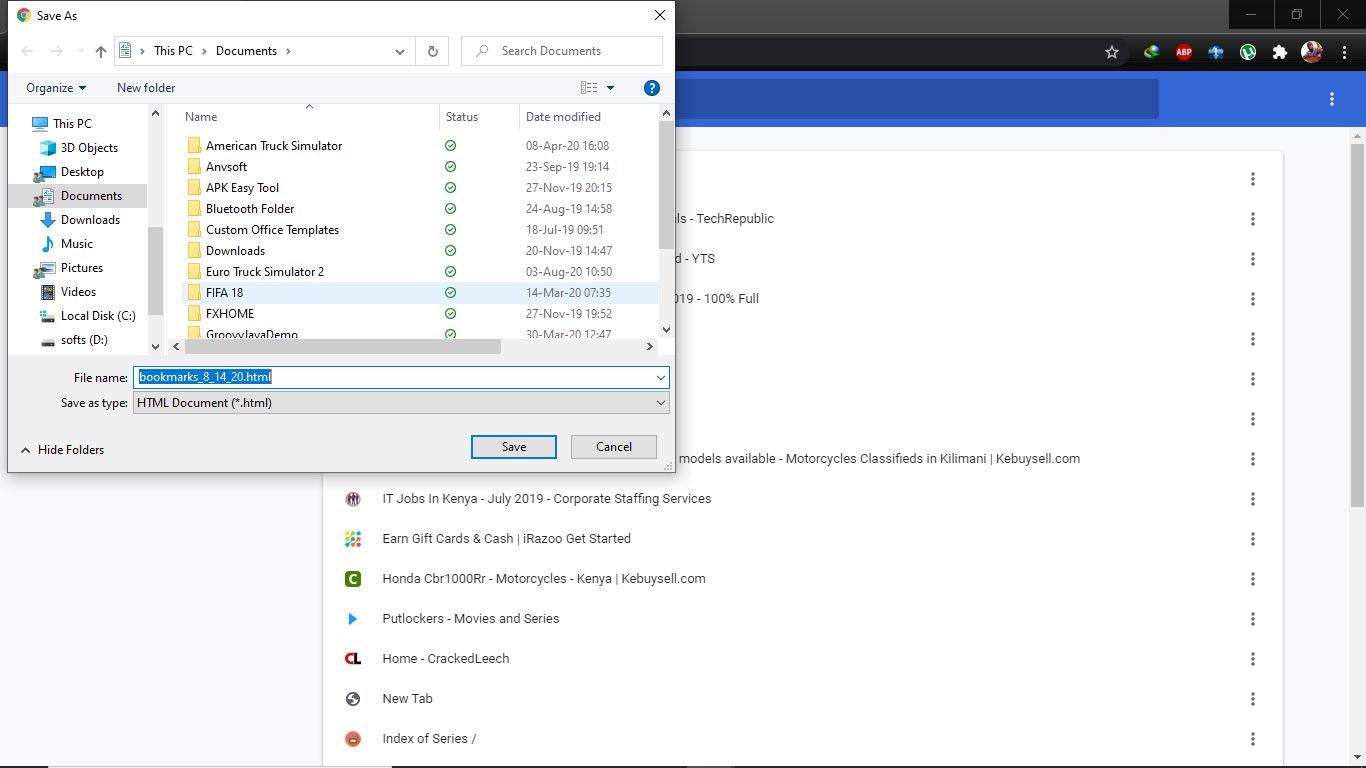
YegonParticipantTo copy and save your bookmarks, open your Chrome browser, go to Menu -> Bookmarks -> Bookmark manager. Click on the three-dot icon at the top right corner of the browser then select Export Bookmarks.
See the screenshots below

Once you are done, select the location where you would like to save your bookmarks.
 YegonParticipant
Many factors contributes to your Enter button not working. It might be due to a malfunctioning key that needs to be replaced or missing system configurations. Otherwise try these options to see if it works:
- First obvious Restart the PC
- Second is setting up the physical keyboard/ Wireless.
- Third is to Restore your Chromebook back to previous time when it was working
First: Restart the Chromebook.
In most cases consider restarting your Chromebook because it might be just a minor problem in your system that is preventing Enter button from working. Whenever you have this problem try this fix first before trying other solutions when your Enter key stopped working suddenly, it saves you a lot of time.
You can also force shutdown by pressing and holding the power button until the Chromebook shuts down , if it is an external one remove the battery and give it some minutes before turning it back on for a quick fix.
Second: Setting up the physical keyboard/ Wireless.
If you are using a physical keyboard / wireless one consider unplugging and plugging back to see if the connection is okay. In some instances the keyboard maybe loose.
Third: Install the operating system to restore the system
In case you had a recent update of the OS and all over sudden the Enter key starts malfunctioning, try restoring your system.
To make a fresh install of Chrome OS, you must have a Computer with access to the internet with at least 4 GB or larger USB flash disk storage. Create your USB Recovery Flash to make your installation smooth. To Create a USB Recovery Flash Drive for your Chromebook follow this link https://computers.tutsplus.com/tutorials/how-to-create-a-chromebook-recovery-usb-drive-using-chrome-os–cms-28842
Follow these steps to make a fresh installation now that you have successfully created a USB Recovery Flash Drive for Chrome OS.
Use this systematic method, Press and hold the Esc key+F3 keys and then press the power button to turn on the Chromebook-> Insert your USB recovery flash drive (now that you are Developer Mode)->Verifications of data integrity of the recovery media is underway, where the system is recovered using the USB flash drive you created. Be patient as this process takes around 10 minutes to successfully complete->unplug the USB flash drive once the system recovery is complete and your Chromebook restarts on its own .
The rest is the normal welcome screen , complete the settings and you are good to go.
YegonParticipantHello, To reset your apple ID password, simply login to apple https://appleid.apple.com/#!&page=signin proceed to forgot password and follow the instructions to reset.
 YegonParticipant
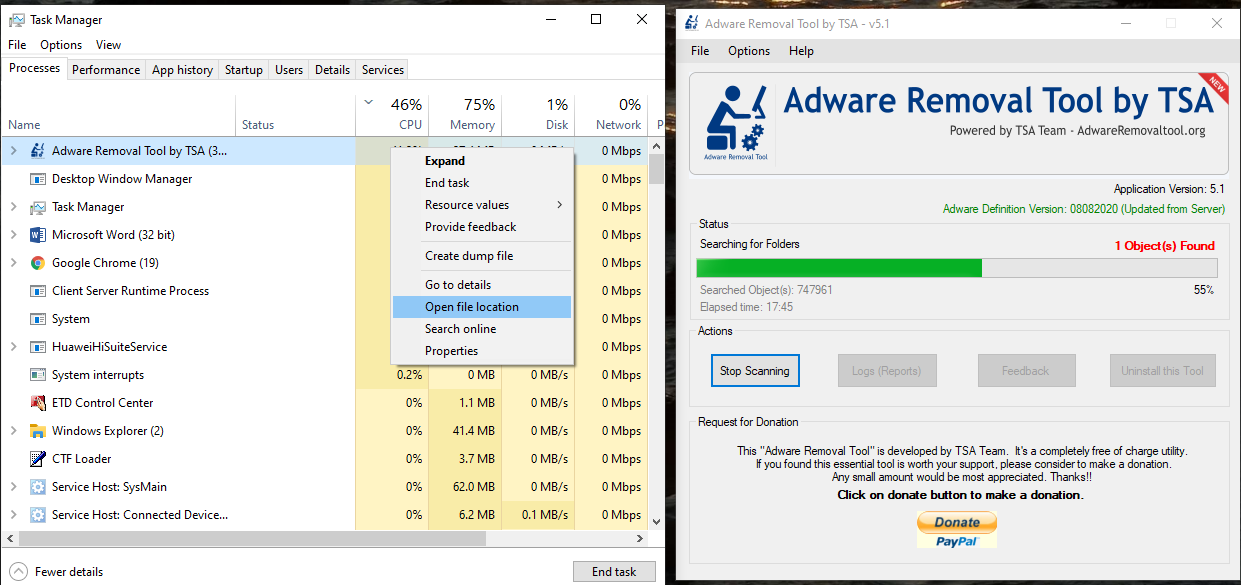
Adware Removal Tool is a portable software program that can be executed directly without the need to install fully into the system. To get the shortcut, locate the location where the software is downloaded and if it is actively running and you don’t know the location , open the task manager then Right click on adware removal tool and choose open file location. Once you find the location, right-click, choose send to then click Desktop (create shortcut).
See the screenshot below for analysis.

 YegonParticipant
This is a common problem for Dell N4110 Laptop . To avoid the persistence of the problem I suggest you try uninstalling and reinstalling the Quickset Software from Dell’s official site. Go to the control panel and look for Dell quickset to uninstall the program. This link directs you to the right source of the software.
YegonParticipantHello, your PC ran into a problem due to the updates you just installed. All you need to do is restore your PC to the previous state. It means some of the critical system updates were not correctly updated that’s why you’re facing those problems. Follow these steps to restore your PC.
Go to safe mode and try troubleshooting by uninstalling recently installed applications and stopping unknown processes. If you don’t know how to enter safe mode use this link https://support.microsoft.com/en-us/help/12376/windows-10-start-your-pc-in-safe-mode . If it doesn’t solve go to the next steps.
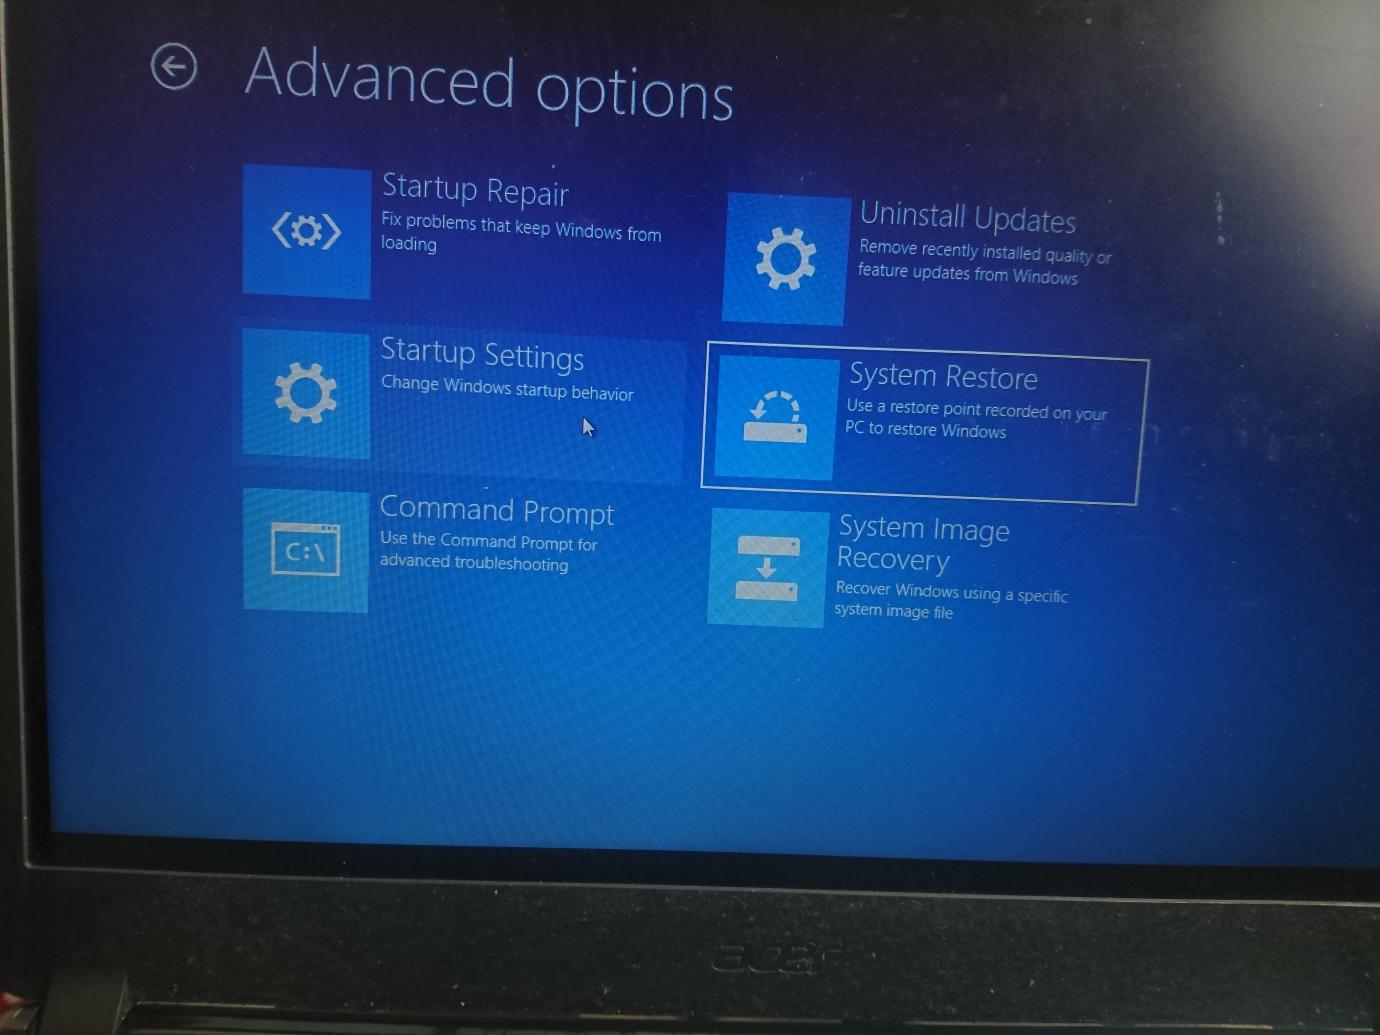
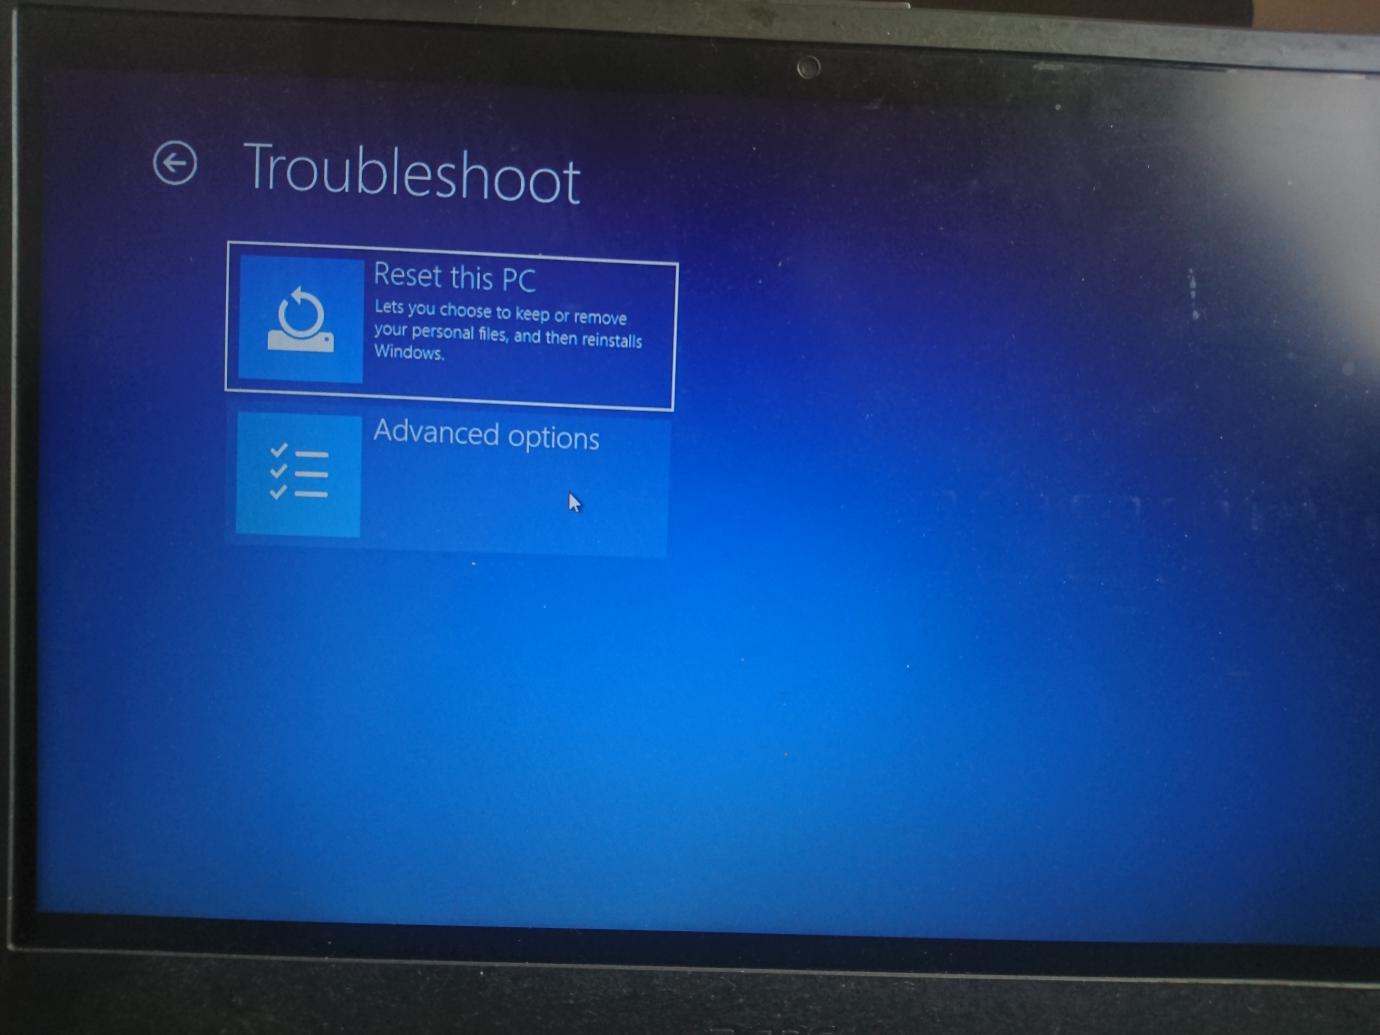
Enter windows advanced mode https://www.laptopmag.com/articles/windows-10-advanced-startup-options-menu then choose the Advanced option. Proceed to select a restore point and that should solve your problem.

If you don’t have any restore point, consider uninstalling the recent updates through advanced troubleshooting as shown above.
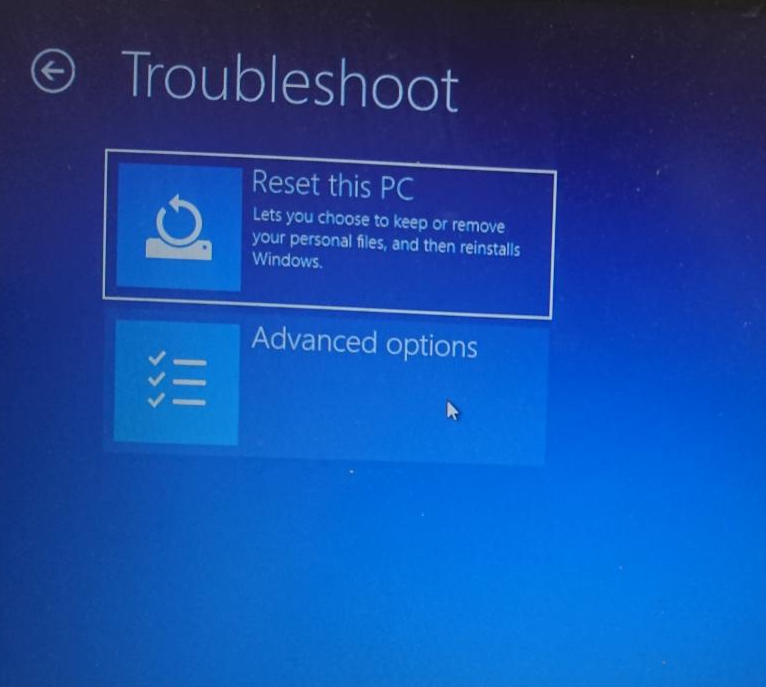
If the problem persists reset your PC

I hope this resolves your problems.
YegonParticipantHello, the best option is to contact apple support team so that they can verify the ownership of the account and help you reset it unless you have the recovery key.
August 13, 2020 at 3:12 pm in reply to: What to backup before a clean reinstallation of Windows operating system? #25738YegonParticipantSince you have already identified the problem being a virus attack I suggest you just back up your personal data i.e documents, music, movies, etc.. and proceed with the clean install. Make sure you synchronize your settings, bookmarks, cookies and passwords if you still need them so that you can restore immediately after installation is complete.
After installation update your windows security and scan your data before copying back to your PC to avoid the spread of the virus.
August 13, 2020 at 2:46 pm in reply to: What is the minimum system requirements of Windows 10? #25737YegonParticipantWindows 10 is a powerful operating system that comes equipped with modern technology and demands more resources for it to run effectively and securely. You can still run even with less recommended requirements even though you will not have the best experience.These are the minimum desired requirements for windows 10; at least 1 GB of Random access Memory (RAM) for a 32 bit operating system, 2 GB RAM for 64 bit operating system, a powerful processor of 1 GHz (gigahertz) or faster, 32 GB or more ROM / hard disk space, a Display resolution of 800×600 and the graphics card that is compatible with Direct X 9 or later that has Windows Display Driver Model (WDDM) 1.0 driver.
Whoever, for some new updates higher systems requirements will be needed even when running specific systems utilities and applications so consider upgrading your PC to the current generation.
YegonParticipantThis normally happens due an on going cumulative window PC update, caused by a device driver or hardware performance issue.
Try the following methods to fix your problem
In this case i will use windows 10
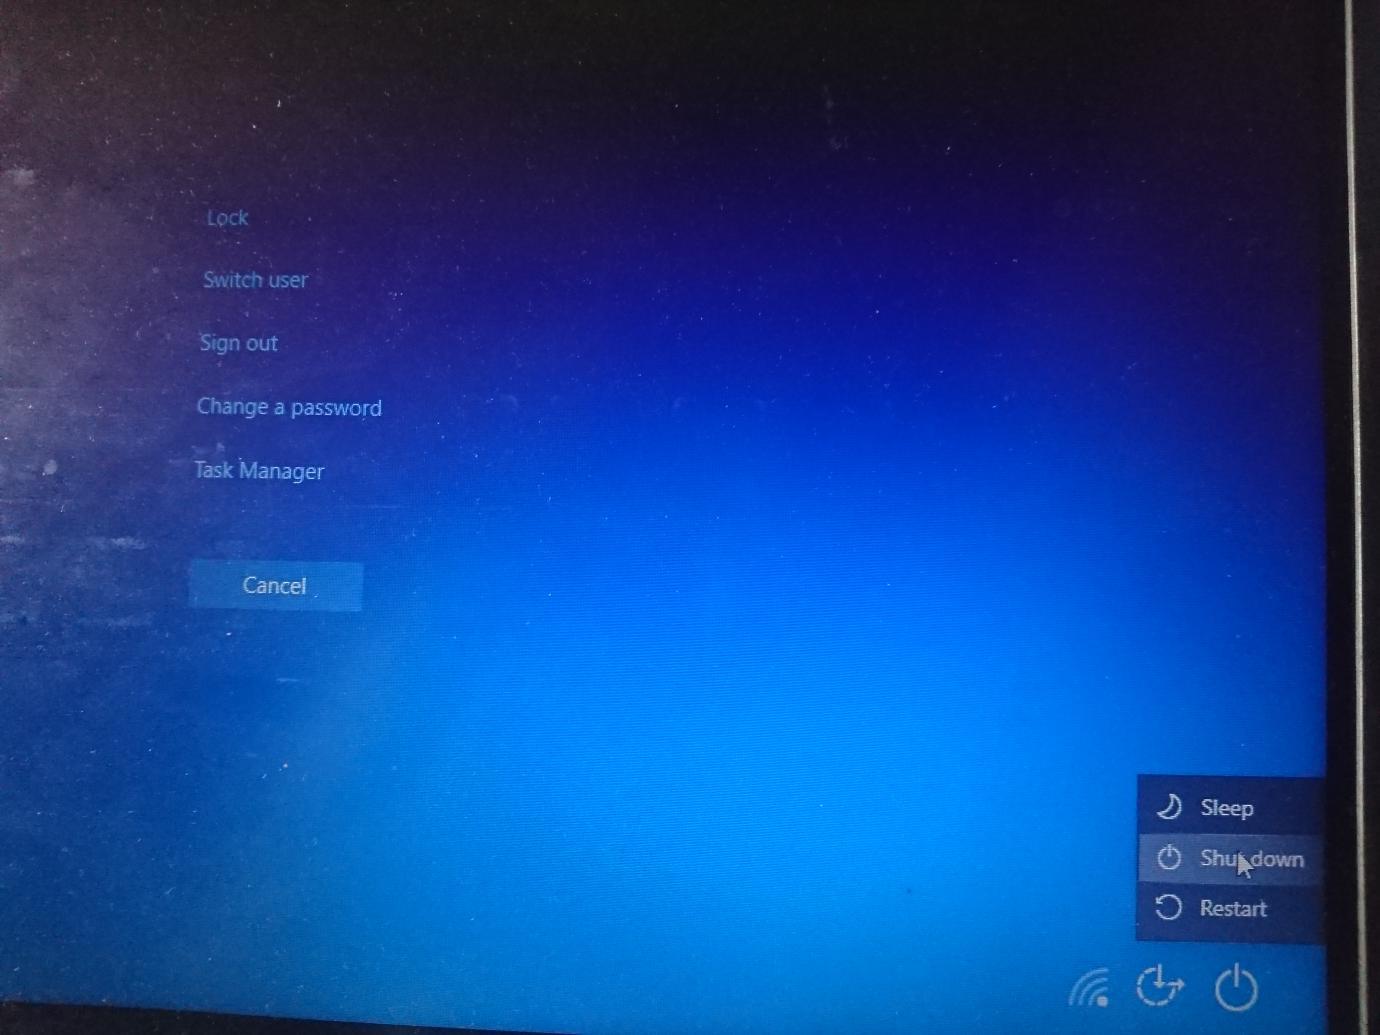
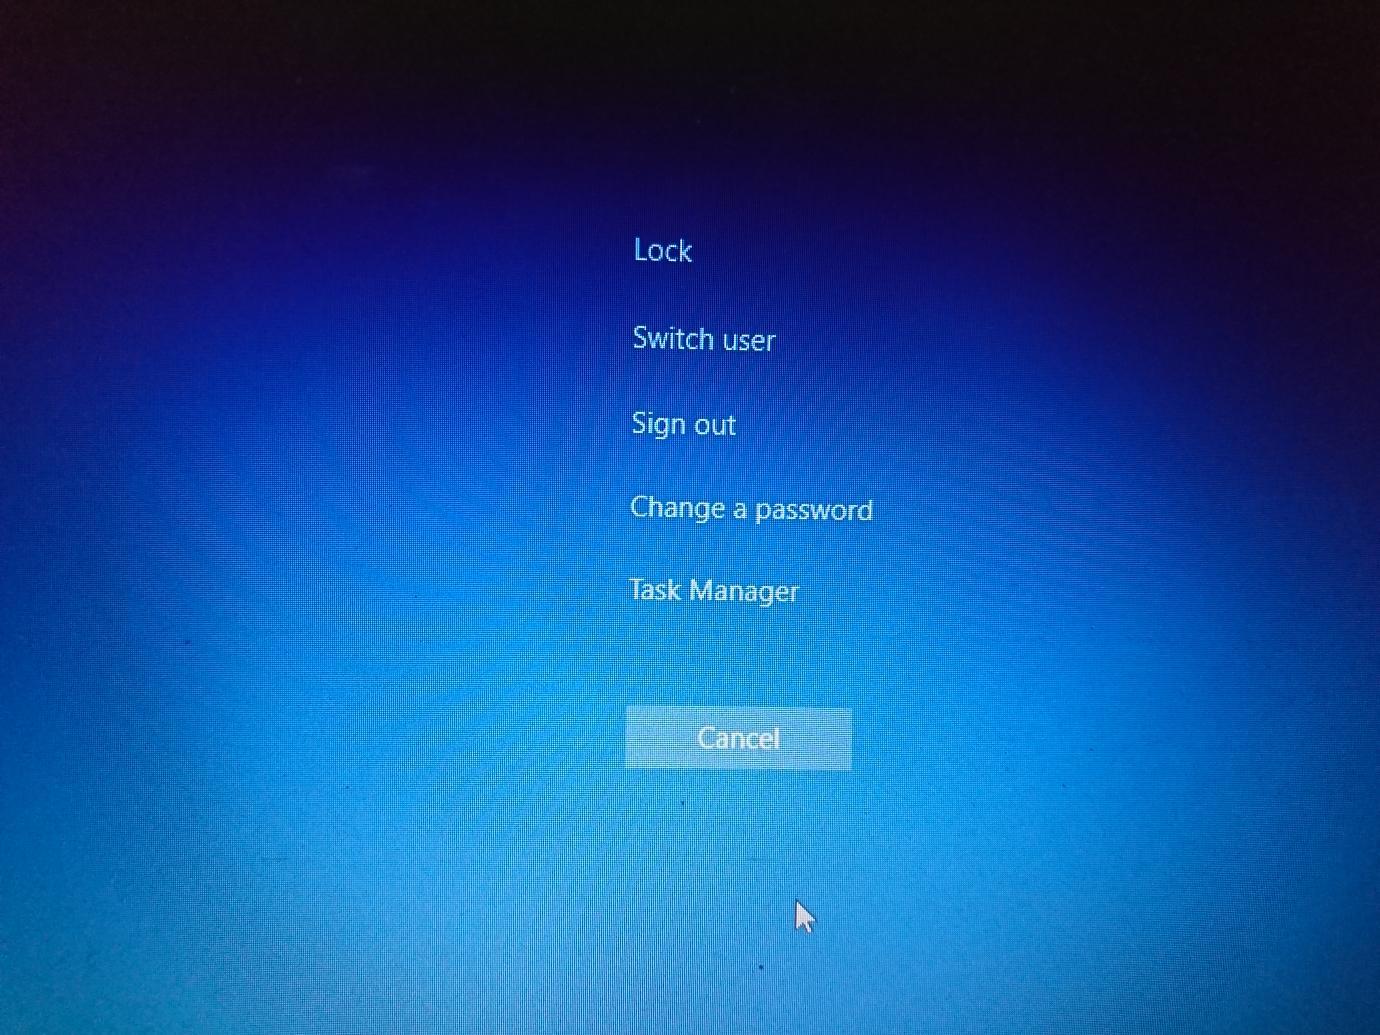
when your Windows PC shows a black screen , it is a sign that something is wrong and has to be fixed. Go to your keyboard and press these combinations Ctrl+Alt+Del. This will take you straight to a blue screen with Lock, switch user, Change password and task Manager Windows is displayed as shown below. Move your mouse cursor to the bottom right corner then click power button and select Restart to restart your PC .

Force shutdown
At times you have to force shutdown your PC by pressing and holding your Computer’s power button or removing the battery if is removable to shut it down . Wait for around 5 seconds before starting your computer normally. Check for any changes.
Press Win+Ctrl+Shift+B hotkey combination to restart your PC’s graphics drivers which normally brings problems. This resets your graphics drivers.
Use safe mode to fix
To do this click power off tab then press shift key+ Restart until the PC turns off.
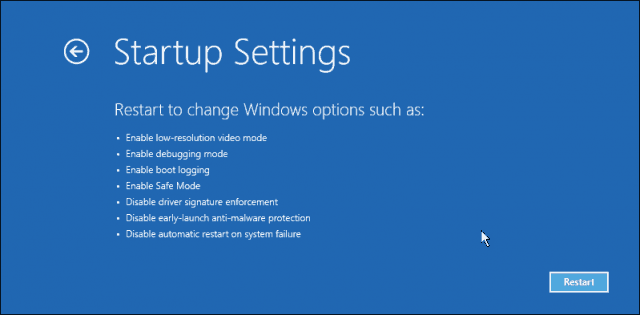
follow these steps choose advanced option->troubleshoot->Advanced option->startup settings->Restart then select number 4 for safe mode.


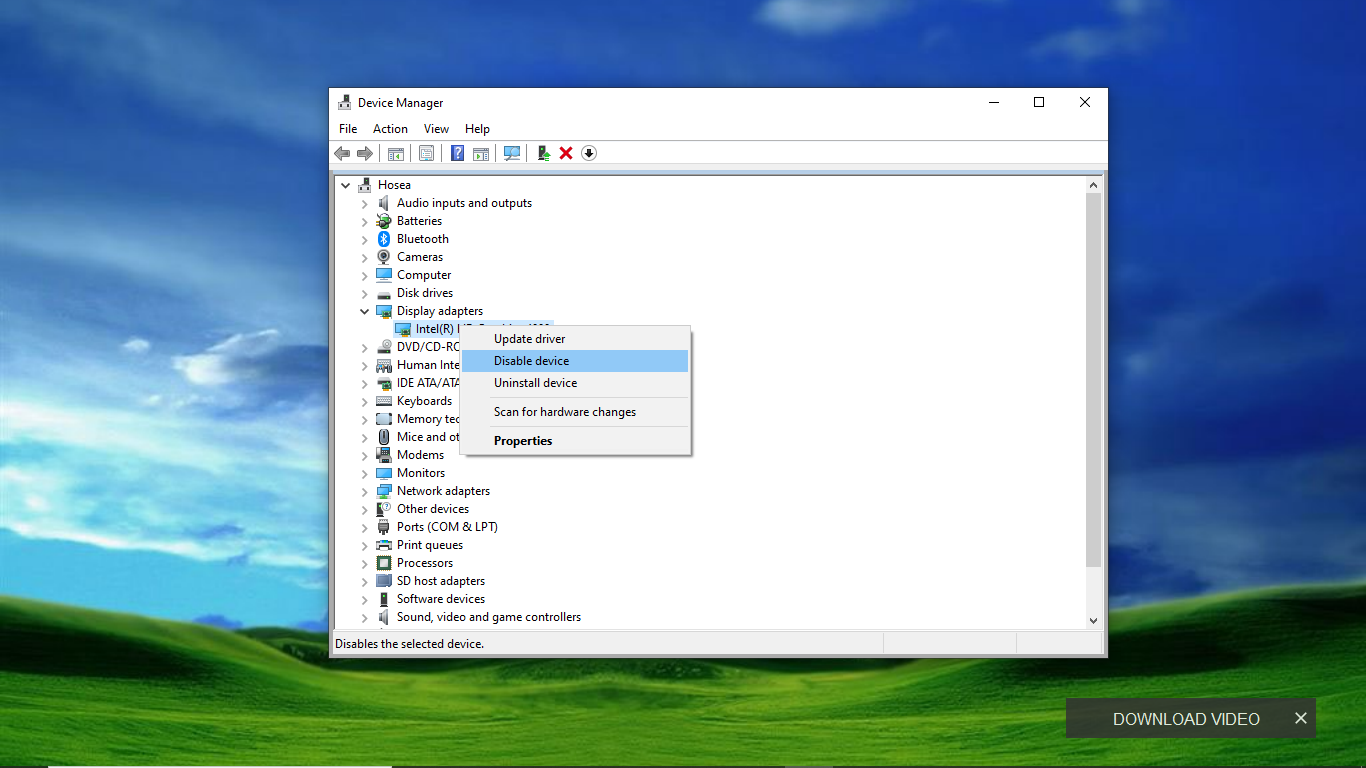
Log in to PC normally then press these combination keys Windows key+X . Click device manager then display adapter. Disable or uninstall the driver then get a new driver online after restart.

 YegonParticipant
Accessing Windows 10 Startup Folder
There are some ways in which you can access the Windows 10 Startup folder. Lets’ go through available methods one by one.
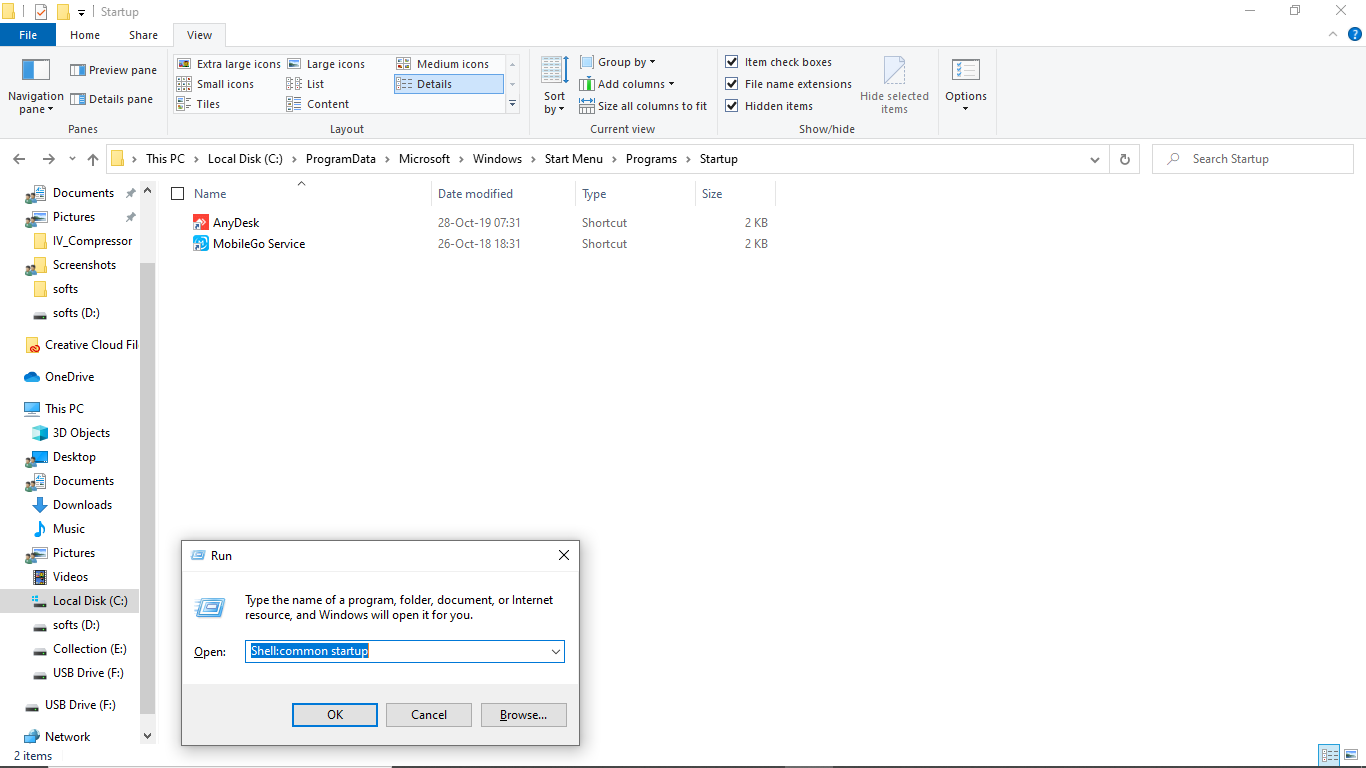
First option is Run command.
- Use these paths- Shell:common startup ->Gives location for all user’s startups.
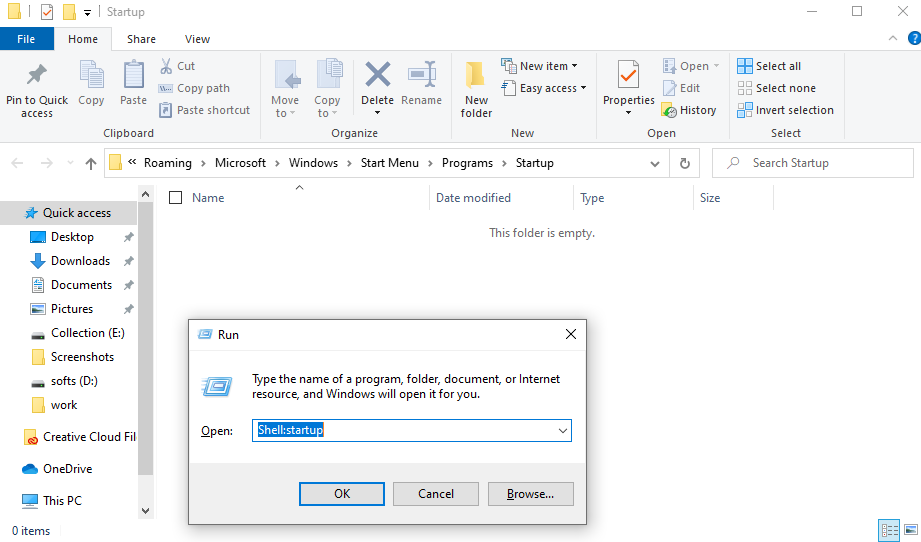
Folder Location: C:\ProgramData\Microsoft\Windows\Start Menu\Programs\StartUp - Shell:startup ->Gives location for current user startups
Folder Location: C:\Users\RK\AppData\Roaming\Microsoft\Windows\Start Menu\Programs\Startup


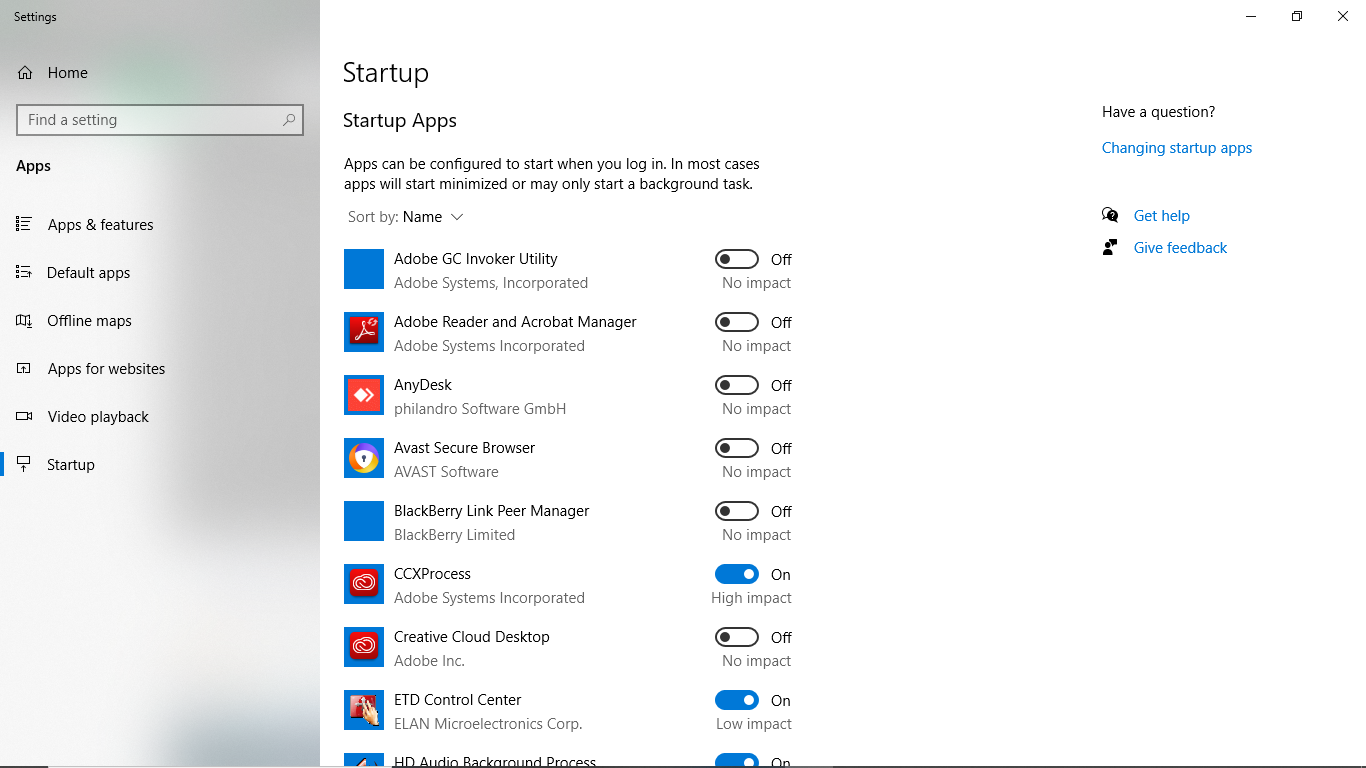
Second through Windows Settings
Tap on Start Menu then click Windows icon in the lower-left portion of your desktop.
Select Settings->Choose Apps -> and on the left side menu, select Startup.

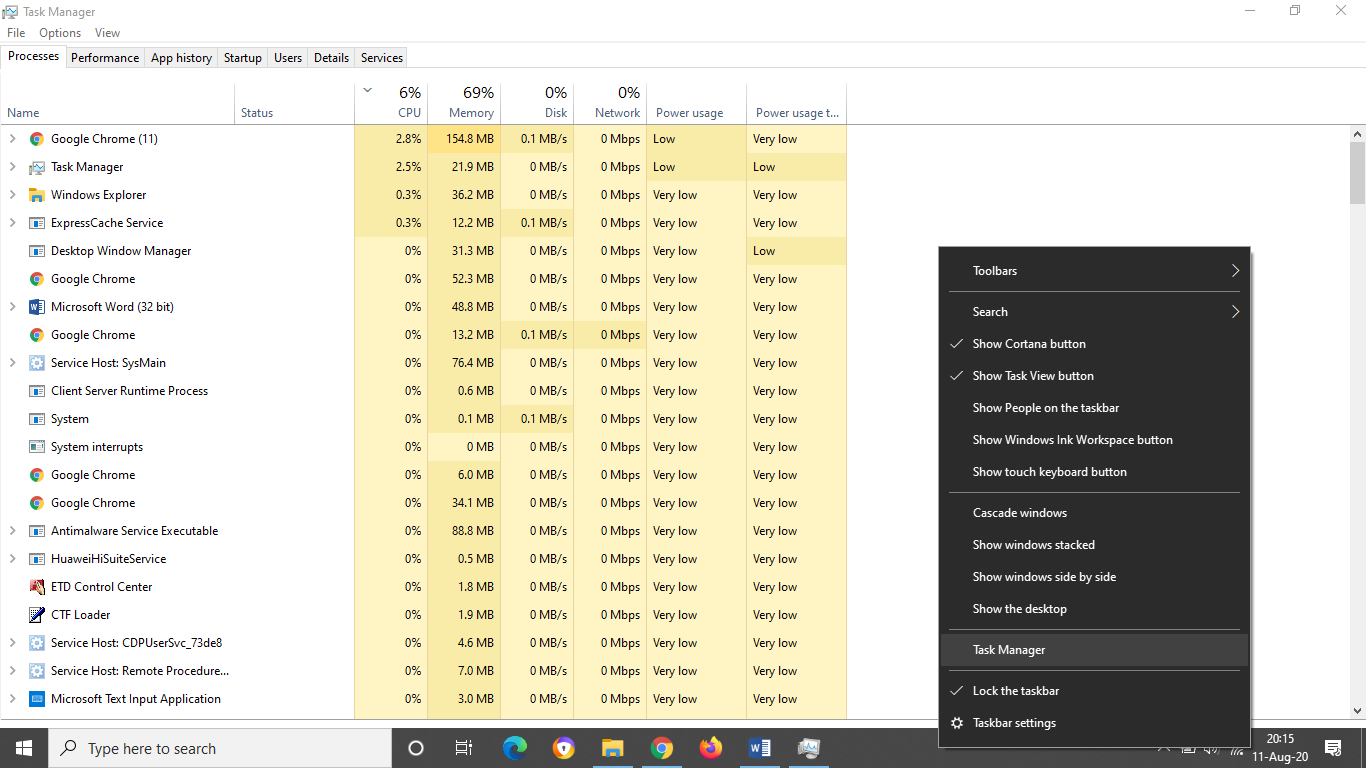
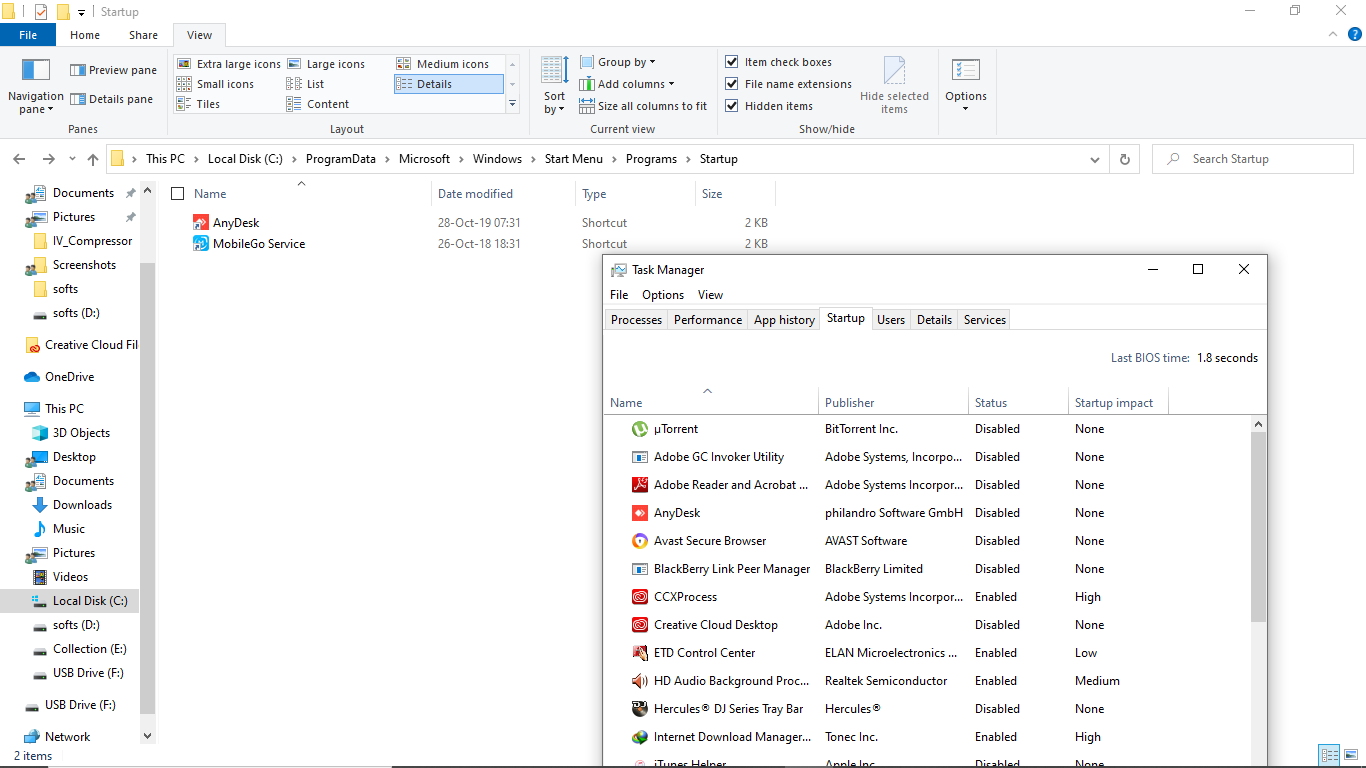
Third Using the Task Manager
Ways to access task manager
1. Right click on taskbar and select task manager

2. Press Ctrl+Alt+delete then select task manager

Click the Startup tab to see the programs then click on the program to either enable or disable
Forth Through File Explorer
Enable the Show Hidden Files option in order to enable you to access hidden system files and folders in the path. Go to the File Explorer and drop the path below into the Quick access bar. All Users Startup Folder is located using the following path; C:\ProgramData\Microsoft\Windows\Start Menu\Programs\StartUp
- AuthorPosts