Hello, how are you? Realtek has been present in sound controllers since the days of Windows XP. For this reason, it has been a manufacturer as old as it is reliable. However, this antiquity of manufacturers sometimes works against them. Because sometimes Windows updates play against the drivers. As a result, the audio driver may fail. This results in a lack of sound or the much feared BSOD. So today we will see how to solve it.
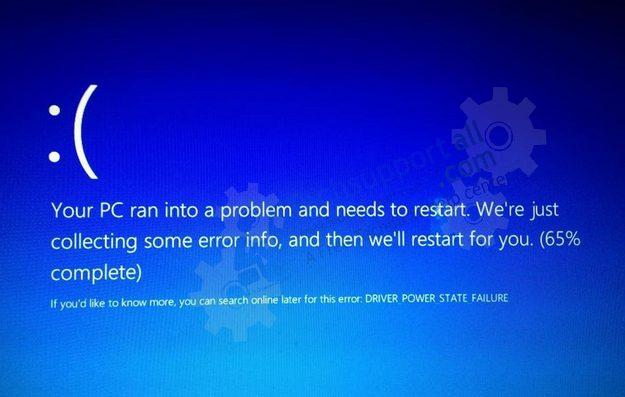
How to Fix DRIVER_POWER_STATE_FAILURE
Some users have reported problems with the Realtek audio driver. In effect, it suddenly fails and leaves the computer without sound. What’s worse, the system freezes showing a blue screen with the message DRIVER_POWER_STATE_FAILURE. Then it restarts and when it does, there is no audio and the driver does not appear in the device manager. Well, now we will see some methods to solve this annoying problem. First, please restart the system in safe mode. With this in mind, follow the instructions given here. Now, we will see the state of the controller.
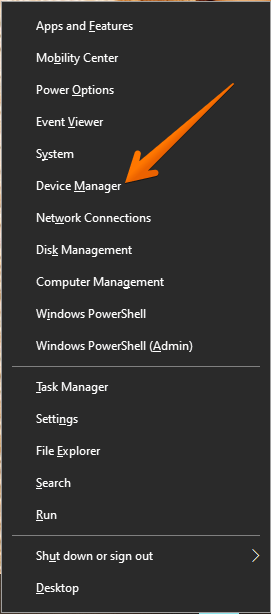
- Press the Win+X combination and then select the device manager.

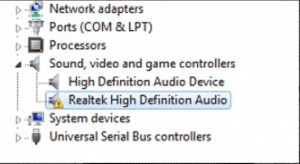
- Then scroll down to ‘Sound, Video and Game controllers’. It is very likely that the driver will appear along with a yellow exclamation point. This indicates that it is in a problematic state.

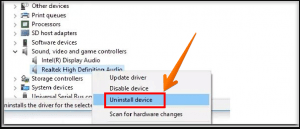
- Then, right-click on the mouse and proceed to uninstall it.

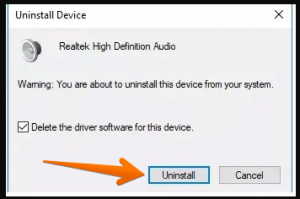
- Make a tick on the check-box “Delete the driver software for this device”
- To confirm the uninstallation of the device, please click on the uninstall button.

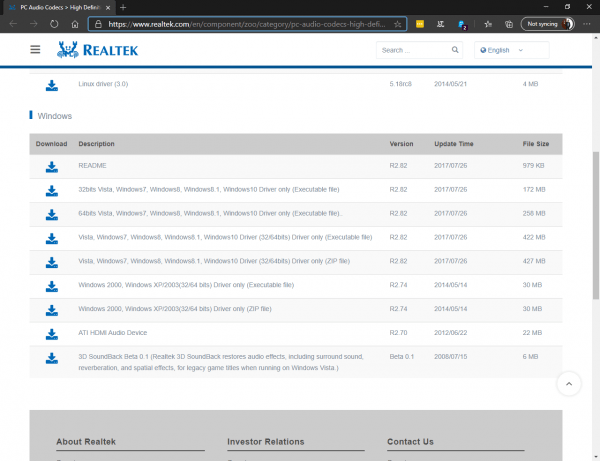
- Then please download the corresponding driver from this link.
Solve DRIVER_POWER_STATE_FAILURE problem using Driver Verifier
If the problem still persists, then we can try the following method: To do this we will use a Windows tool called Driver Verifier. This app allows you to identify and repair defective drivers. Well, before enabling this tool it is highly recommended to create a restore point.
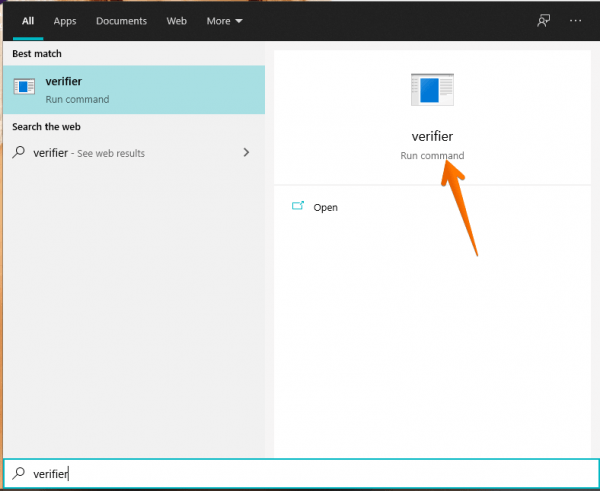
- Press the Win+Q combination and type in Verifier.

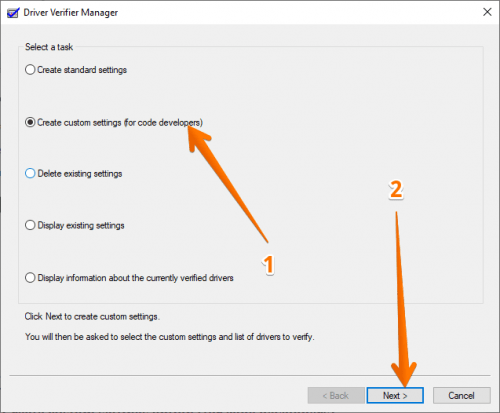
- After launching the tool, select the Create custom settings option (for code developers)

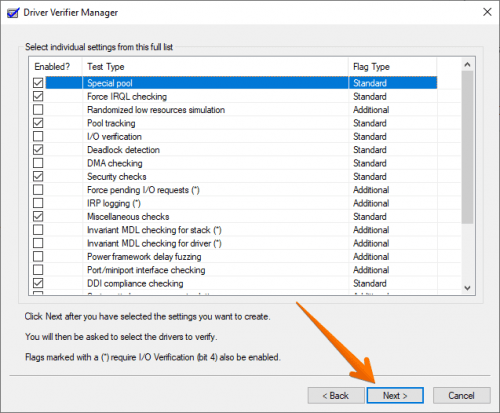
- Now select individual settings from a full list. Please check the following boxes:
- Special Pool
- Pool Tracking
- Force IRQL Checking
- Deadlock Detection
- Security Checks
- DDI compliance check
- Miscellaneous Checks

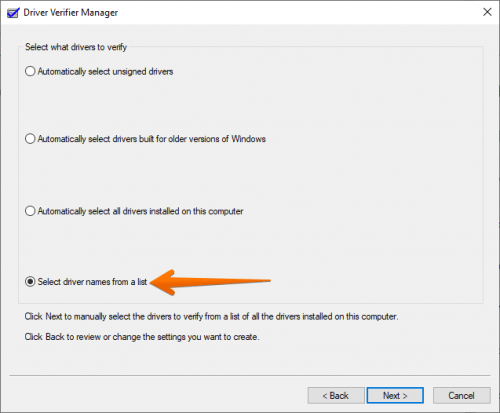
- In the next screen, please select a driver name from the list.

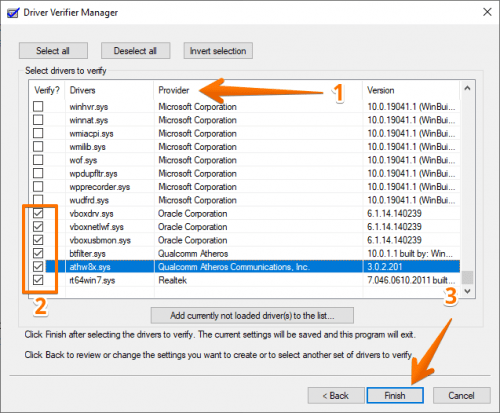
- Now follow the next steps. First, click on the Provider tab. This will be arranged by the drivers according to the manufacturer. Next, check all the boxes that are not provided by Microsoft/Microsoft Corporation. Then click on finish and then restart the system.

- What to do after rebooting the system:If the driver verifier gets a violation, then the system will enter a BSOD. But don’t worry. Should this happen, please enter safe mode by repeatedly pressing F8 during the boot. Then follow these instructions to choose the previously created restore point. If you haven’t created a restore point or can’t access it, you can still fix it. In that case, restart in safe mode again. Then from a CMD please run the following command:
verifier /reset
Please keep the Driver Verifier enabled for at least 24 hours. If at this time the system does not have BSOD, then disable it. Very well, I hope that with these steps you can fix this problem.
