System Restore is a feature in Windows to revert back all the Windows settings to a previous working state which are stored as Restore Points which can be searched by dates. It was present since the Windows 98, but in Windows 10 methods has changed slightly.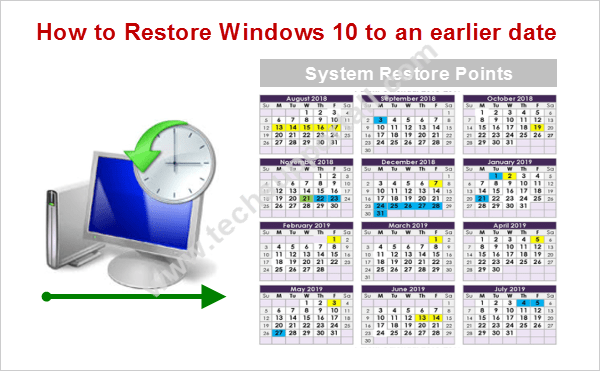
Using system restore feature, you can easily restore your Windows 10 to the previous restore point (Rollback to the earlier date). Computer automatically creates the system restore points time-to-time or when any other important activity happens on a computer, like installing a program, installing an update, installing drivers, etc. You can also create your own restore points. Please note that restore feature must be enabled to get benefit of this feature.
Read: How to enable system restore feature in Windows 10.
How to Restore Windows 10 to an earlier date
Eventually, if you want to restore your computer to a well-working date, then you can go through the following process. The below steps will guide you, how you can choose the already made system restore point to restore the computer. Let’s see how it works.
There may be two situations where you will have to perform Windows 10 restore. First is, if your computer is not booting up, and the second is when your computer is able to boot up normally.
- Restore Windows 10 from Boot
- Restore Windows 10 using its bootable disk
- Restore Windows 10 after booting up the computer
Method 1: Restore Windows 10 from boot
It can happen that the system does not start up at all, and we are unable to start windows properly. In this case, we will have to start computer in the “startup settings” menu. Here, we found some options, let’s see how it works.
- Turn ON your computer/laptop, and then instantly (after 5 seconds) press and hold the power button until your computer shuts down forcefully. Repeat this process until you get the Advanced options screen.
- Click on troubleshoot.
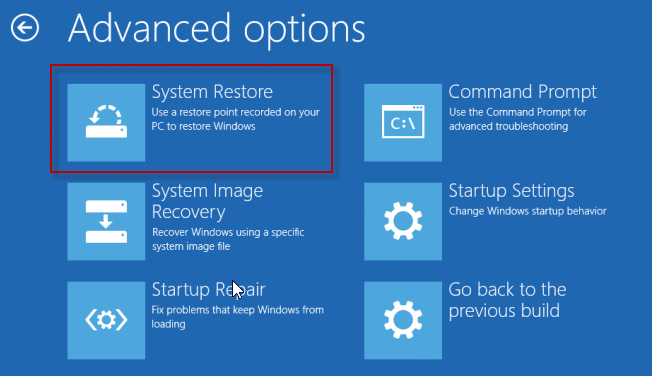
- Click on advanced option.
- Click on System Restore.

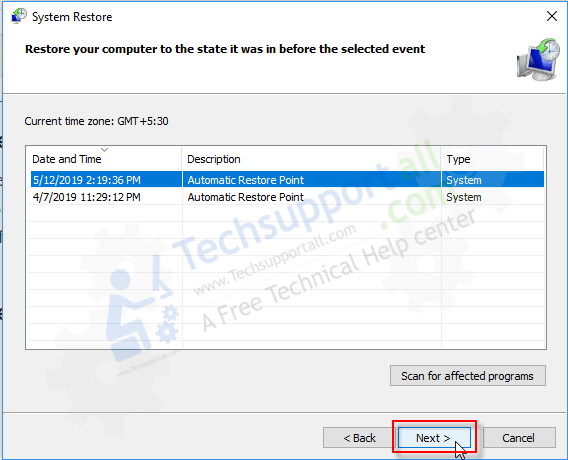
- Choose the preferred restore point and click on the Next button.
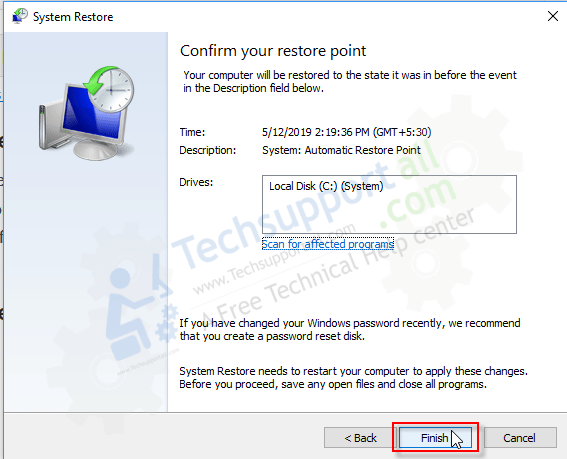
- Click on Finish button to start the restoring process. You’ll have to wait until complete this restore process. We recommend you to please don’t restart your computer until it’s done because in this situation, it may cause the no boot issue.
Method 2: Restore Windows 10 using its bootable disk
If you are even not able to go up to the above steps. This method can be helpful.
- Take a Windows 10 Bootable disk / USB stick handy with you. If you don’t have Windows 10 disk then here’s the guide how to create Windows 10 bootable disk.
- Boot your computer through Windows 10 bootable disk / USB stick.
Click here to know how to boot computer using bootable disk or USB. - Click on Next button.
- Click on Repair your computer.

- Click on troubleshoot.
- Click on advanced option.
- Click on system restore.

- Choose the preferred restore point and click on the Next button.
- Click on Finish button to start the process. You’ll have to wait until complete this restore process. We suggest you to please don’t reboot your computer until it’s done.
Here is another simple method that let you restore to the previous state after starting up the Windows.
Method 3: Restore Windows 10 after booting up the computer
This method will only work if your computer is able to start up to the desktop screen. Otherwise, use the above method 1 & 2.
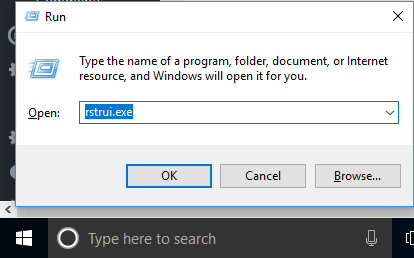
- Press and hold the Windows key + R key together to open the RUN box.
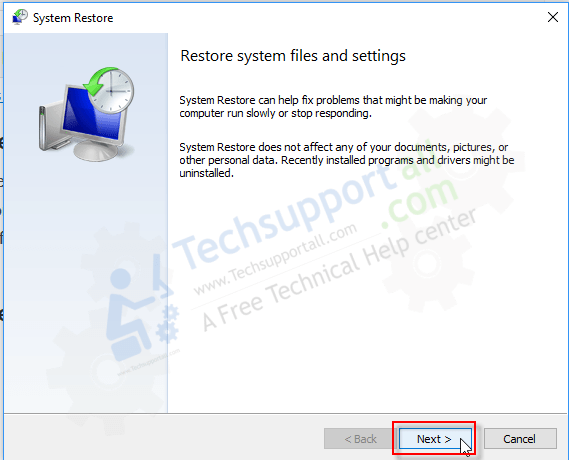
- Type rstrui.exe command in the run box and click on OK. A “system restore” window will open in front of you.

- Click on Next button to show all the available restore points in next window.

- Choose the preferred restore point and click on the Next button.

- Click on Finish button to start the process. Wait for a few seconds, then the operating system restarts. The job is done, and we come back to a previous system point.

That’s it.
If you have any question & suggestion about the above steps, then you are welcome to write about it by using the comment box below.
Restore Windows 10 Brief Detail
In Windows 10, like all previous versions, when making changes to the system, whether installing or uninstalling a program, updating the operating system or any other task that could mean a potential change on the computer, Windows automatically performs a restore point to avoid possible errors or instabilities in the system.
The restore points are faithful copies of the operating system until the moment it was created. That is, if the system is restored to an earlier date, all existing programs, configurations and software on the computer after that point are lost.
Restoring your device will help you solve any errors that may have been produced at the time of a failed installation, due to a virus or a general system failure. When executing the restoration, all programs and records will remain the same at the time the copy was created, suppressing any error that occurred after the date.
Whenever you want to make a restore point, you can easily access by typing “Create a restore point” in the search box located on the taskbar.
FAQ
Q: How much time takes to do system restore?
A: Normally system restore takes 10-15 minutes. If your computer has lots of files then it takes 15-60 minutes to restore all the files.
Q: Why do we need to restore Windows 10?
A: Sometimes happens that when we install a new device, a new program, or update a driver, this causes instability or malfunction in PC. This situation is annoying, and personally, I am a very curious operator, always trying new things in my OS, and because of that, I faced this problem a lot of time. Happily, “System Restore” always come to rescue me.
This feature allows you to restore your computer to the previous restore point of Windows 10. This is an effective method to find the way to recover from computer problem. A very important fact is that by doing this restoration, your files will not be lost. So, let see how to activate it.

I have been a member with -windows/explore-for ten years.Then my system had to be updated, and of course
everything hanged as Yahoo was in charge.I could not get into my E-mail until I saw that I could RESTORE my files
I live alone, I’m 88 yrs old, so you can see tht I have a problem,I assumed it would take a minute or two to
get back to my files.I tried to follow the directions I’m afraid I just don’t have the touch””””
Hi, Thanks for contacting us.
This instruction is not for downgrade the Windows 10 to the Windows 7 or older. This instruction is only for restore Windows itself to the old date.
As you have already upgraded to Windows 10, now you have two options. The first option is: keep updated your Windows 10 until it get updated properly (Do Windows Update and then reboot the computer, repeat the same process again and again until your windows get updated properly.)
The second option is: Downgrade Your Windows 10 to your older OS. Please see the following guide how to downgrade windows 10 to Windows 7.
Please don’t hesitate to ask anything further.
Thanks