The latest updates are intended to give Windows 10 greater stability. In fact, this is a user’s claim, to have a stable and functional system. However, sometimes these updates bring performance problems. For that reason, I recommend waiting until some time has passed. This guarantees that the update will work correctly on most computers.
Error Message:
There was a problem starting C:\Windows\System32\LogiLDA.dll
The specified module could not be found
Now, some users have reported the following error after an update: There was a problem starting C:\Windows\System32\ LogiLDA.dll The specified module could not be found. This error is associated with a bug with a DLL file. It is a library that contains resources that can be used by several of the programs that we have installed on the PC. In this case, the error is associated with an incompatible version of the Logitech download wizard. This belongs to the Logitech mouse, one of the most widely used mice among PC users. So naturally, there are a large number of users affected. But don’t worry, here I’ll show you how to solve this annoying error.
How to Fix “there was a problem in starting LogiLDA.dll” error
Follow the following step-by-step guide on how to solve this logida.dll issue.
Method 1: Disable LogiLDA at startup
Sometimes this problem is caused by the wizard starting at system startup. The first thing we will do is to disable the service from the boot.
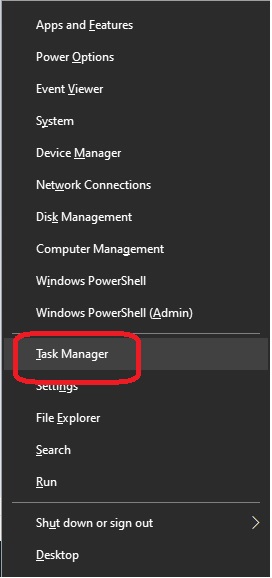
- Press the “Win + X” combination. And once the menu opens, please select “Task Manager“.

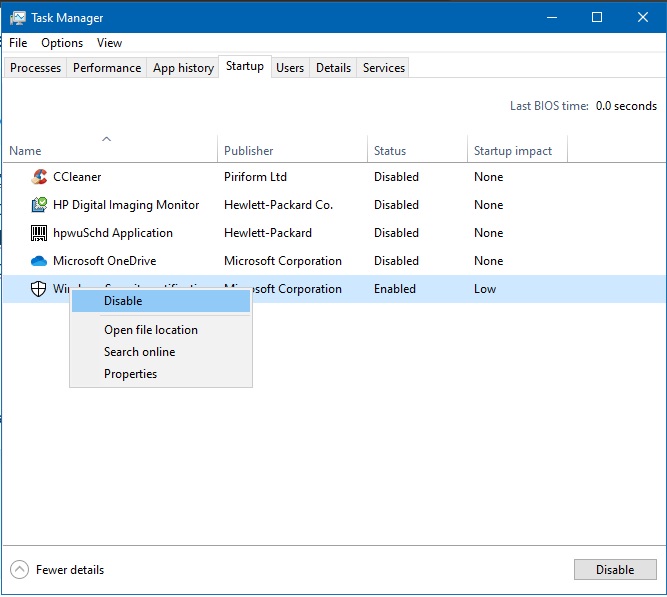
- Once the menu has expanded, please locate the “Startup” tab. Locate the LogiLDA service, right-click the mouse and press “Disable“.

Method 2: Uninstall the Logitech Setpoint software.
If the above method did not work, then it may be necessary to uninstall the software responsible for the error. If the above method did not work, then it may be necessary to uninstall the software responsible for the error.
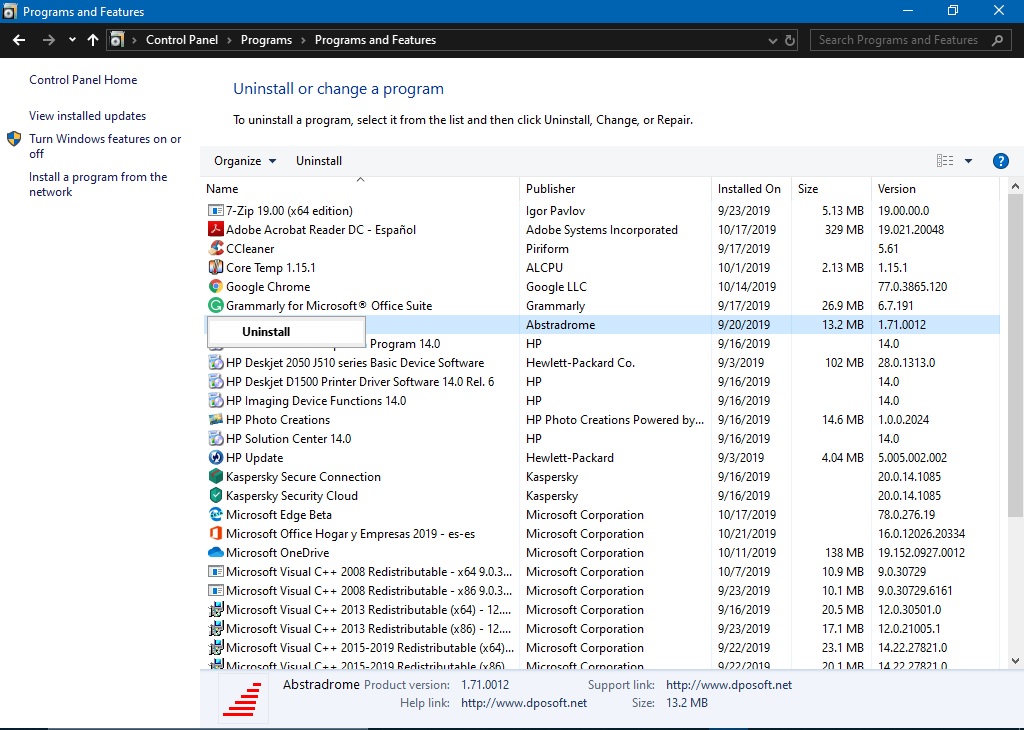
- Please follow this path: Control Panel ⇾ Uninstall a program. Once there, locate the program Logitech Setpoint, right-click the mouse and press uninstall.

Method 3. Remove the Logitech registration key.
Once the software is uninstalled, it is necessary to remove any key from the registry. We do this by logging into the Windows registry editor.
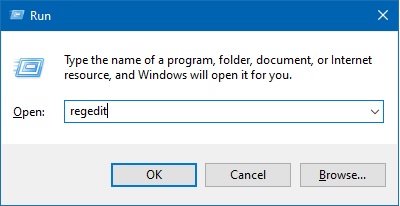
- Press the “Win+R” combination. When the box opens, please type Regedit.

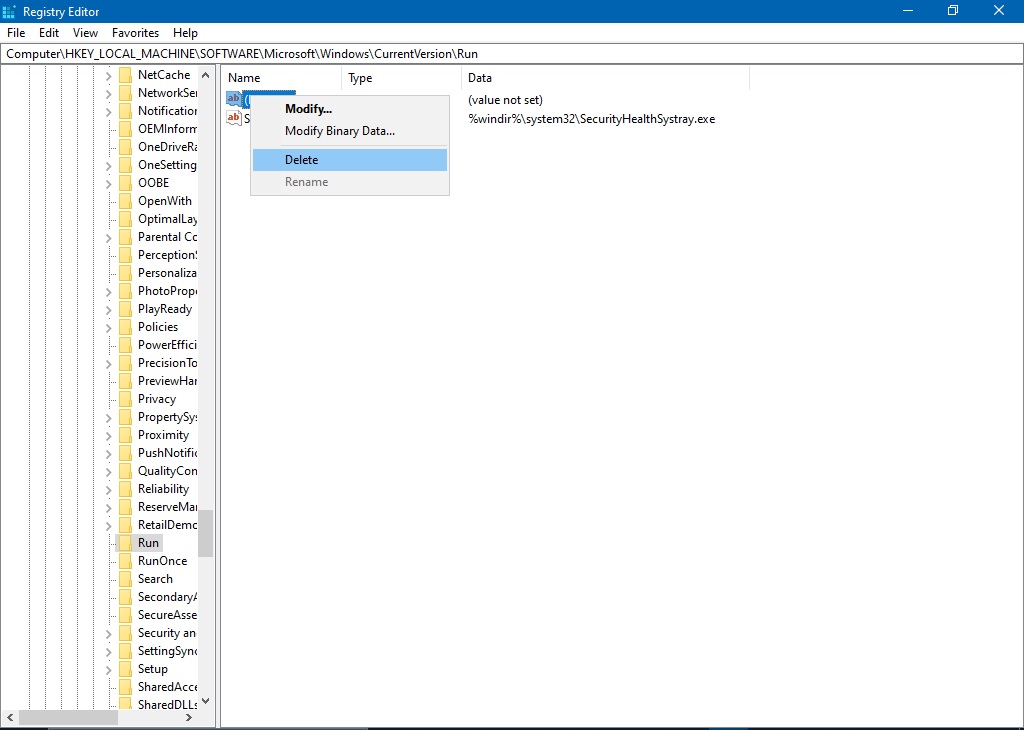
- Within the registry editor, it is necessary to follow the following path: HKEY_LOCAL_MACHINE\SOFTWARE\Microsoft\Windows\CurrentVersion\Run
- Next, select the Logitech value. Right-click the mouse and select Delete.
Please note that the Windows registry is an essential element for the operation of the system. So you must be especially careful when modifying it. For this reason, I suggest you pay special attention to the key you want to remove. Note that it is the Logitech registry that you are going to delete. With this, our system will continue to function correctly.
Method 4. Reinstall the driver.
At the beginning of the post, we made it clear, that this is an update problem. Windows upgraded to a newer version, and the Logitech driver does not support such an update. So a solution may be to upgrade the Logitech mouse driver to its latest version. To avoid possible conflicts first, uninstall the mouse driver.
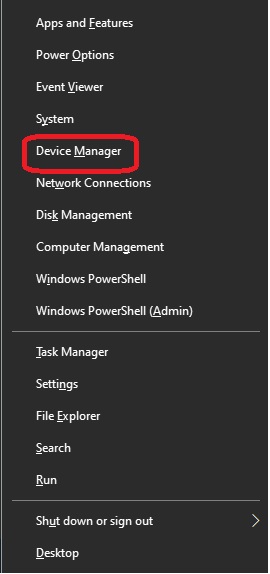
- Press the Win+X combination, and enter Device Manager.

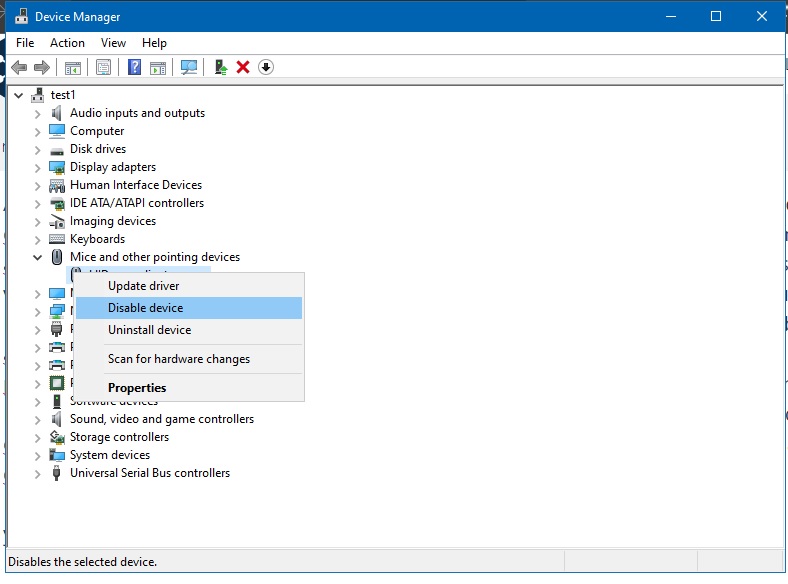
- Once Device Manager is opened, please navigate to Mice and other pointing devices. Then double-click on the Logitech device and click on Uninstall device.

- This will have uninstalled the problem driver. Now, just restart the system. In an automatic way the device will be reinstalled and with it, the most recent version of the driver.
We have seen different ways of solving this annoying mistake. On many occasions these malfunctions disrupt users. Now, we have observed that the problem has its origin in the update of the operating system. So with the methods, we have proposed, we hope you solve this problem correctly. All right, that’s it for now, I hope you enjoyed this post.
