
The Windows Media Creation Tool is being provided by Microsoft as a user-friendly application for downloading and installing the Windows 10 OS. However, sometimes users encounter errors while using this application, like the error code 0X80072F8F – 0X20000 Not Activated. If you want to know how to fix error code 0X80072F8F – 0X20000 on Windows while using Media Creation Tool, then this guide is for you.

Causes behind Error Code 0X80072F8F – 0X20000
There can be several reasons behind this error on your Windows. We are going to briefly explain some of the most prominent reasons, so that you can better understand what is causing this error on your Windows computer.
- Issues Related to Essential Services: There are several Windows Services which are required to run properly if you want this installation process to be completed successfully. However, due to certain reasons if some of these essential services are either not running properly or are not running at all, then you will surely encounter errors in your operations.
- Conflict Among Applications: If there are multiple applications running and using the same system files, then it can cause conflicts among those apps which will eventually cause the error code 0X80072F8F – 0X20000.
- Third Part Security Software: Sometimes security software like some antivirus installed on your computer can cause this error because it stops or obstructs the download of files from the internet.
- Lack of Administrator Privileges: For installing Windows you need Admin privileges, but if you don’t have them, then you won’t be able to complete this task.
- System isn’t Compatible: There are certain minimum system requirements for Media Creation Tool and Windows 10 OS. If your computer doesn’t satisfy those requirements, then installing Windows by using Media Creation Tool won’t be possible.
- Transport Layer Security is Turned Off: TSL services offers security to the data transferred over the internet. However, if the TLS 1.1 and 1.2 are disabled, then you will encounter error code 0X80072F8F – 0X20000.
- Poor Internet Connection: To properly download and install the Windows 10 OS you will require a stable internet connection running on decent speed. If you lack such an internet connection, then you won’t be able to complete this task.
As you can see, there are several reasons which can cause the error code 0X80072F8F – 0X20000 on Windows when you are using Media Creation Tool to install Windows 10. Don’t worry, all these problems have their solutions, which we are going to describe below.
How to Fix 0X80072F8F – 0X20000 Error
Now you know that there are several reasons behind this error, and thus, there are many solutions as well. We have shared all those solutions below. You can try all the solutions given below one-by-one, or else, if you know what is causing this error on your computer, then you can follow the solution which is applicable in your case. Whichever method you choose, just remember to follow the solution steps in their correct order to get the desired results.
Solution 1: Verify Minimum Requirements
There are certain minimum requirements which your computer must fulfill before it can properly run the Media Creation Tool and complete the Windows OS installation.
Minimum Requirements for Media Creation Tool are:
- Uninterrupted internet access to your computer.
- Blank USB drive, DVD or some other storage device with 5 GB of free memory.
- The 25-digit product key of the Windows 10 OS version which you want to install and use.
Minimum requirements for Windows 10 OS are:
- Processor: 1 GHz or more clock rate.
- Memory (RAM): 1 GB for 32bit OS version and 2 GB for 64bit OS version.
- Hard Disk Space: 16 GB for 32bit OS version and 20 GB for 64bit OS version.
- Graphics Card: DirectX 9 or later with WDDM 1.0 driver.
- Display: 800 x 600 pixels.
Although we have shared the minimum requirements above, but you can search over the internet if you want more details.
Solution 2: Check Stability of Internet Connection
As said above, having access to a reliable internet connection is a critical requirement for completing this task. Therefore, you must ensure that your internet connection is stable and internet speed is more that 2 Mbps. Follow the steps given below to verify both these conditions:
- Go to Speedtest website and click on the ‘Go’ icon to check the status of your internet connection.

- Wait for the online application to check the speed and stability of your internet connection.

- In the final results you can verify the necessary details.


If your internet connection is unstable right now or its speed is low, then wait for it to normalize before using the Media Creation Tool. If the internet connection is stable and running at good speed, then try the next solution.
Solution 3: Run the Tool with Administrator Rights
When you run the Windows Media Creation Tool on your computer, then it makes significant changes on your computer. Therefore, it’s better to run this tool with administrator rights, otherwise, it will be unable to complete its stipulated task.
- Visit the Windows Media Creation Tool webpage, then click on the ‘Download Now’ button in the ‘Create Windows 10 installation media’ section.

- After the download is complete. Right click on the Media Creation Tool and choose ‘Run as Administrator’ option.


If you are unable to fix 0X80072F8F – 0X20000 error in Media Creation Tool, then try the next solution.
Solution 4: Modify Windows Registry
One highly effective way to fix error code 0X80072F8F – 0X20000 is by editing the Windows registry. You will have to create a new file in your Windows registry which will be able to resolve this issue. However, before modifying the registry file on your Windows, it’s better to create a backup of your Windows registry so that if something goes wrong, then you can restore the original settings.
- Press ‘Win + R’ keys on your keyboard to open the Run dialog box, then type ‘regedit’ and click on the ‘OK’ button.

- In the Registry Editor window, navigate to the ‘Computer\HKEY_LOCAL_MACHINE\SOFTWARE\Microsoft\Windows\CurrentVersion\WindowsUpdate\Auto Update’ path.

- In the Empty space on the right-pane, right click to select ‘New’, then choose ‘DWORD (32-bit) Value’ from the options.

- Name the new value ‘AllowOSUpgrade’.

- Double click the newly created AllowOSUpgrade value, then enter ‘1’ under Value Data and click on the ‘OK’ button.


Close the Registry Editor window and try to run Media Creation Tool. If the error is still unresolved, then try the next solution.
Solution 5: Perform Clean Reboot
Sometimes there are other apps running on the background which cause conflicts with the Media Creation Tool and you end-up witnessing the error code 0X80072F8F – 0X20000. A simple solution to this problem is to reboot your computer with minimum apps running. Follow the steps given below to complete this task:
- Type ‘msconfig’ in the Windows search box, then choose ‘System Configuration’ from the search results.

- In the System Configuration window, under General tab, choose ‘Selective startup’ option and deselect ‘Load startup items’ option.

- Click on the ‘Services’ tab, then check the ‘Hide all Microsoft services’ option. Now make sure all the services are selected, then click on the ‘Disable all’ button. Finally, click on the ‘OK’ button to apply the changes.


Restart your computer and check if the 0X80072F8F – 0X20000 error code has been resolved or not.
Solution 6: Empty Software Distribution Folder Contents
The Software Distribution folder in your Windows stores some temporary files which are used during the installation of the Windows Updates. While running the Media Creation Tool it might happen that the files in the Software Distribution folder can cause error 0X80072F8F – 0X20000, especially if the files are corrupted or are creating conflicts. Therefore, its better to delete all the files of the Software Distribution folder so that they don’t have any affect on the Media Creation Tool’s operation.
- Press ‘Win + R’ keys on your keyboard to open the Run dialog box, then copy-and-paste ‘C:\Windows\SoftwareDistribution\Download’ into the box and click on the ‘OK’ button.

- Press ‘Ctrl + A’ keys on your keyboard to select all the files in the folder, then right click the files and choose ‘Delete’ from the options.

- After deleting the files, Type ‘command’ in the Windows search box, then right click ‘Command Prompt’ in the search results and choose ‘Run as administrator’ from the options.

- In the Command Prompt window, type or copy-paste ‘wuauclt.exe /updatenow’ command and press ‘Enter’ key on your keyboard.


Now restart your computer and check if the Media Creation Tool error has been fixed or not.
Solution 7: Activate TLS 1.1 and TLS 1.2
When the Media Creation Tool downloads the OS installation files over the network it uses an encrypted connection to send and receive data from the Microsoft site. Therefore, during this data transfer it utilizes Transport Security Layer (TSL) to establish the encrypted connection. There are two versions of TLS, the TLS 1.1 and TLS 1.2. However, if the TLS 1.1 and 1.2 are disabled on your computer, then you can encounter error code 0X80072F8F – 0X20000 while using Media Creation Tool. Follow the steps given below to activate TLS 1.1 and TLS 1.2 in your Windows:
- Right click on the desktop, move to ‘New’ option, then select ‘Text Document’ from the menu options.

- Open the newly made Text file and copy-paste the code (bold text) given below.
Windows Registry Editor Version 5.00
[HKEY_LOCAL_MACHINE\SOFTWARE\Microsoft\Windows\CurrentVersion\Internet Settings\WinHttp]
“DefaultSecureProtocols”=dword:00000a00[HKEY_LOCAL_MACHINE\SOFTWARE\Wow6432Node\Microsoft\Windows\CurrentVersion\Internet Settings\WinHttp]
“DefaultSecureProtocols”=dword:00000a00[HKEY_LOCAL_MACHINE\SYSTEM\CurrentControlSet\Control\SecurityProviders\SCHANNEL\Protocols\TLS 1.1\Client]
“DisabledByDefault”=dword:00000000
“Enabled”=dword:00000001[HKEY_LOCAL_MACHINE\SYSTEM\CurrentControlSet\Control\SecurityProviders\SCHANNEL\Protocols\TLS 1.2\Client]
“DisabledByDefault”=dword:00000000
“Enabled”=dword:00000001

- Click on the ‘File’ and choose ‘Save As’ from the options.

- In the Save As window, type new name for the file and give it ‘.reg’ extension, then click on the ‘Save’ button.

- Double click to run the registry file created in the last step.

- You will be warned that new entries will be created in your Windows Registry and the older ones will be deleted. Confirm by clicking on the ‘Yes’ button.

- You will be informed that the new values have been successfully added, then click on the ‘OK’ button.


Now try to run Media Creation Tool again and check it the error has been resolved or not. If you are a Windows 7 user, then you should download the KB3140245 package from the Microsoft website to make your Windows capable of running TLS 1.1 and TLS 1.2.
Solution 8: Reboot Selective Windows Services
There are some Windows Services which are required to run when you are trying to update your Windows. If these services are not running properly on your computer, then you can experience error code 0X80072F8F – 0X20000 while using Media Creation Tool. Follow the instructions given below to restart all such relevant services on your Windows:
- Press ‘Win + R’ keys on your keyboard to open the Run dialog box, then type ‘services.msc’ and click on the ‘OK’ button.

- In the Services window, scroll to locate and right click on the ‘Windows Update’ service and choose ‘Properties’ from the options.

- In the Properties window, choose ‘Automatic’ in the Startup type, then click on the ‘Start’ button.

- Wait for the Windows Update service to start on your computer.

- When you see that the service is running, then click on the ‘OK’ button to close the Properties window.

- Follow all the above-mentioned process for the following services as well:
Background Intelligent Transfer Service
IKE and AuthIP IPsec Keying Modules
Server
TCP/IP NetBIOS Helper
Workstation


After restarting all the above-mentioned services, try to run Media Creation Tool and find if the error code 0X80072F8F – 0X20000 is fixed or not.
Solution 9: Re-enable Windows Update Component Services
While updating the Windows OS, the Windows Update Component Service is also used. Therefore, if this service is not working properly, then you will encounter errors related to updating Windows. Follow the steps given below to reset this service in your Windows:
- Type ‘command’ in the Windows search, then right click the ‘Command Prompt’ in the search results and choose ‘Run as administrator’ from the options.
- Now copy-paste the commands given below, one-by-one, and press the ‘Enter’ button on your keyboard after each command to complete the resetting task.
net stop bits
net stop wuauserv
net stop appidsvc
net stop cryptsvc


That’s it, you have successfully reset the Windows Update Component Services in your Windows. Check if the error code 0X80072F8F – 0X20000 still persists, then try the next solution.
Solution 10: Clean the Primary Hard Drive
You should use the Disk Cleanup utility of Windows to clean the primary hard drive. Doing this will free-up the space on your hard drive as it will remove all the unnecessary files. Freeing-up this space will help in the installation of the new Windows 10 version. Follow the steps given below:
- Open File Explorer window, inside This PC, locate and right click on ‘C Drive’, then select ‘Properties’ from the option.

- In the Properties window, under General tab, click on the ‘Disk Cleanup’ button.

- Wait for the Disk Cleanup to perform the necessary calculation.

- In the Disk Cleanup window, select all the files, then click on the ‘OK’ button.


That’s it, you have cleaned up the primary drive. Check if the problem persists.
Solution 11: Get the Windows ISO File
Downloading the Windows ISO file from the Microsoft website can solve this error code. Follow the steps given below to download the Windows ISO file:
- Go to the Windows Media Creation Tool webpage. There, under the ‘Create Windows 10 installation media’ section, click on the ‘Download Now’ button.
- Right click on the newly downloaded Media Creation Tool file and choose the ‘Run as Administrator’ option.
- Wait for the Windows Media Creation Tool to start.

- Wait as the app gets ready for the process.

- Click on the ‘Accept’ button to agree with the license terms.

- Wait for the app to move to the next step.

- Choose ‘Create installation media’ option, then click on the ‘Next’ button.

- Make all the selections according to your requirements, then click on the ‘Next’ button.

- Choose the ‘ISO file’ option, then click on the ‘Next’ button.

- Make sure that the file is getting saved in your desired location and type the file name to ‘Windows’, then click on the ‘Save’ button.

- Wait for the app to download the Windows 10 ISO file.

- After the Windows 10 ISO file download is completed successfully, then right click the file and choose ‘Mount’ option to open the file.

- Locate and right click the ‘setup.exe’ file inside the ISO file and choose ‘Run as administrator’ from the options.


This will start the updating of Windows to its latest version. Follow the on-screen prompts to complete the installation process.
Solution 12: Install Windows Using External Device
If the above-mentioned solution of installing the Windows 10 directly from its ISO file didn’t work for you, then you should try installing the Windows from an external device, like laptop, mobile or computer.
We will describe below the methods to install Windows 10 by using its ISO file from a mobile phone and also from another computer. Follow the instructions of the option that you prefer.
A) Install Windows 10 Using Smartphone
Before you start to install Windows 10 by using mobile phone, you need to download the Windows 10 ISO file. For that you should follow the download steps mentioned in the Solution 11. Step 1 to Step 11 in Solution 11 describes the whole process. Just follow that process to download Windows 10 ISO file, then follow the steps given below to complete the remaining process.
- Transfer the Windows 10 ISO file from your computer into your mobile phone at your preferred location and remember the location of this file as you will have to recall it in the future steps.
- Go to Google Play Store, there search and find ‘DriveDroid’ app, then tap on the ‘Install’ button to install the app on your smartphone.

- In the Welcome screen, tap on the ‘Next’ button.

- Tap on the ‘ACQUIRE ROOT ACCESS’ link to proceed.

- When Root is acquired, then tap on the ‘Next’ button.

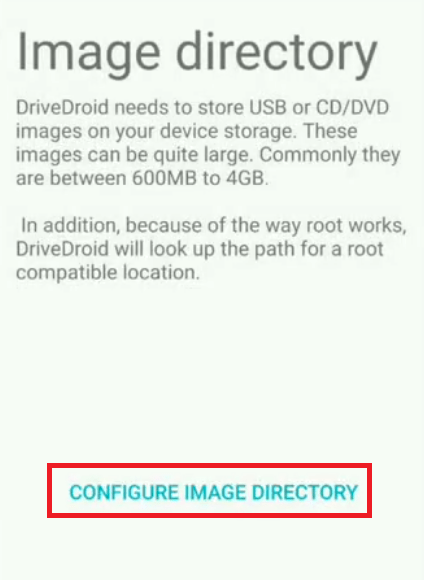
- In the Image directory screen, tap on the ‘CONFIGURE IMAGE DIRECTORY’ link.

- Wait for the app to look for the path.

- Choose the folder where you have saved the Windows 10 ISO file in the Step 1, then you will see that location on the screen informing you that the image directory has been configured. Tap on the ‘Next’ button.

- Connect your mobile with the computer where you want to install the Windows 10 OS by using a USB cable.

- In the Use USB for options, tap to choose the ‘File transfer’ option.

- In the USB System screen, choose the ‘Standard Android’ or the ‘Standard Android Kernel’ option, then tap on the ‘Next’ button.

- Wait for the app to host the drive.

- In the USB Mass Storage screen, choose the ‘Android shows up in OS’ option, then tap on the ‘Next’ button.

- In the Boot screen, choose the ‘Booted successfully using DriveDroid’ option, then tap on the ‘Next’ button.

- In the Summary screen, you can read all the details, finally tap on the ‘Next’ button.

- In the list of files, scroll to locate and tap on the ‘Windows.iso’ file.

- In the Host image using options, tap to choose ‘CD-ROM on Mass Storage’ option. This will make your computer detect the Android phone as a CD-ROM image.

- Verify that the ISO file is set to display as a CD-ROM, then tap on the ‘Next’ link.

- Now reboot the computer and press the shortcut key which allows you to go into the boot menu of your computer. Usually, its Delete, F11, F10 or F12 key.
- In the Boot Menu, you will see a device labeled ‘Linux File Gadget’. Select this device and press the ‘Enter’ key on your keyboard to boot from this device.

- Now you can see Windows Setup screen. Follow the on-screen instructions to complete the Windows 10 OS installation process.


If this solution didn’t solve your problem or you weren’t able to apply this solution, then try the next solution.
B) Install Windows 10 Using Another Computer
Before you start installing the Windows 10 OS from another computer, you need to create a Windows 10 bootable USB drive. Follow the steps given below to complete this task:
- In another computer, go to the Windows Media Creation Tool webpage. There, under the ‘Create Windows 10 installation media’ section, click on the ‘Download Now’ button.
- Right click on the newly downloaded Media Creation Tool file and choose the ‘Run as Administrator’ option.
- Wait for the Windows Media Creation Tool to start.
- Wait as the app gets ready for the process.
- Click on the ‘Accept’ button to agree with the license terms.
- Wait for the app to move ahead.
- Choose ‘Create installation media’ option, then click on the ‘Next’ button.
- Make all the selections according to your preferences, then click on the ‘Next’ button.
- Insert a blank USB drive into the USB port of your computer, then choose the ‘USB flash drive’ option, then click on the ‘Next’ button.

- Once the Windows 10 OS download is completed, then unplug the Windows 10 USB bootable drive and plug it into the problematic computer where you want to install the Windows 10.
- Now, restart the problematic computer and press the appropriate shortcut key to enter its ‘Boot Menu’. Usually, the keys are F12, F11, F10 or Delete. In the Boot Menu, choose the ‘USB pen drive’, then press the ‘Enter’ key to boot from the USB drive.

- Now, you will see the Windows Setup screen, and you should follow the on-screen prompts to complete the Windows 10 installation process.


That’s it, you have successfully installed Windows 10 OS by using the Media Creation Tool, but you required another computer to complete this task.
We have shared several solutions for how to fix error code 0X80072F8F – 0X20000 on Windows while using Media Creation Tool. However, if none of the above solutions were able to resolve this issue on your computer, then you should contact a Windows repair professional.