
If you surf the internet using your Wi-Fi connection, you’re likely to face problems with the DNS server — DNS server not responding. The Domain Name System (DNS) is the system responsible for the conversion of alphanumeric domain names into numeric IP addresses. If this fails, then it will not be possible to access the network. Consequently, in this article, we will see step-by-step how to fix this error.

How to Fix when DNS server not responding
Follow the following step-by-step guide to fix this DNS server not responding issue.
Reboot your Router

Flush DNS server

Type the following command (ipconfig/flushdns) in the command prompt and press enter and verify that the problem has been solved or not. If not, then move forward to the next step.
ipconfig/flushdns

This resets the Windows DNS. From now on you should be able to access any page without limitations. If not, it is still possible to modify the DNS servers manually to bypass possible blockages.
Release DNS server
ipconfig/release

Renew DNS server
ipconfig/renew

Disable Proxy Settings


Change default DNS servers (Recommended)

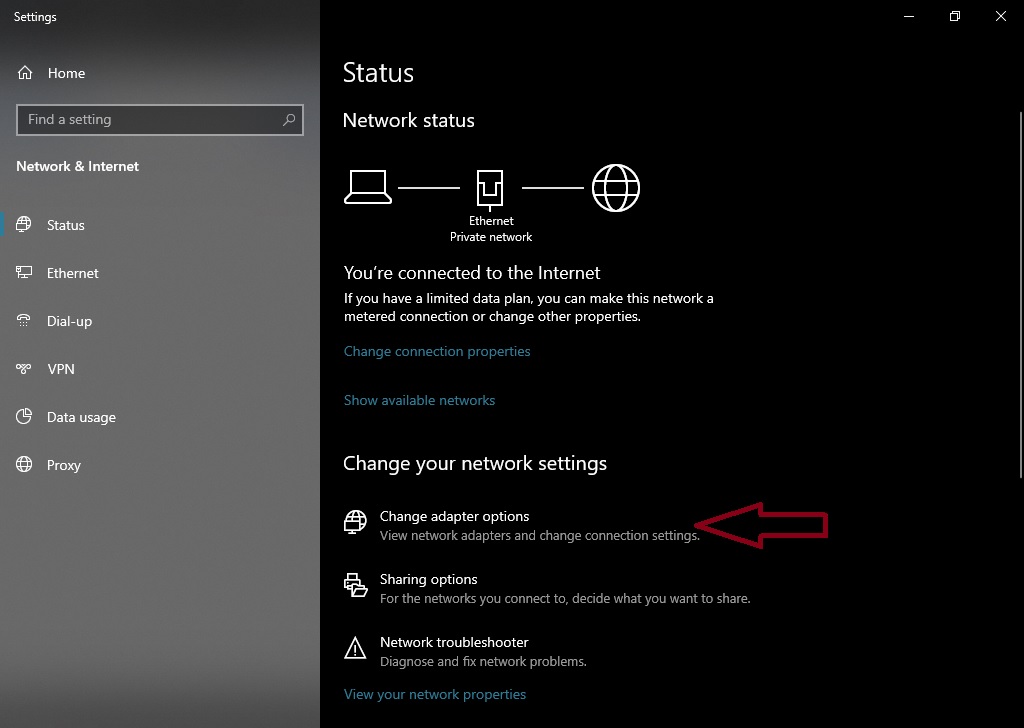
On the next screen click on Change adapter options:

Then select the IPV4 option. Next click on Properties.

On the next screen click on Use the following DNS server. In the empty field, please fill in the values with the DNS server of your preference. Use the following DNS values. 8.8.8.8 or 8.8.4.4.

Disable Windows Firewall temporarily to diagnose the issue

Press OK and you have renewed the DNS server.
Reset Browser to its factory settings
To check if the problem is a network configuration, try to access the page with another browser. On the market, there are several options such as Edge, Firefox, Chrome, and Opera. It is also advisable to have your browser updated. As a last solution, try to uninstall and reinstall, reset the browsers. If you find any issue on a specific browser, then recommend you to Reset the browser to its default settings.
That’s it!!
From there, you should have no problem accessing the network. If the problem still persists, then it is very likely that there is an issue with the provider. I hope that with these steps you can solve the problem and surf the Internet without problems. I hope you enjoyed this tutorial. See you later!
