Hi! Today we are going to see How to change Windows 10 user account’s name easily. This is a very useful procedure when you want to modify the profiles of several users. In addition, it allows you to adapt the computer to different needs. Well, let’s get to work!
Please note user account name is different then the computer name. If you want to change the computer name then refer to this article.
How to Change Windows 10 User Account’s Name in Easy Steps
We have prepared the step-by-step guide on how to change user name of Windows 10 profile, follow the following steps.
First Method
Change the user profile name using Windows Settings.
In the first place, enter the Windows configuration by pressing the Win + I in combination. Once there, click on Accounts.
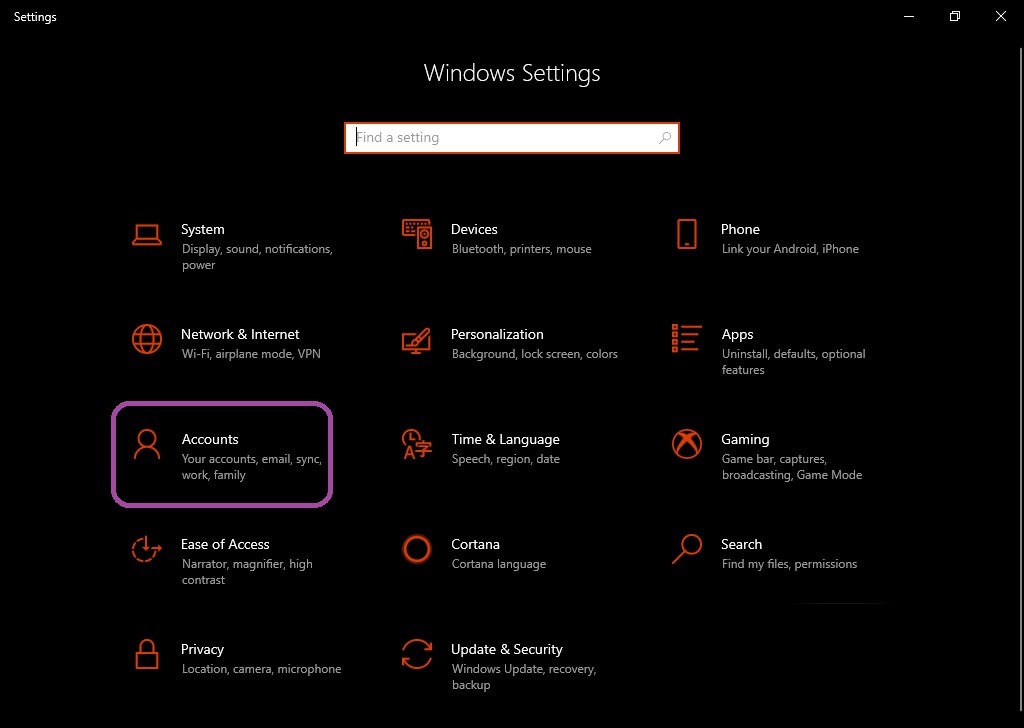
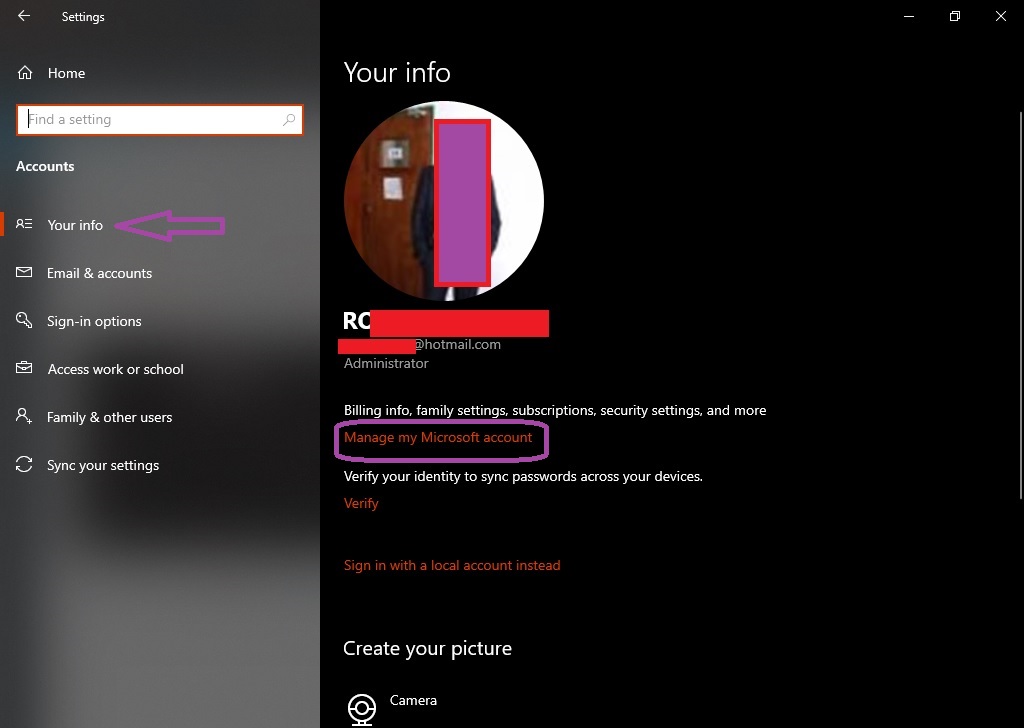
On the next screen, please click on Your Info. Next, click Manage My Microsoft Account. A Microsoft page will open where you may be asked to identify yourself.
Then select the More Options action. Then click on Edit Profiles.
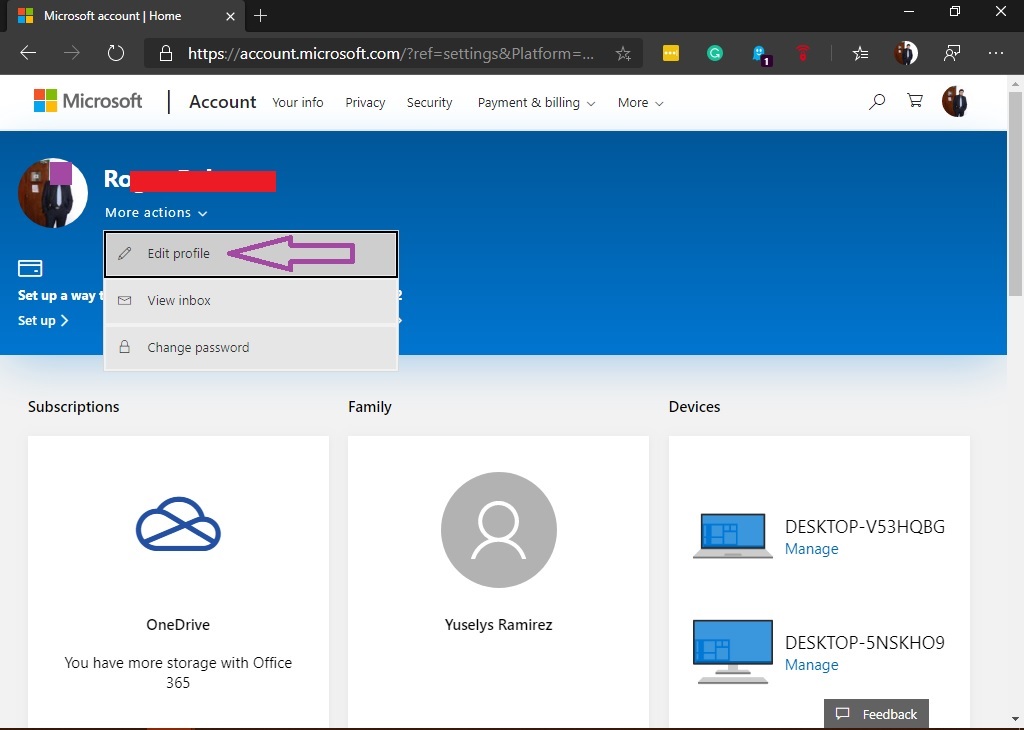
On the next screen click on Edit name.
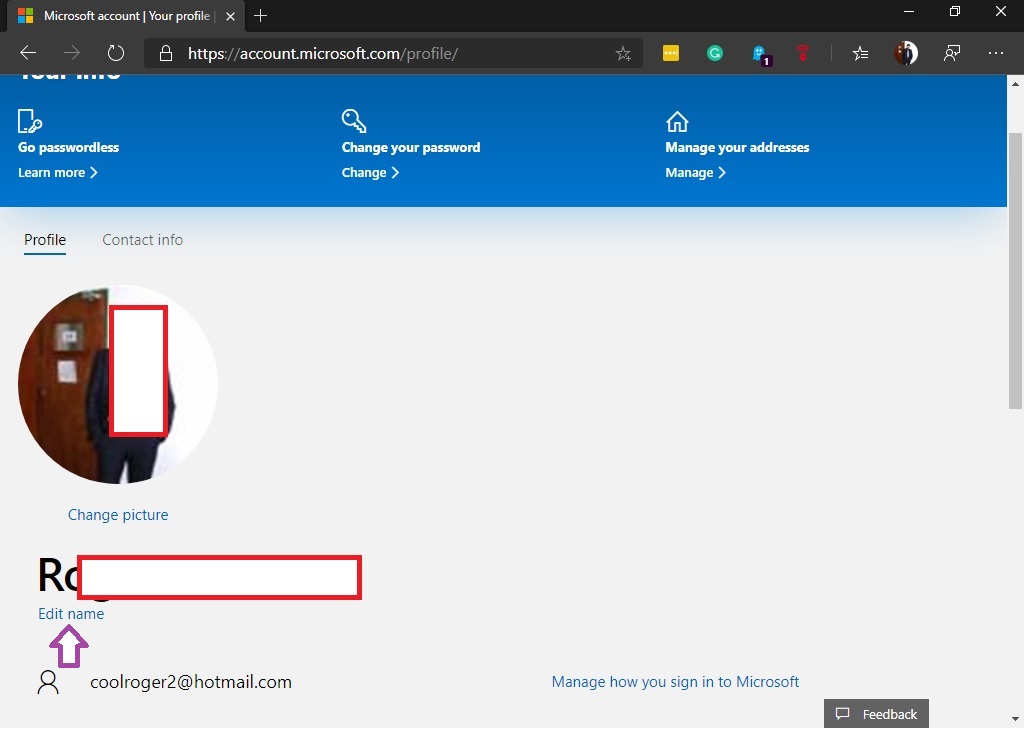
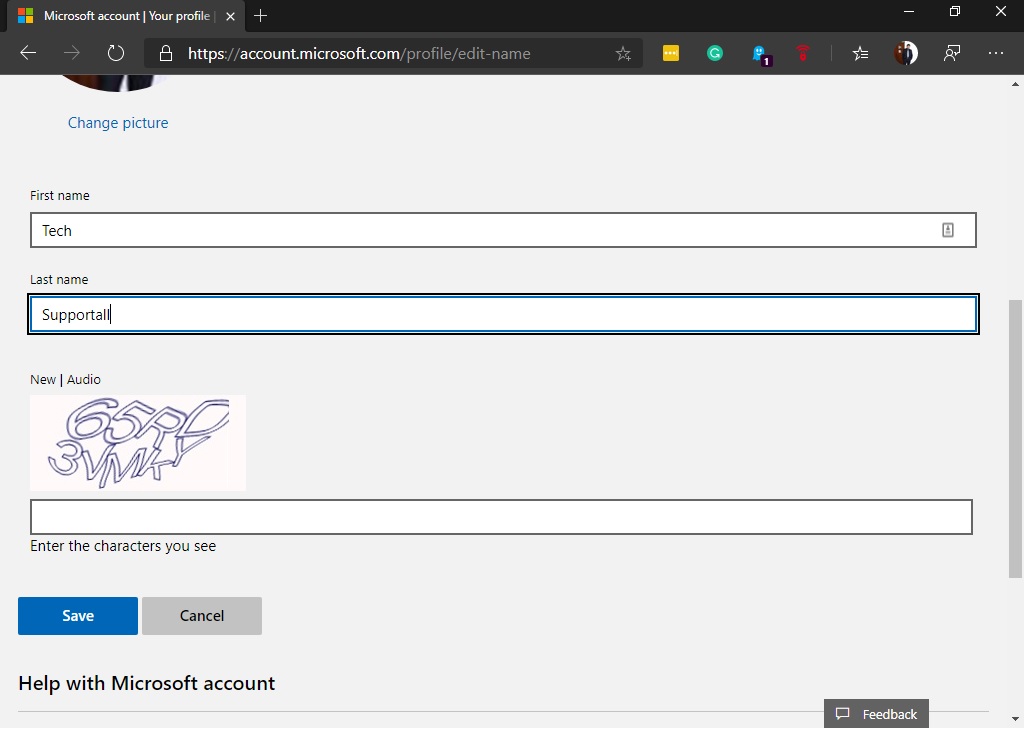
Finally, edit the First name and Last name corresponding to the account. Save the changes and restart the PC to make the changes effective.
Second Method (Recommended)
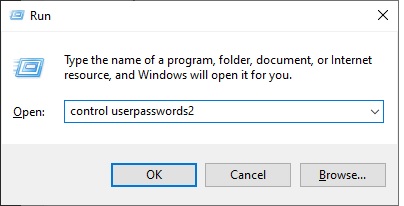
Change system account profile name through netplwiz command.
This requires the execution of the above-mentioned commands. With this intention press the combination Win + R and execute any of the two commands:
Next, a window will be displayed where you have to select the user you want to modify. Then click on Properties.
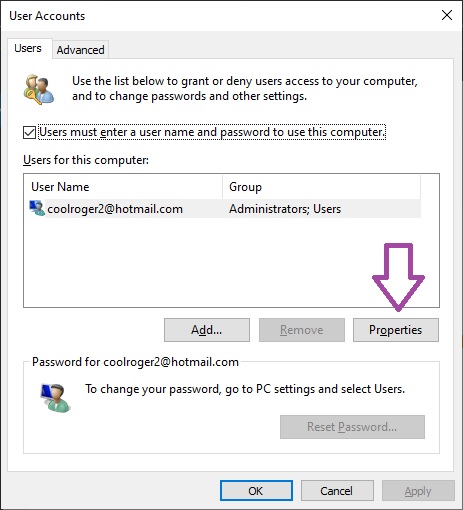
A window will be displayed where you can edit the account name. Enter the name what you want and press OK to set the changes.
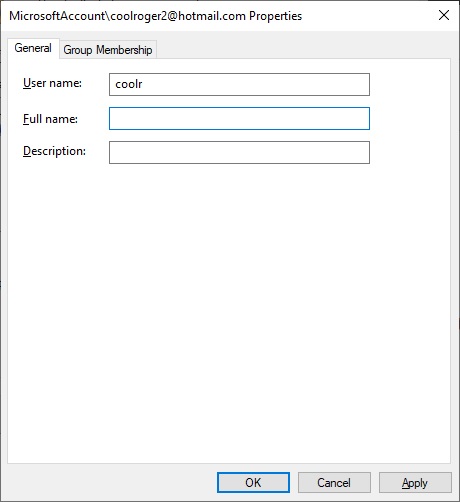
From now on we will try solutions that only work on Windows 10 Pro.
Third Method
Modify account name from the computer management.
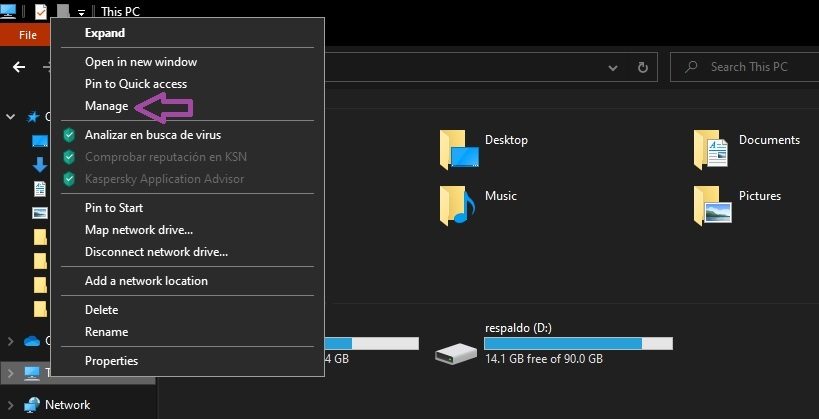
With that intention, press the Win + E combination to enter the file manager. Then right-click on This PC and select Manage.
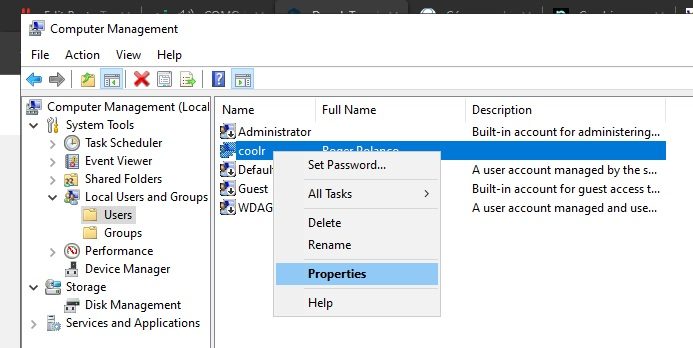
Click on Local Users and Groups → Users. Then right-click on the user you want to modify and click on properties.
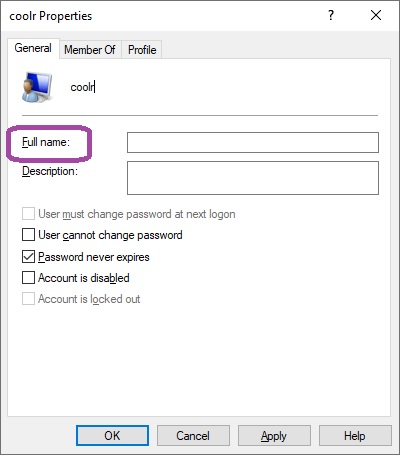
In the next window, please modify the account name. Enter the new name what you like and then click on apply and OK.
Fourth Method
Change the user profile name with Local Users Manager.
Another way to change the account user name is to enter the local user and group policy. With this intention, please press the Win + R combination and execute the following command.
lusrmgr.msc
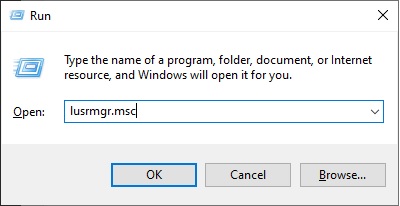
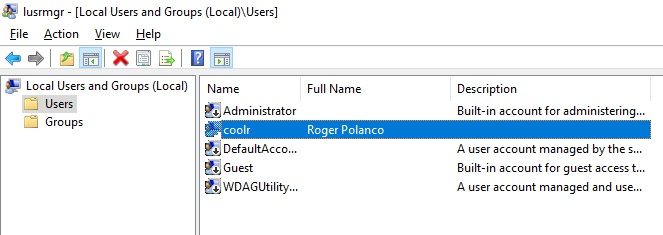
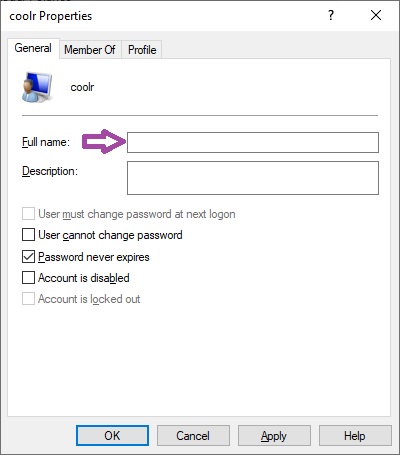
Inside the Users folder, select the user you want to modify and double-click on it to enter the properties. Immediately, a window will be displayed where you can edit the user name easily:
Fifth Method
Change the name of the account with the group policy editor.
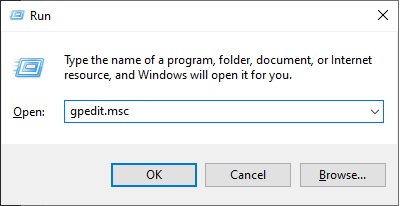
Finally, we’ll see how to modify the username through the group policy editor. Once again we’ll use the Win + R combination and run the command:
gpedit.msc
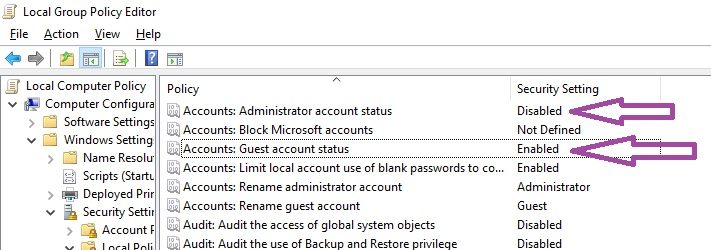
In the Group Policy editor, go to the following path: Computer configuration → Windows Settings → Security Settings → Local Policies → Security Options.
Finally, locate the rules regarding user names. Edit them to change the names.
 This way you can change the account user name in Windows 10. This allows you to assign different roles to users who use the computer. Also, it is convenient if you want to modify your profile on the computer. That’s all for now, see you!
