Windows 10 has an inbuilt powerful tool that can create a system backup image as a backup of your operating system. So, you may restore it anytime whenever your computer fails to boot. This process is not too typical, it is even very simple. See what you need to do to take a complete backup of your Windows 10.
Index:
How to take a full backup
Steps:
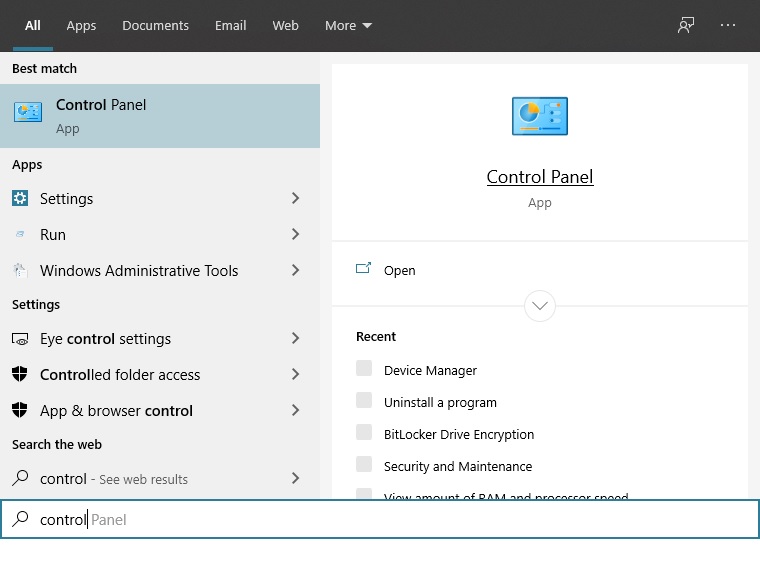
- With this intention, please enter into the control panel by typing control in the search bar:
- Once the control panel is open, please enter the Backup and Restore (Windows 7).
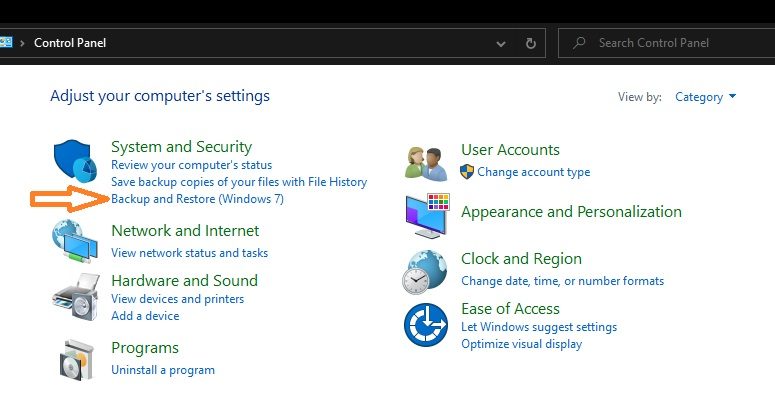
- On the next screen please click on Create a system image.

- As mentioned above, it is possible to save the image to a hard drive. It is also possible to save it on a group of DVDs. It is also possible to save the backup to a network location. For the purpose of this tutorial, we will save the backup on a hard drive.

- After selecting the location, just start the process and wait a few minutes while the wizard does his work. After that, click on Start Backup.
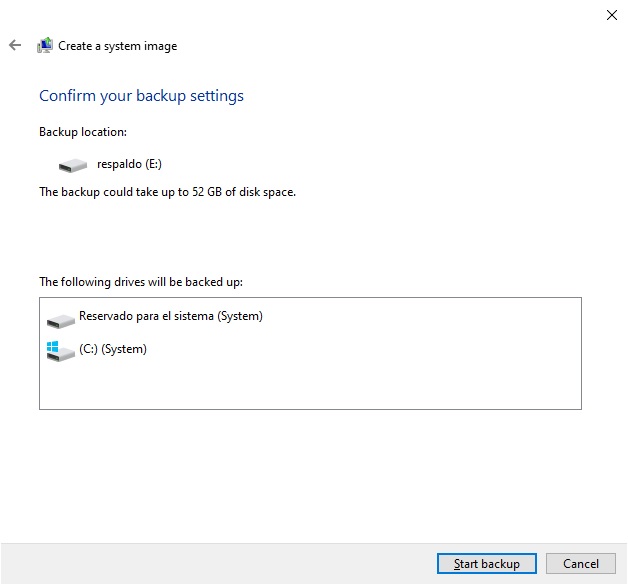
- That’s it. It will take time to complete it. For more details see the following video tutorial with examples.
Video Tutorial:
How to Restore from Created Backup
- Press the Win + I combination to enter the settings. Once you are there, please go to Update and Security.
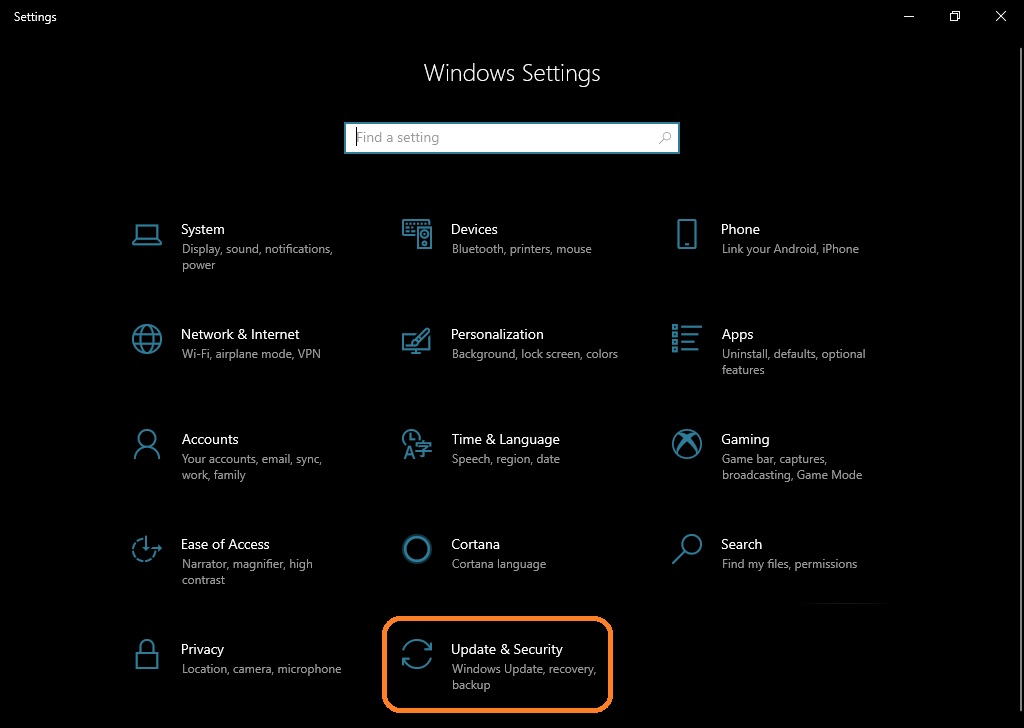
- On the next screen, click on Recovery.
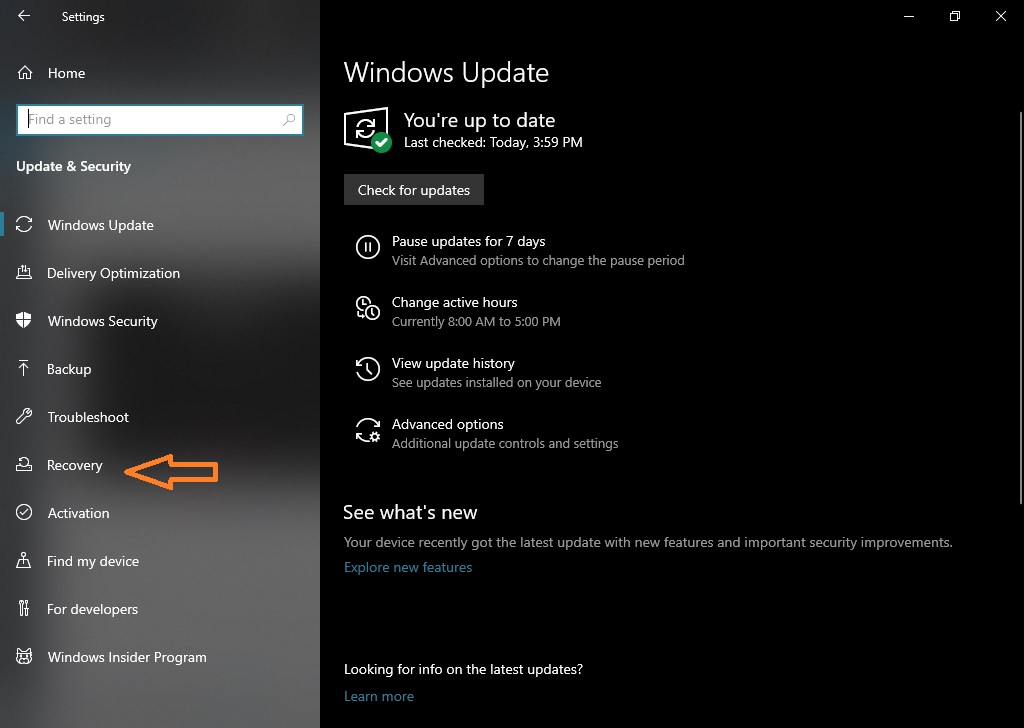
- For Recovery, on the menu please select Restart Now. This will restart your computer and display the Windows advanced options. Once there, click on System Image Recovery.
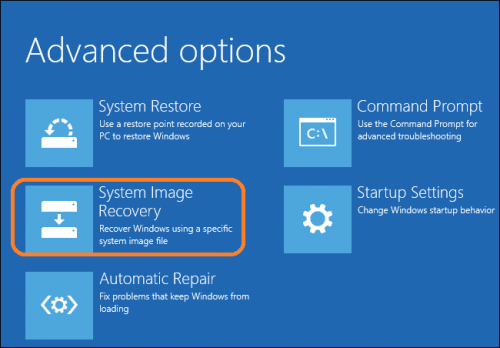
- After that, it will ask you to select the created system image drive. Select the drive where you have backed up and follow further instructions on-screen.
Apply this Restore Process (if your Windows won’t boot)

More Information:
This tool to create a system backup image has been present since Windows 7. In effect, this method allows you to make a complete copy of the operating system. This includes applications and files.
This way, if the operating system fails, it is possible to completely restore Windows 10. As you can see, it is a very interesting method to back up all the information present in the system. Well, in this post we will see how to make a full backup image of Windows 10.
