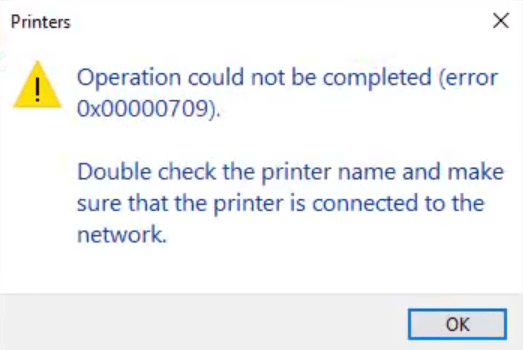
Are you trying to set a new default printer on a computer via a network and are getting the message “Operation could not be completed error 0x00000709”? Don’t worry, this problem can be easily solved if you follow the solution shared below. In this tutorial, we will explain how to fix “Operation could not be completed error 0x00000709” error when using shared printer.

What Causes “Operation could not be completed error 0x00000709”?
While installing a printer you make some changes on your computer files, Windows Services, registry entries and many other settings. However, these changes can be altered when you install another printer or other printing applications. Sometimes the permissions are changed due to malware or conflicting programs by the Windows Firewall, which makes the printer to stop working normally.
The “Operation could not be completed error 0x00000709” or the “Error 0x00000709” is usually caused due to the above-mentioned accidental changes on your Windows computer. Therefore, whether you are trying to solve this problem on a shared network printer or a directly connected printer, the solution given below will work for all the conditions.
How to Fix “Operation could not be completed error 0x00000709” Error When Using Shared Printer?
When solving this error over a network computer and printer you will have to work with at least two computers. First is the computer where the printer is directly connected and installed and the second computer is where you are unable to access the printer and witnessing the Error 0x00000709. In order to solve this error, first you will have to perform all the steps on the main computer, which is where the printer is connected and installed, then check the error on the second computer.
Before following the steps given below make sure that the printer is connected to the network and is working properly. The steps given below will work for all the versions of the Windows operating system.
1) Steps for the First Computer
Make sure that you are logged into your Windows through Administrator account or you have Administrator privileges. This is extremely important for the success of this solution.
- Open Windows Explorer window, right click ‘This PC’ and choose ‘Manage’ from the options.

- In the Computer Management window, click on the ‘Services’ option under the ‘Services and Applications’ section.

- In the list of Services, locate and right click ‘Computer Browser’, then choose ‘Restart’ from the listed options. Wait for the Computer Browser Service to restart.

- Next, locate and right click ‘Print Spooler’ service, then select ‘Restart’ from the options. Wait for the Print Spooler Service to restart.

- Then, locate and right click ‘Windows Firewall’ service and select ‘Restart’ from the given options. Wait for the Windows Firewall Service to restart.

- After restarting all the three above-mentioned services click on the ‘Close’ button at the top right side of the Computer Management window.

- Simultaneously, press and hold the ‘Win’ and ‘R’ keys on your keyboard. This will open the Run dialog box. Type ‘regedit’ in the dialog box and click on the ‘OK’ button.

- In the Registry Editor window, expand the folder tree to locate “HKEY_CURRENT_USER\Software\Microsoft\WindowsNT\CurrentVersion\Windows”. Now, right click the ‘Windows’ folder and choose ‘Permissions’ from the shown options.

- In the Permissions, choose ‘All Applications Packages’, then ‘Allow’ ‘Full Control’ by checking the relevant box and finally click on the ‘Apply’ button.

- Next, choose ‘Administrators’ from the list, then check ‘Full Control’ box under ‘Allow‘ and finally click on the ‘Apply’ button.

- Click on the ‘Add’ button to create a new group.

- In the Select Users window, click on the ‘Advanced’ button.

- Click on the ‘Find Now’ button, then locate and select ‘Everyone’ from the search results and click on the ‘OK’ button.

- Check that ‘Everyone’ is listed in the object names, then click on the ‘OK’ button.

- Now, choose ‘Everyone’ group from the list and ‘Allow’ ‘Full Control’ to this group. Then, click on the ‘Apply’ button to finalize the changes and finally the ‘OK’ to confirm all the changes.

- Click on the ‘Start’ button, choose ‘Power’ option and select ‘Restart’ to reboot your computer.

After the computer reboots all the changes made above will take effect, thus, now is the time to move to the network computer where you are unable to connect with your network printer and are experiencing the Error 0x00000709.
2) Steps for the Second Computer
To properly follow the steps mentioned below you must know the IP Address of the computer where the printer is installed.
- Simultaneously, press and hold the ‘Win’ and ‘R’ keys on your keyboard to open the Run dialog box. In the Run dialog box, type the ‘IP Address’ and click on the ‘OK’ button.

- In the Network window, double click on the printer you want to access.

- When you see the message ‘Connecting to printer’ it’s a sign that the Error 0x00000709 has been resolved.

That’s it, you have fixed the “Operation could not be completed error 0x00000709” error on a shared printer.
Now you know how to fix “Operation could not be completed error 0x00000709” error when using shared printer on a Windows computer. However, do remember that the solution given above can be used for printers which are accessed via network as well as the printers which are directly connected with your computer.


Not working on clean install of windows 10 December 2021.
Tried half a dozen “so called” fixes. NOTHING has worked. Microsoft needs to fix this. Linux is looking better all the time.