When you see a Code 43 error in Nvidia graphics card software, then it’s a sign that your computer is unable to identify your video card. At first glance this error seems to be related to the hardware, but that’s not the case most of the time. If you are having trouble with Nvidia Error 43 on your computer, then don’t worry. In this guide, we will explain how to fix Nvidia Error 43 by following some simple methods.
Windows has stopped this device because it has reported problem (Code 43)
What Causes Nvidia Error 43?
This error in Nvidia graphics can be due to various reasons, but they can be broadly categorized into hardware and software categories.
Hardware Issues: The Nvidia Error 43 can arise due to hardware issues, like when the graphics card is improperly inserted, connection cable is faulty, the card is fake, etc. We will discuss some of the solutions for such hardware issues below.
Software Issues: The software issues that cause Error Code 43 in Nvidia cards are usually related to corrupt or outdated driver files. Sometimes this error can occur due to corrupt or missing system files. Although software issues are more common than hardware issues, but the solution for them is also simpler.
How to Fix Nvidia Error 43?
As you know by now that this Nvidia error can be caused due to hardware as well as software issues. Therefore, the solutions given below will require you to check both these aspects. We have kept the hardware solutions to minimum as it’s better to leave its detailed solutions to the experts, like the professional hardware engineers. Go through our methods one-by-one in the order they have been mentioned below.
Method 1: Check the Card Installation and Perform Power Cycle
It’s better to start by verifying the hardware installation of the Nvidia card so that we are sure there is no problem with the card installation. Follow the steps given below carefully.
Press ‘Win + R’ keys together to open the Run dialog box, then type ‘devmgmt.msc’ and click on the ‘OK’ button.
In the Device Manager window, expand ‘Display adapters’, then right click the ‘Nvidia card’ and choose ‘Disable device’ option.
Now turn off your computer and perform the power cycle by following the steps given below.
If you are using the laptop, then take out its battery and the power cord connected to the laptop. If you are using a PC, then take out the power cord.
Now press the power button of your laptop or PC and keep it pressed for about 1 minute. This will discharge any electrical build-up in your system.
If you are using a PC, then open your computer lid and make sure that your graphics card is properly installed and the PCI-E 6 pin cable is properly connected.
Insert the battery into the laptop and reconnect the power cable to the main supply, then restart your laptop or PC.
After the computer has rebooted, follow the Steps 1 and 2 to open the Device Manager window. Click to expand ‘Display adapters’, then right click your ‘Nvidia card’ and select ‘Enable device’ from the options.
Check to see whether you were able to fix Nvidia error 43 or not. If the error is still displayed, then move to the next solution.
Method 2: Uninstall VIRTU MVP Application
Nvidia has officially said in a statement that the Lucid VIRTU MVP program is not compatible with the Nvidia cards. Although the Lucid VIRTU MVP software is an extremely useful tool as it allows you to switch between installed graphics card and on-board graphics, but it has problem integrating with the Nvidia cards. Therefore, if you have installed the VIRTU MVP software on your computer, then it can be a cause for the Nvidia Error 43 and you must uninstall this program.
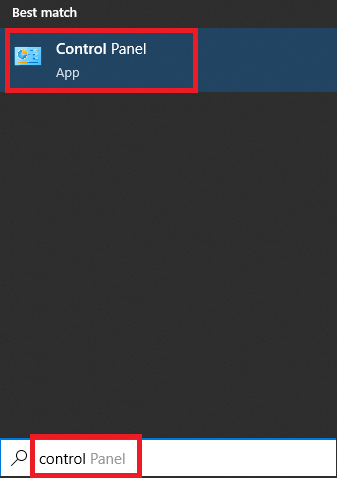
Type ‘control’ in the Windows search box and click on the ‘Control Panel’ in the search results.
In the Control Panel window, click on the ‘Program and Features’ option.
In the list of installed programs, locate and right click ‘Lucid VIRTU MVP’ application and select ‘Uninstall’. Follow the prompts to complete the uninstall process, then restart your computer.
After your computer has rebooted check whether the Nvidia Error 43 has been resolved or not. Also, make sure that applications, like UPSilon, duetdisplay and f.lux are not installed on your computer. If you have any of these programs installed on your computer, then uninstall them as well. Even after uninstalling all the above mentioned programs if you still experiencing the Error Code 43, then try the next solution.
Method 3: Update your Windows
Windows has taken notice of this error and it has released an update to resolve this Nvidia error. If you haven’t updated your Windows from a long time, then you should do it now. This simple looking method can actually solve this error.
Click on the ‘Start’ button and choose ‘Settings’ from the menu options.
In the Settings page, click on the ‘Update & Security’ option.
In the Update page, under the Windows Update, click on the ‘Check for updates’ button.
After the Windows has been updated you should restart your computer and check whether the Nvidia error is fixed or not. If this error persists, then try the next method.
Method 4: Install Default Graphics Driver
Sometimes the graphics card driver files get corrupted which may cause this Nvidia error. The simplest solution is to install your graphics card with its default driver and check if this solves the problem. You will have to perform this method in the Windows Safe Mode.
Press ‘Win + R’ keys together to open the Run dialog box, then type ‘msconfig’ and click on the ‘OK’ button.
In the System Configuration window, choose the ‘Boot’ tab, then click on the ‘Safe Boot’ option and select ‘Minimal’. Finally, click on the ‘Apply’ and ‘OK’ buttons respectively.
Click on the ‘Restart’ button to reboot your computer in the Safe Mode.
After your computer has restarted in Safe Mode, press ‘Win + R’ keys to open the Run dialog box, then type ‘devmgmt.msc’ and click on the ‘OK’ button.
In the Device Manager, click to expand ‘Display adapters’, then right click your ‘Nvidia card’ and select ‘Uninstall device’ option. Follow the prompts to complete the uninstall process, then restart your computer.
After the restart your Windows will detect the Nvidia card, but without its drivers and it will automatically install the default display drivers. If this method doesn’t resolve the Nvidia Error 43, then try the next method shared below.
Method 5: Uninstall NVIDIA Programs
Nvidia installs multiple software on your computer to ensure its best performance. However, if any of these programs have faulty files, then you can experience all kinds of Nvidia errors, including the Error 43. Therefore, uninstalling Nvidia software from your computer can solve this problem.
Click on ‘Start’ button and choose ‘Settings’ from the options.
In the Settings page, click on the ‘Apps’ option.
In the Apps list, you will find all the Nvidia programs installed on your computer.
Select any one of the Nvidia programs and click on the ‘Uninstall’ button, then follow the on-screen instructions to complete the uninstall process. Also, uninstall rest of the Nvidia programs, then restart your computer.
After restart check whether the Nvidia 43 error is resolved or not. If this error is still displayed, then try the next method.
Method 6: Installing/Re-Updating NVIDIA Drivers
Since the default drivers didn’t solve your problem it’s time to install the latest Nvidia drivers. However, before installing the latest drivers you should completely uninstall all the Nvidia display drivers from your computer so that they can’t cause any conflicts with the new driver files. For this you can use a free application called the Display Driver Uninstaller or the DDU. It’s recommended to run this application in the Windows Safe Mode.
Press ‘Win + R’ keys to open the Run dialog box, then type ‘msconfig’ and click on the ‘OK’ button.
In System Configuration, select ‘Boot’ tab, then check ‘Safe boot’ and select ‘Minimal’, finally, click on the ‘Apply’ and ‘OK’ buttons respectively.
Choose the ‘Restart’ button to reboot your computer in Safe Mode.
After your computer restarts in Windows Safe Mode, run the DDU program from its desktop folder and click on the ‘OK’ button.
In the Options window, choose all the options under ‘NVIDIA Specific Options’, then click on the ‘Close’ button.
In the device type, choose ‘GPU’.
In the device name, choose ‘NVIDIA’.
Click on the ‘Clean and restart’ button to begin the driver uninstall.
Wait for the DDU app to create a system restore point.
Wait as the DDU app performs the uninstall process. After the driver uninstall is completed restart your computer.
After your computer restarts you should download the latest Nvidia driver installer for your graphics card. Right click the newly downloaded Nvidia Installer file and select ‘Run as administrator’. Wait for the driver installer app to load.
Wait for the installer to check your system.
Accept the license agreement by selecting the ‘Agree and Continue’ button.
In the Installation options, select ‘Custom’ install and click on the ‘Next’ button.
In Custom installation options, select ‘Perform a clean installation’ option and click on the ‘Next’ button.
Wait as the graphics driver installs on your computer.
When you see ‘Nvidia Installer has finished’, then click on the ‘Close’ button.
Now restart your computer and check if the Nvidia error has been fixed or not. If the error still exists, then try installing the previous version of your Nvidia graphics drivers by following the steps given below.
Press ‘Win + R’ keys together to open Run dialog box, then type ‘sysdm.cpl’ and click on the ‘OK’ button.
In the System Properties window, choose ‘Hardware’ tab and click on the ‘Device Installation Settings’ button.
In Device Installation Settings window, choose ‘No’ option and click on the ‘Save Changes’ button.
Press ‘Win + R’ keys to open Run dialog box, then type ‘devmgmt.msc’ and click on the ‘OK’ button.
In the Device Manager, expand ‘Display adapters’ option and right click on your ‘Nvidia card’ name, then click on the ‘Update driver’ option.
In the Update Driver window, click on the ‘Browse my computer for drivers’ option. After this enter the location of the old Nvidia driver folder and follow the prompts to complete the installation. Finally, restart your computer.
If this method didn’t fix Nvidia Error 43 on your computer, then try the next solution given below.
Method 7: Check Legitimacy of Nvidia Card
Since you have installed all the possible combinations of drivers and software for your Nvidia card, but still you are witnessing the Nvidia Error 43, then it might be possible that your graphics card is fake. It means, may be your computer manufacturer has flashed your BIOS and you are actually using a different card than the one you actually bought.
To verify the legitimacy of your card you should note down the make and model number of your Nvidia graphics card, then search for its specifications on the official Nvidia site. Finally, you should use a free application called GPU-Z to check if the card installed on your computer has the same specifications or not.
Download GPU-Z from here and install it on your computer. Run this application and you can see complete details of the card installed on your computer.
Compare the specs of the card on your computer with the specs you got from the official Nvidia site. If they match, then you have a genuine card. Otherwise, your card is of a different make and model.
Additional Methods to Fix Nvidia Error 43
If none of the above methods proved to be useful for you, then you can try some more methods.
Update BIOS: There are some reports where users have been able to fix the Error 43 in Nvidia cards by updating their BIOS. However, updating your computer BIOS is a highly technical task and it’s better to be performed by the hardware experts. That’s why we have placed this solution in additional methods.
Run SFC and DISM Tools: Sometimes the Nvidia Code 43 error is caused due to faulty system files or a corrupt hard disk. You can check and resolve both these problems by running the SFC and DISM tools through Windows command prompt.
Install Latest Java: Some users have complained that they encountered Nvidia Error 43 due to outdated Java version. Installing the latest Java version helped them solve this error. You can also try this method.
Now you know how to fix Nvidia Error 43 on a Windows computer. However, if after following all the methods shared above you are unable to fix this Nvidia error on your computer, then most probably your problem is due to faulty graphics card and you should consult a hardware engineer.


good program rtx4090 first error solve!