
Nvidia is the most popular graphics card manufacturer which is credited for some of the most powerful and efficient graphics cards. However, some of its users are reporting that they are encountering ‘ERROR CODE: 0x0001’ in GeForce Experience and their application crashes while displaying the error “Something went wrong.” The reasons for this error vary and most users are unable to resolve this Nvidia error. In this guide, we will describe how to fix Nvidia error code 0x0001 on your computer by following a few simple solutions.
What Causes Nvidia Error Code 0x0001?
There can be multiple reasons behind this Nvidia error code on your computer, but we are mentioning the most common ones:
- Outdated OS: Maybe you haven’t updated your Windows OS for a long time and the new driver files aren’t fully compatible with it.
- Wrongly Configured Services or Processes: This Nvidia error can be because the Nvidia Services or Processes were improperly configured during their installation.
- Problem with GeForce Experience Installation: Sometimes the program files of the GeForce Experience application get corrupted or missing, which may cause this error.
- Improperly Configured Directories Permissions: Nvidia directories should have complete permission so that all the Nvidia services and processes can access them fully.
How to Fix Nvidia Error Code 0x0001?
As you have read above, there can be multiple reasons behind this error. Therefore, there are also multiple solutions recommended to solve this error. We are sharing all such solutions below. You should try them in the order they have been mentioned and most probably you will fix this problem on your computer.
Solution 1: Update your Windows
Due to outdated Windows, your computer may encounter many problems. This is especially true if you have recently updated your graphics driver, because sometimes new drivers are not fully compatible with the outdated Windows. The simplest solution to this problem is to update your Windows.
- Click on the ‘Start’ button and choose ‘Settings’ from the options.

- In the Settings page, choose ‘Update & Security’ option.

- In the Update & Security page, click on the ‘Check for updates’ button to start the Windows update process.


After the Windows update has completed successfully you should restart your computer and check if the Nvidia error has been resolved or not. If the error persists, then you should try the next solution given below.
Solution 2: Uninstall VPN Client
Sometimes while you are updating the Nvidia GeForce Experience the internet connection breaks down and you will experience the Error Code 0x0001. If you are running a VPN, then this breakdown of the internet connection is most probably due to the VPN program.
You can try to disable the VPN on your computer, then update the GeForce Experience app. If there is no error, then the problem is resolved. However, the best solution is to uninstall the VPN app from your computer.
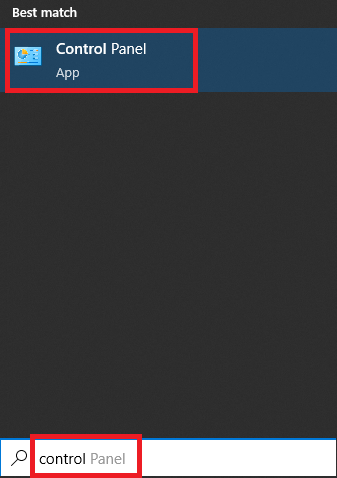
- Search ‘control’ in the Windows search box and choose ‘Control Panel’ from the search results.

- In the Control Panel, click on the ‘Programs and Features’ option.

- In the list of installed programs, choose your VPN program and click on the ‘Uninstall’ button, then follow the prompts to complete the uninstall process.


After uninstalling the VPN program you should restart your computer and check if you are experiencing the Nvidia Error Code 0x0001. If the error is still displayed, then try the next solution.
Solution 3: Enable Processes and Services Related to Nvidia
There are certain Nvidia processes and services that must start when your system is booting-up so that GeForce Experience can function properly. If these processes and services don’t start during the system boot-up, then you will experience the Nvidia Code 0x0001. To fix this problem you should enable these processes and services in your system start-up options.
- Type ‘system configuration’ in Windows search and click on ‘System Configuration’ in the search results.

- In the System Configuration window, choose ‘Services’ tab and check ‘Hide all Microsoft services’ option.

- In the list of Services, locate and enable all the Nvidia services you can find.

- Now, choose the ‘Startup’ tab, then click on the ‘Open Task Manager’ link and finally click on the ‘Apply’ button.

- In the Task Manager, under ‘Start-up’ tab, locate the Nvidia process and make sure it’s enabled. If the Nvidia process is disabled, then you can select the Nvidia process and click on the button given below to enable the process.


After completing the above mentioned steps you should restart your computer and check whether the Nvidia 0x0001 error is fixed or not. If this error persists, then follow the solution given below.
Solution 4: Scan your System Drive
If your system driver has any error, such as bad sectors, etc., then the GeForce Experience can display errors. That’s primarily because the GeForce program is unable to access some essential resources for its functioning. Therefore, you must scan and fix the errors on your system drive by following the steps given below.
- Close all the applications running on your computer, then right click the ‘Start’ button and choose ‘File Explorer’ from the menu options.

- In the File Explorer window, select ‘This PC’, then right click on ‘C’ drive and choose ‘Properties’ from the options.

- In the Properties window, choose ‘Tools’ tab and click on the ‘Check’ button.

- In the Error Checking window, click on the ‘Scan drive’ option.

- Wait for the scanning of the system drive to complete.

- Once the scanning is finished, click on the ‘Close’ button.


Now restart your computer and check if the Nvidia Error 0x0001 has been resolved or not. If the problem still exists, then continue to the next solution.
Solution 5: Configure Services Related to Nvidia
This Nvidia error is sometimes caused when the services which are essential for the operation of the Nvidia are improperly configured. Follow the steps given below to reconfigure the services properly.
A) Enable/Restart Nvidia Services
- Search ‘services’ in the Windows search, then right click ‘Services’ in the search results and choose ‘Run as administrator’ from the options.

- In the Services page, locate and right click ‘NVIDIA Display Container’ service and choose ‘Restart’ for restarting the service.

- If the ‘NVIDIA Display Container’ service is disabled, then right click the service and choose ‘Properties’ from the option.

- In the Properties window, click on the Startup type drop-down, choose ‘Automatic’ from the list, then click on the ‘Apply’ button and ‘OK’ button respectively.

- Perform the above mentioned steps for the following Nvidia services as well.


- NVIDIA LocalSystem Container
- NVIDIA NetworkService Container
- NVIDIA Telemetry Container
After making all the above mentioned changes you should restart your computer and check if the issue has resolved or not.
B) Set Local System Account as Nvidia Services Logon
- Type ‘services’ in the search bar. In the search results, right click ‘Services’ and select ‘Run as administrator’ from the options.
- In the Services page, find and right click ‘NVIDIA Display Container’ service and choose ‘Properties’ from the options.
- In the Properties window, choose ‘Log On’ tab, then select ‘Local System account’ option and check the ‘Allow service to interact with desktop’ checkbox. Finally, click on the ‘Apply’ and ‘OK’ buttons respectively.

- Follow the above steps for the following Nvidia services.

- NVIDIA LocalSystem Container
- NVIDIA NetworkService Container
- NVIDIA Telemetry Container
Now restart your computer and check if the issue is resolved.
If the Solution 5 solves your Nvidia error, then you may have to perform these steps after every Nvidia update. However, if the problem still persists, then move to the next solution.
Solution 6: Change Permissions of Nvidia Directories Folder
Your user account and the Nvidia system services must have complete access to the Nvidia directories, otherwise, GeForce Experience will not have complete access to the Nvidia directories and you will see Error Code 0x0001. Follow the steps given below to solve this problem.
- Press ‘Win + R’ keys together to open Run dialog box. In the box, type ‘%ProgramData%’ and click on the ‘OK’ button.

- In the ProgramData folder, locate and right click the ‘Nvidia Corporation’ folder and choose ‘Properties’ from the option.

- In the Nvidia Properties window, click on the ‘Edit’ button.

- In the Permissions window, click on the ‘Add’ button.

- In the Select Users or Groups window, click on the ‘Advanced’ button.

- Click on the ‘Find Now’ button, then in the search results choose ‘Everyone’ and click on the ‘OK’ button.

- In the Select Users or Groups window, click on the ‘OK’ button.

- In Permissions window, choose ‘Everyone’ under Group or user names, then click ‘Full Control’ checkbox under Allow. Finally, click on the ‘Apply’ and ‘OK’ buttons respectively.

- In the Nvidia Properties window, click on the ‘OK’ button to finalize the changes.

- Perform the above steps for the ‘\Program Files (x86)\Nvidia Corporation’ as well.


Now restart your computer and check if your Nvidia error is fixed or not. If the error is still displayed, then try the next solution.
Solution 7: Set the Right Path in Windows Registry
Sometimes users install their OS on one drive and their Nvidia program on another drive. This can also cause the Nvidia 0x0001 error. However, you can resolve this problem by making the following changes in your Windows Registry.
- Type ‘registry editor’ in Windows search, then click on the ‘Registry Editor’.

- In Registry Editor, navigate to ‘Computer\HKEY_LOCAL_MACHINE\SOFTWARE\Microsoft\Windows\CurrentVersion’.

- In CurrentVersion, make sure that the Data value for the strings ‘ProgramFilesDir’ and ‘ProgramFilesDir (x86)’ are ‘C:\Program Files’ and ‘C:\Program Files (x86)’ respectively.
- If the Data Value is not as mentioned above, then double click the relevant string and in the Value data field type the right value and click on the ‘OK’ button.

- After making the changes click on the ‘Close’ button to close the Windows Registry.


Restart your computer and check if the Nvidia error exits. If the error is still not fixed, then follow the next solution.
Solution 8: Install GeForce Experience Program Again
Maybe some of the GeForce Experience files on your computer have gotten corrupt or have gone missing, which is causing this Nvidia error. The best solution is to reinstall GeForce Experience on your computer by following the steps given below.
- Click on ‘Start’ and choose ‘Settings’ from the options.
- In the Settings page, click on the ‘Apps’ option.

- In the list of Apps, choose ‘NVIDIA GeForce Experience’ and click on the ‘Uninstall’ button, then follow the prompts to complete the uninstall process. Finally, restart your computer.

- Right click the GeForce Experience installer file and choose ‘Run as administrator’ from the options.

- Wait for the GeForce Experience to load itself.

- Wait for the GeForce Experience to prepare your computer for the installation.

- In the installation options, choose ‘Perform a clean installation’ option and click on the ‘Next’ button, then follow the prompts to complete the installation process.


After installation is completed launch the GeForce Experience program as administrator and check if the Nvidia error is resolved or not. If the problem is not resolved, then you can apply the Services solutions discussed above. If none of the solutions work, then try the final solution given below.
Solution 9: Create a New User Profile
Maybe the user profile you are currently using has gotten corrupt, which is causing this Nvidia error. Therefore, you should create a new user profile and try to run GeForce Experience from there.
- Right click the ‘Start’ button and choose ‘Computer Management’ from the options.

- In the Computer Management window, expand ‘Local Users and Groups’ option and select ‘Users’ folder.

- Click on ‘Action’ and select ‘New User’ from the options.

- Enter the relevant details in the New User window and click on the ‘Create’ button.

- In the User list, find and right click on the newly created user, then choose ‘Properties’ from the options.

- In Nvidia Properties window, choose ‘Member Of’ tab and click on the ‘Add’ button.

- In Select Groups window, click on the ‘Advanced’ button.

- Click on the ‘Find Now’ button, then select ‘Administrators’ from the list and click on the ‘OK’ button.

- In the Select Groups window, click on the ‘OK’ button.

- In the Nvidia Properties window, click on the ‘Apply’ and ‘OK’ buttons respectively.


Now restart your computer and check if the Nvidia error is fixed or not. If the error is fixed, then you can transfer data from your old profile to the new profile.
Conclusion
We have shared multiple solutions for how to fix Nvidia Error Code 0x0001 on a Windows computer. However, if the solutions given above weren’t able to solve your problem, then you should consider reinstalling your Windows OS.