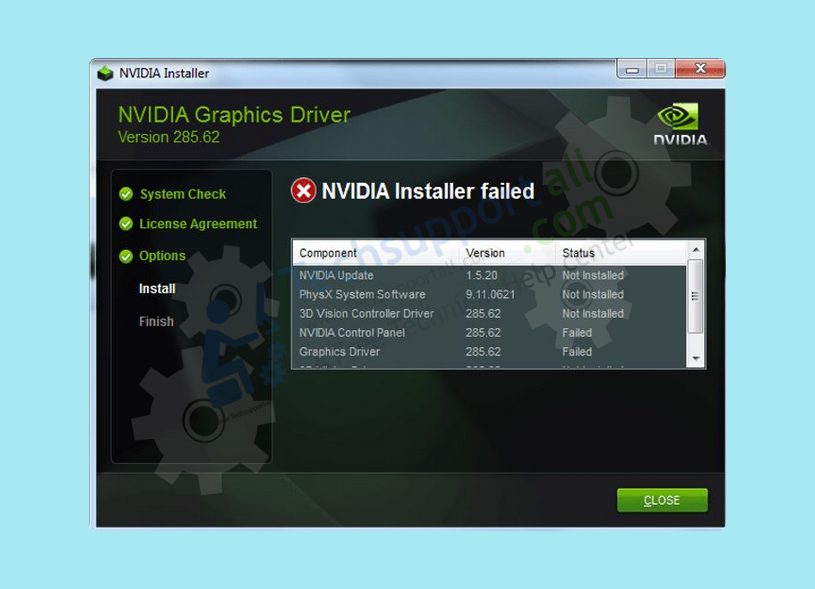
Many users are complaining that when they are trying to install their Nvidia drivers, either for the first time or while updating their existing drivers, they are experiencing the “Nvidia Installer Failed” error. Usually, this error is encountered by users who have recently upgraded their Windows OS to Windows 10. Since having the latest GPU drivers installed on your computer is important for its proper performance, this error can cause a lot of problems for the users. Therefore, in this guide, you will learn how to fix it if Nvidia Installer fails to install your graphics drivers.

What Causes Nvidia Installer Failed Error?
The exact reason behind this error can vary, but usually such an error is associated with certain issues with the old driver and/or system files.
- After Windows Install: This error is usually experienced after users install a new Windows 10 OS. That’s because they try to update their Nvidia drivers while Windows is updating its files in the background.
- Third-Party Programs: Sometimes third-party security programs installed on your computer block the installation of new driver files because they flag them as a threat.
How to Fix Nvidia Installer Failed Error?
There are multiple solutions that are being suggested below to resolve this error. You should go through them one-by-one and try to determine which one works for you. We will start with the simplest solution first.
Solution 1: Custom Install the Drivers
This solution will be especially useful for the users who have recently installed their Windows 10 and encountered the ‘Nvidia Installer failed’ error while they were trying to install their graphics driver for the first time. Performing a custom installation is really easy if you follow the installation steps given below.
- Right-click on the Nvidia Installer file and choose ‘Run as administrator’, then wait for the installer to start itself.

- Wait as the installer checks your system for compatibility.

- Accept the Nvidia software license agreement by clicking on the ‘Agree and Continue’ button.

- In the Installation options, choose ‘Custom’ option, then click on the ‘Next’ button.

- In Custom installation options, choose/select the ‘Perform a clean installation’ option, then click on the ‘Next’ button to proceed.

- Wait for the graphics driver to install on your computer.

- When you see ‘Nvidia Installer has finished, click on the “Close” button to close the installer.

That’s it, you have solved the Nvidia Installer error. However, if the custom driver installation fails and you see ‘Nvidia Installer failed’ error, then try the next solution.
Solution 2: Turn-off Security Programs
Sometimes security programs which are running on your computer obstruct the download and install of new driver files on your computer. This can cause the ‘Nvidia Installer failed’ error because the security program perceives driver files are dangerous for your system. However, you can easily solve this problem by temporarily disabling the security programs on your computer, then after updating your driver you can again enable your security programs.
- Right click the ‘Windows Taskbar’ and in the options click on the ‘Task Manager’.

- In the Task Manager, under Processes tab, locate and right click the antivirus process running on your computer, then click on the ‘End task’ option to stop that process.

- Perform the Step 2 for all the security programs running on your computer, like Firewall programs, antivirus programs, anti-malware programs, etc.
After disabling all third-party security programs running on your computer try to install the Nvidia drivers as described in Solution 1. If you are still witnessing the ‘Nvidia Installer failed’ error, then try the next solution.
Solution 3: Stop Running NVIDIA Files and Processes
Sometimes the existing Nvidia files and processes running on your computer disrupt the installation of the new driver files. You can easily resolve this problem by deleting the Nvidia files and stopping Nvidia processes on your computer before you start the installation of Nvidia drivers. Follow the steps given below.
- First you need to delete the specified files from their folders given below. Make sure to only delete the files which have been mentioned and not any other file or the folder.
- In ‘C:\Windows\System32\DriverStore\FileRepository’ delete ‘nvdsp.inf’ file
- In ‘C:\Windows\System32\DriverStore\FileRepository’ delete ‘nv_lh’ file
- In ‘C:\Windows\System32\DriverStore\FileRepository’ delete ‘nvoclock’ file
- In ‘C:\Program Files\NVIDIA Corporation\’ delete ALL files
- In ‘C:\Program Files (x86)\NVIDIA Corporation\’ delete ALL files
- In ‘C:\Program Files (x64)\NVIDIA Corporation\’ delete ALL files
After deleting all the files mentioned in Step 1 you should restart your computer, then follow the steps given below.
- Right click on the ‘Windows Taskbar’ then choose ‘Task Manager’ from the options.

- In the Task Manager, under Processes, find and right click the Nvidia process, then choose ‘End task’ to end that process. Perform these steps for all the Nvidia processes running in your Task Manager.

Now try to install Nvidia drivers by following the installation steps of Solution 1. If you still encounter the ‘Nvidia Installer failed’ error, then try the next solution.
Solution 4: Use Display Driver Uninstaller
Sometimes you need to uninstall the previously installed drivers before installing the new ones. However, uninstalling the existing drivers through Windows Add/Remove option is not the most efficient way to uninstall graphics drivers. Therefore, many users use the Display Driver Uninstaller application to completely remove their Nvidia drivers before reinstalling them. The DDU app is completely free.
- Download Display Driver Uninstall (DDU) from here, then extract its files into a folder on your desktop.
- Preferably, you should run the DDU app in Windows Safe Mode. Therefore, press ‘Win + R’ keys to open the Run dialog box, then type ‘msconfig’ and click on the ‘OK’ button.

- In the System Configuration window, choose ‘Boot’ tab, under Boot options check ‘Safe boot’ and select ‘Minimal’, then click on the “Apply” and “OK” buttons respectively.

- Click on the ‘Restart’ button to reboot your computer in Safe Mode.

- After your computer reboots in Windows Safe Mode, run the DDU application from the desktop folder and press on the ‘OK’ button to confirm its launch.

- In the Options window, select all the options under the ‘NVIDIA Specific Options’ section, then click on the ‘Close’ button.

- In the device type drop-down list, select ‘GPU’.

- In the device brand drop-down list, select ‘NVIDIA’.

- Click on the ‘Clean and restart’ button to start the driver uninstall process.

- Wait as the DDU app creates system restore point so that if you want, then you can undo this change later.

- Wait for the DDU app to complete the uninstall process.

After the driver uninstall is completed, restart your computer and try to install Nvidia drivers using the process described in Solution 1. If you are still encountering the ‘Nvidia Installer get failed’ error, then try our next solution.
Solution 5: Remove NVIDIA from Temp Folder
While installing the driver on your computer, the Nvidia Installer creates a folder in the Temp folder. Sometimes deleting this folder can solve the ‘Nvidia Installer failed’ error. However, for deleting the Nvidia folder, you must have ownership of that folder. Follow the steps given below to assign ownership of that folder, then you should delete that folder.
- Press ‘Win + R’ keys together to open Run dialog box, then type ‘%temp%’ and click on the ‘OK’ button.

- Inside the Temp folder, find and right click on the ‘Nvidia’ folder and choose ‘Properties’ from the options.

- In Nvidia Properties, choose ‘Security’ tab and click on the ‘Advanced’ button.

- In the Advanced Security Settings window, click on the ‘Change’ link in front of the ‘Owner’ files.

- In the Select User or Group window, type the username you want to give access to the Nvidia folder, then click on the ‘Check Names’ button.

- Click on the ‘OK’ button.

- In the Advanced Security Settings window, click on the ‘OK’ button.

- In Nvidia Properties window, click on the ‘OK’ button.

- Now, right click on the Nvidia folder and choose ‘Delete’ from the options.

Try to install Nvidia drivers by following the steps given in Solution 1. If you still experience the ‘Nvidia Installer failed’ error, then move to the next solution.
Solution 6: Install Driver from the Extraction Folder
When you run the Nvidia Installer it creates an extraction folder where it extracts all the driver files before it installs them on your computer. When the installation fails that extraction folder remains undeleted with all the driver files. You can use that folder to manually install Nvidia drivers by following the installation steps given below.
- Press ‘Win + R’ keys on your keyboard to open the Run dialog box, then type ‘devmgmt.msc’ and click on the ‘OK’ button.

- In the Device Manager window, click to expand Display adapters, then right click ‘Microsoft Basic Display Adapter’ option and choose ‘Update driver’ from the list.

- In the Update Driver window, choose ‘Browse my computer for drivers’ option to proceed.

- In the driver location, enter the location of the Nvidia extraction folder, then click on the ‘Next’ button. The address of the Nvidia extraction folder is displayed by the installer before starting the driver installation. By default it’s the same address as shown in the image below. Finally, follow the on-screen instructions to complete the driver installation.

If this solution solves your problem and you are able to install the Nvidia drivers, then the problem was with the Nvidia Installer application. If you are still unable to install Nvidia drivers, then try the next solution.
Solution 7: Restart Windows Update
Sometimes updating your Windows can solve the ‘Nvidia Installer failed’ error. However, Windows Update folder can get corrupted over time and new updates are unable to load properly. Therefore, you should rename the old Windows Update folders on your computer before running the Windows Update. This will ensure that the new update is clean and done properly.
- Type ‘cmd’ in the Windows search, then find and right click ‘Command Prompt’ in the search results and choose ‘Run as administrator’ from the options.

- Click on the ‘Yes’ button in the User Account Control window to proceed.

- In the command prompt window, type ‘net stop wuauserv’ and press ‘Enter’, then wait for the service to stop successfully.

- Follow step 3 for the ‘net stop cryptSvc’, ‘net stop bits’ and ‘net stop msiserver’ services one-by-one. Please wait for all these services to stop successfully.

- After stopping all the Windows Update services you should rename the Windows Update folders by typing the ‘ren C:\Windows\SoftwareDistribution SoftwareDistribution.old’ and ‘ren C:\Windows\System32\catroot2 Catroot2.old’ command respectively and pressing the ‘Enter’ key to execute them.

- Now that the Windows Update folders have been renamed it’s time to restart the Windows Update services. Type ‘net start wuauserv’ command and press ‘Enter’ key. Please wait for the service to successfully start again.

- Follow the step 6 for the ‘net start cryptSvc’, ‘net start bits’ and ‘net start msiserver’ services one-by-one. Wait for all these services to start again.

- Now that the Windows Update Services are running again it’s time to update your Windows. Click on the ‘Start’ button and choose ‘Settings’ from the menu options.

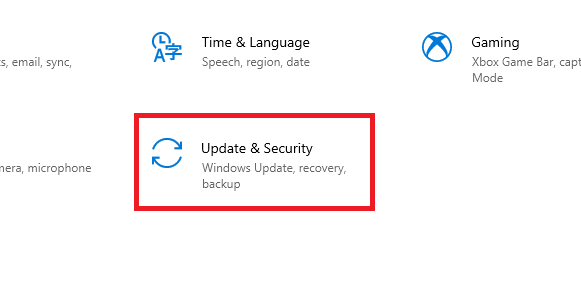
- In the Settings page, click on the ‘Update & Security’ option.

- Under Windows Update, click on the ‘Check for updates’ button.

After Windows is updated, you should restart your computer and try to install Nvidia driver by using the steps described in the Solution 1. If you are still shown the ‘Nvidia Installer failed’ error, then try the next solution given below.
Solution 8: Perform SFC Scan
While installing the Nvidia drivers your system files also play an important role. If the ‘Nvidia Installer failed’ error is due to missing or corrupted system files, then you can resolve this error by running the SFC (System File Checker) scan.
- In the Windows search box, type ‘cmd’ and right click ‘Command Prompt’ in the search results, then select ‘Run as administrator’ from the options.

- Click on the ‘Yes’ button to proceed.

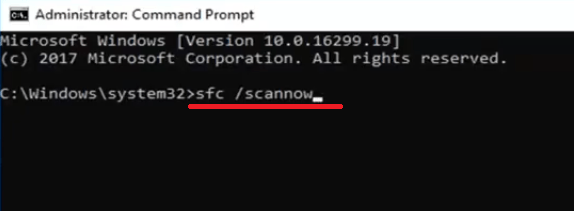
- Type ‘sfc /scannow’ and press ‘Enter’.

- Wait for the SFC scan to complete.

- Once the SFC scan is completed you should restart your computer.

After your computer reboots try to install Nvidia drivers by using the Solution 1 installation steps. If you are still experiencing the ‘Nvidia Installer failed’ error, then try the final solution given below.
Solution 9: Install Windows 10 Again
Since all the solutions mentioned above have failed to fix the ‘Nvidia Installer failed’ error on your computer. The only solution left is to reinstall Windows 10 by using its proper installation procedure.
Conclusion
There are many users who don’t know how to fix if Nvidia installer gets failed on their computer, but the solutions given above will surely help them resolve this problem.


Does the Nvidia installer need any Windows services running to work properly?
Yes, lots of basic Windows services should be in running condition while installing it like: “Windows Installer” and “Windows Event Collector” and many others. Do update your Windows and reboot your computer (not shutdown and then start, just “restart” the computer from the start menu), all the stopped services will be restarted after reboot the computer.