
Hi, This time we are going to talk about the performance of the processor in Windows 10 – How to Fix Microsoft Compatibility Telemetry High CPU Usage. And as a particular process can generate an excessive use of it. It is well known that computer performance can become a real headache for some users. In fact, if you’ve come this far, it’s because you want to improve the performance of your CPU. Very well, some users have reported the presence of a process that highly consumes CPU usage. This process is called Microsoft Compatibility Telemetry (CompatTelRunner.exe) and is in the following path: C:\Windows\System32

In addition, the file is part of the Windows Customer Experience Improvement Program. And what is its main function? Collect and transfer telemetry data from our operating system and send it to Microsoft servers. Sounds a bit intrusive, doesn’t it? In other words, it collects data related to our hardware, installed applications and our use of them. According to Microsoft, the goal is to identify problems and help solve them, analyze activity and behavior, and thus improve the user experience. However, these constitute an intrusion to the privacy of users, as well as an unnecessary consumption of resources. With this intention, let’s see how to solve the high CPU usage associated with telemetry in Windows 10.
How to Fix Microsoft Compatibility Telemetry High CPU Usage
Here we have shared some solution to fix this issue. We request you to please follow the following steps:
Method 1: Disable telemetry service using Windows 10 Task Scheduler
The first solution we’re going to try is to modify the Windows task scheduler. This is in charge of predefined tasks that have to be executed in a certain period of time. What we will do is locate the telemetry within it. The first solution we’re going to try is to modify the Windows task scheduler. This is in charge of predefining tasks that have to be executed in a certain period of time. What we will do is locate the telemetry within it. With this in mind, please press the combination Win+R, and in the box runs the following command:
taskschd.msc
Press enter and follow the next route: Task Scheduler Library>Microsoft>Windows>Application Experience. Then select the Microsoft Compatibility Appraiser task, and in the menu on the right select the Disable option to disable the task.

Method 2: Disable telemetry using Local Group Policy in Windows 10
Please note that in order to edit Local Group Policies you must have the Pro and Enterprise version of Windows 10. With this intention, please press the Win +R combination and execute the following command:
gpedit.msc

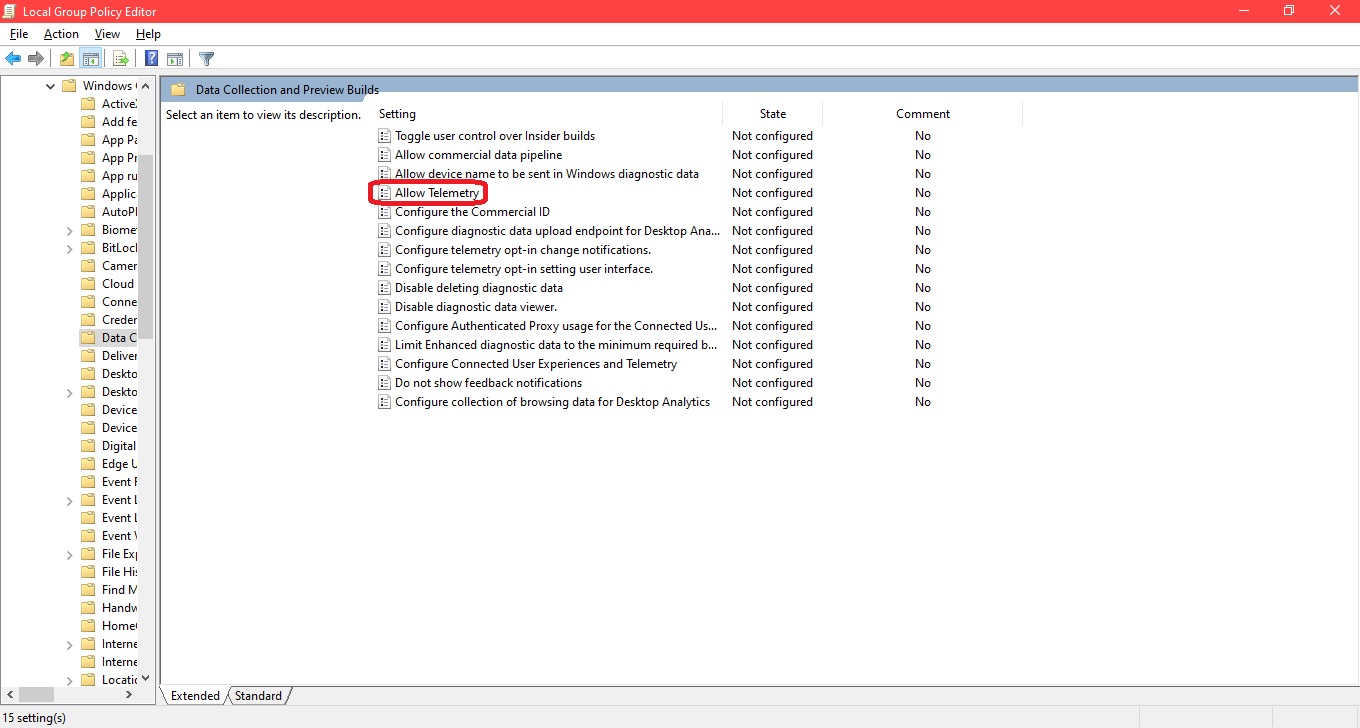
In the next window, please select the following route: Computer Configuration → Administrative Templates → Windows Components → Data Collection and Preview Builds. Once there, select the Allow Telemetry policy.
Method 3: Disable telemetry using the Registry Editor in Windows 10
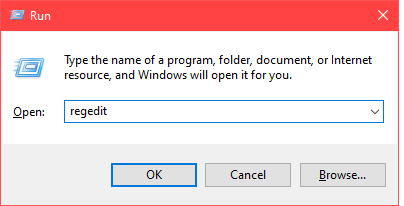
Another option we can use to disable telemetry is through the registry editor. Once again, press the Win + R combination and run the next command.
regedit
Straightaway, the Registry Editor will open. Please locate the following path:
HKEY_LOCAL_MACHINE/ SOFTWARE/ Policies/ Microsoft/ Windows/ DataCollection
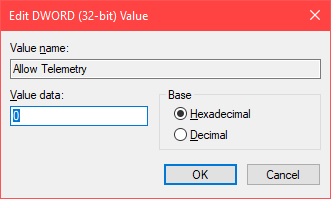
Once there locate the Allow Telemetry value, if it doesn’t exist then right-click on any blank space and select New DWORD (32-bit) Value.

Create the new value, right-click the mouse to rename it, assign the name Allow Telemetry and in the Value Data field enter the number 0 as value
Conclusion
Finally, we have learned to disable telemetry in Windows 10. This will allow us a substantial improvement in CPU performance as well as keeping our privacy safe. All right, that’s it for now. I hope you enjoyed this tutorial. See you next time.