Today on this page, we are going to talk about the laptop battery not charging problem. The problem is when we plug the charger to the laptop, it doesn’t charge the battery. It shows the error at the right-bottom corner “Plugged in, not charging”.
It would be a really very frustrating and embarrassing situation when you couldn’t find the solution of the problem like this. To fix this specific issue, you don’t need to apply any huge solution for this. It will be done with a simple trick. We are going to share a tested method to resolve this issue.
We have found its proper solution to fix this specific problem. Please follow the following step-by-step guide to know how to fix it.
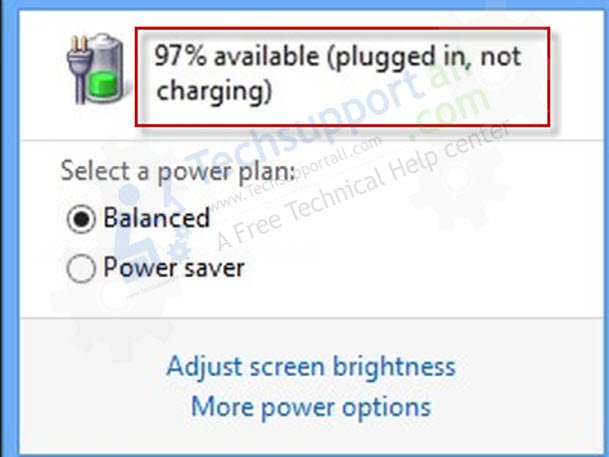
Error Message: “Plugged in, not charging”
How to Fix “plugged in, not charging” Error
The following methods are for Windows 7, 8, 8.1, 10, and Servers operating systems.
Methods
- Boot your laptop without the battery and then Reinstall Battery Drivers.
- Run the Battery’s Troubleshooter.
- Restore the computer’s BIOS to its default settings.
- Check your laptop’s power adapter is connected properly.
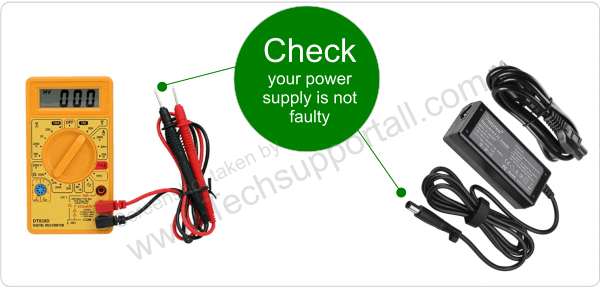
- Check the power adapter is not faulty.
- Check the Battery Report to diagnose it.
Method 1: by reinstalling battery driver
- Take out the laptop battery from the laptop.
- Then connect the laptop charger to the laptop’s charging port.
- Now, turn on your laptop by pressing the power button. The laptop should be booting up because it gets the power from the charger directly, without a battery.
- Go to the control panel when your laptop is up.
- Go to Device Manager.
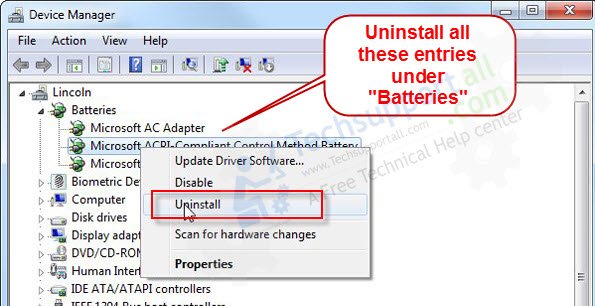
- In the device manager, double-click on the “batteries”. When you double-click on that, you’ll get two options (you might get more than two). You need to uninstall all of them under batteries one by one right-clicking on that.

- After that, shut down the laptop.
- Put the battery in the laptop again.
- Now, start your laptop.
Your problem should be fixed. It will not show you any error message regarding your battery. It will start charging your laptop battery again, and your battery percentage will grow up.
If you found this article helpful, please let me know by leaving a comment. If you have any doubt or not solved your issue then leave a comment, we’ll answer your comments there.
Additional methods to fix plugged in, not charging issue.
Try the following techniques if the above first method did not work for you. In the 90% cases, method #1 works.
Method 2: By using Windows Power Troubleshooter
- Click on the start button and click on settings.
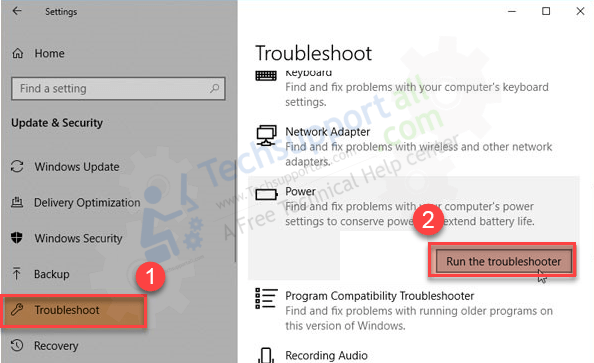
- Click on Update and Security.
- Click on Troubleshooting from the left-side pane.
- Select the power option from the right-side pane. Then click on “Run troubleshooter”. It will be starting for troubleshooting your battery power problem and fix it automatically.
Sometimes this method will work for you. If it doesn’t work, then try the next method.

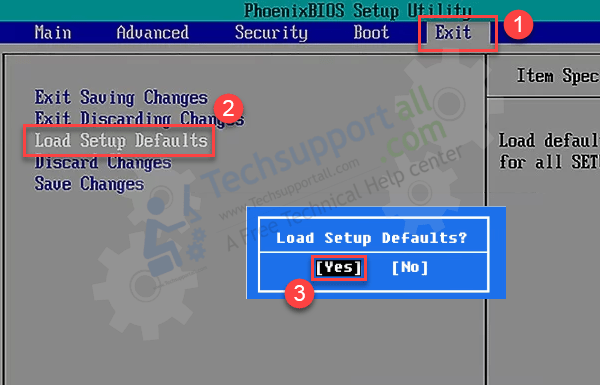
Method 3: Restore BIOS settings to default
- Turn off your computer and boot it up into bios. Make sure your laptop is turned off completely.
- After turned off, press the power button of your laptop and the continuously press the F10, Delete key from your keyboard to enter BIOS settings. Your bios open key might be different according to your computer laptop’s manufacturer.
- After getting the bios settings page, press the “F9” key to set default from your keyboard. I will be asking you to save the settings. After that select “Yes” using arrow keys and press enter key to save settings and reboot the computer with default bios settings. After this, your problem should be fixed. If it did not work, then go to the next step. Click here to get more help with it.

Method 4: Connect charger properly
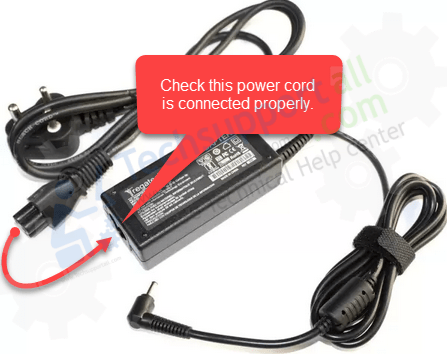
Here I’ll show you how to check your laptop’s power adapter is not loose. Here are three different points to check on your laptop’s power adapter to ensure that it is not loose and connected properly.
- Check the power cable that connects to the laptop’s adapter for damage. Remove the input power cable from the adapter and check the plugin socket on the adapter. The input power cable should fix firmly into the socket on the adapter.

- Check the output power cable that starts out from the other end of the adapter. This cable is fixed to the adapter and cannot be removed. Check the output cable for signs of damage at the point where it is fixed to the adapter. The output cable should be firmly attached to the adapter and should not wiggle at that point.
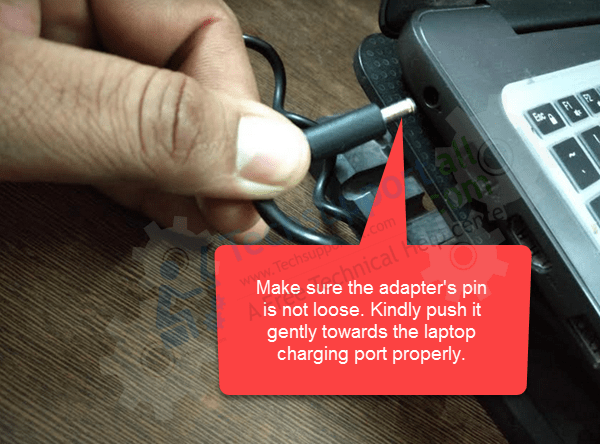
- Check the power supply point on the power cable that runs from the adapter to the laptop. This power adapter pin should fit perfectly into the laptop charging port.

Method 5: Check the Power Adapter
Try to use another laptop’s charger. If it works for you then the problem is in your charger, please replace it. If it doesn’t fix the problem after replacing the charger, then replace your battery.
Method 6: Check Battery Status
Hey there. In the following text, I will explain to you, how to check your laptop’s battery, to see if it is dead/faulty or not!
Your battery, no matter how well you will treat it, will eventually die. This can come suddenly, but some indications can warn you about your battery performance and condition in advance.
Normally, Windows will automatically warn you if your battery reaches a low capacity level. On your standard battery icon, will appear a red X-mark indicating, that your battery is already at a critical point.
While this procedure is a passive one, there are other ways to check your laptop’s battery active. The first one is the easiest one, you just install a tool, which informs you automatically on your laptop’s battery status.
The second way to check if your laptop’s battery is faulty (dead) or not is divided into some steps, listed below:
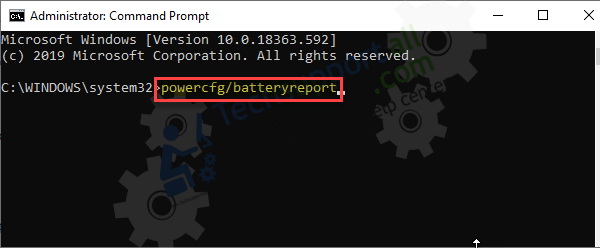
- Press Windows key + X both together or right-click on the Start Menu and then click on Command Prompt (Admin) option.
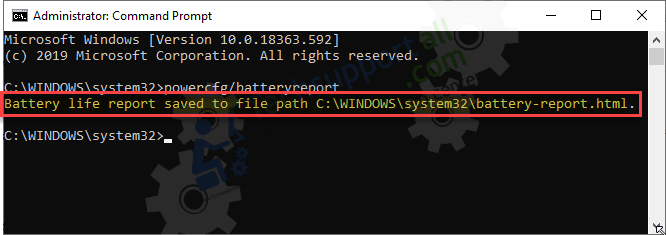
- Type: “powercfg/batteryreport” in the command prompt window and press enter button from your keyboard.

- Once you press enter button, the command will execute and the battery life report will be saved to the following path: “C:\Windows\System32\battert-report.html”

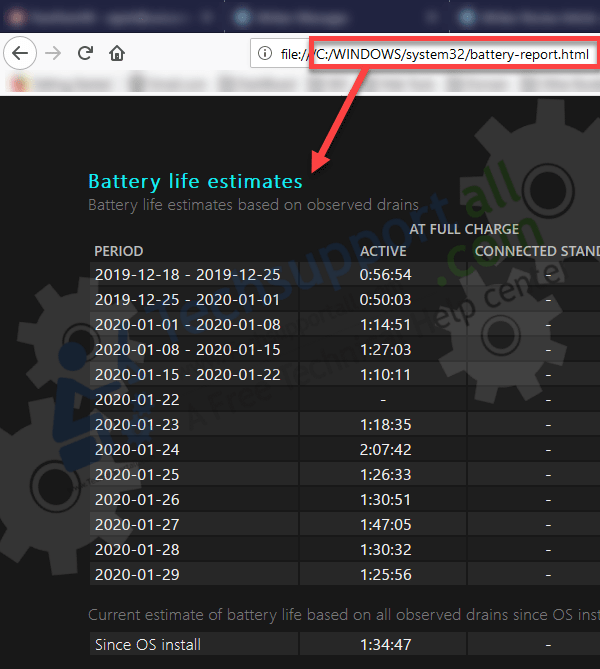
- Go the saved path: “C:\Windows\System32\battert-report.html” and open up the report.
The second section will show you all the information about the battery (like if it should be checked or replaced).

In this article, we have seen all the possible methods to fix the “Plugged in, not charging” issue. Hopefully, you liked it. Please share your experience with us in the comments section below.
when in plugged in the charge my laptop but not charging my laptop this problem had occurred much time, then I pilled in the charger notification comes out that plugged in but battery no charging, so then I just followed their steps then I resolved this kind of problem.