Hello! This is a very common error. As the name indicates, it is related to the file D3DX9_41.dll. Also, this error usually appears when you run a program that uses this file. For example: Borderlands, Crusader Kings 2, Need for Speed Shift, etc. Fortunately, this problem can be solved. All you have to do is follow the steps below.
How to Fix the error when this file is missing in the system
Sometimes DLL file errors are related to problems in Visual Studio C++. It is well known that this is a set of libraries necessary for the operation of certain Windows components. Therefore, the first solution is to download the necessary libraries. However, it is first necessary to determine the architecture of the equipment.
- Go to the following settings:
Windows Settings → System → About
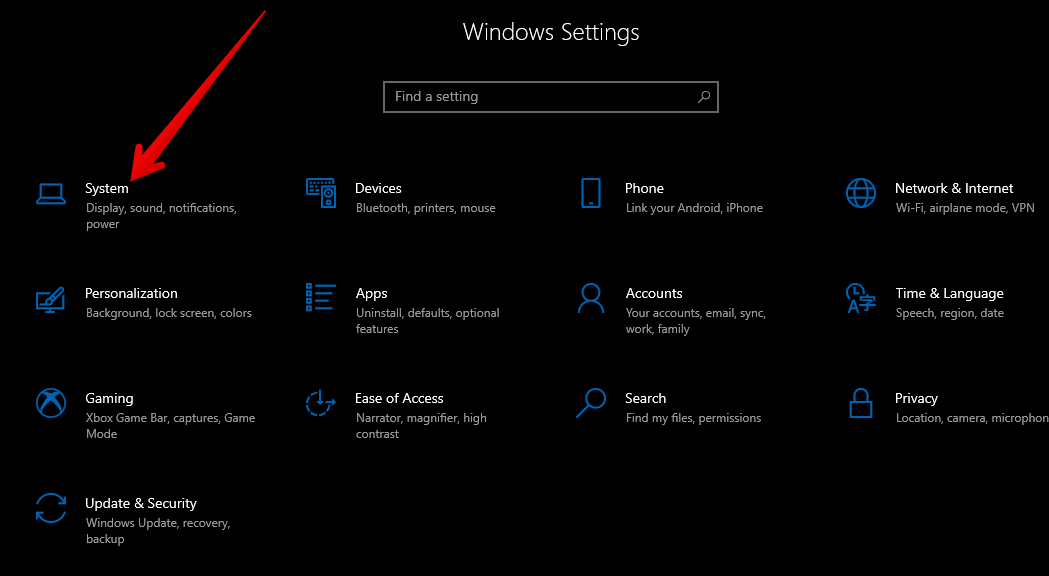

- Once you know the computer architecture, go to this link. Once you’re there, select the appropriate version for your computer and click on the download button to download the file.

- After downloading, double-click on the downloaded file to install it on your computer. Follow the installation wizard prompts. The installation process is the same as any Windows program. After installation, restart the computer. Then test to see if the error is fixed.
Fixing bugs using DirectX
Other times this error is related to the failure of the DirectX API, which is a set of multimedia technologies required to run programs, applications and games on Windows. Well, the solution is to download the DirectX-User Runtime Web Installer.
- With this intention, go to this link. Please download the file. Then, accept the license and install it normally. Please restart the computer and verify that everything is in order.

Reinstall DirectX
If the above solution does not work, then it would be better to reinstall DirectX.
- With this in mind, go to this link to download the latest installer.

- If the problem originated from playing a game, then you can use its own configuration file. That is, most games include the necessary DirectX installation file. Therefore, you can find it in the installation directory. Just enter it in the directory: redist/directx. Then run the installation file. This should solve the problem.
Check for graphics driver updates
Lack of proper drivers in the display adapter will cause errors. Now, DirectX works with the GPU. Therefore, if the GPU drivers do not match DirectX, then there will probably be errors. Also, the generic Windows drivers are sufficient for most peripherals. But as for GPU, it is recommended to use the official drivers. Therefore, it is necessary to do an update of the graphics drivers. To learn how to do it, check our complete tutorial.
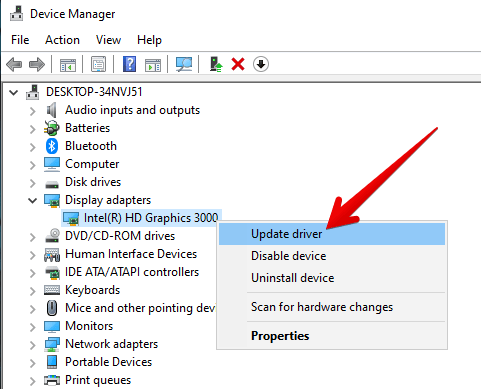
Download and install the problem file directly
If none of the above does not work, then the best thing to do is to install the file directly. For this, it is necessary to know the architecture of the computer. Please refer to the steps above. Below are the links to the files in their respective versions:
- D3DX9_43.dll for 32-bit systems.
- D3DX9_43.dll for 64-bit systems.
Next, you need to unzip and paste the file into the directory of the problem program. With this in mind, right-click on the shortcut of the game or program. Then, select Open file location.

Next, paste the file d3dx9_43.dll into the directory of the problem program. Please repeat the process for all programs that cause the error.
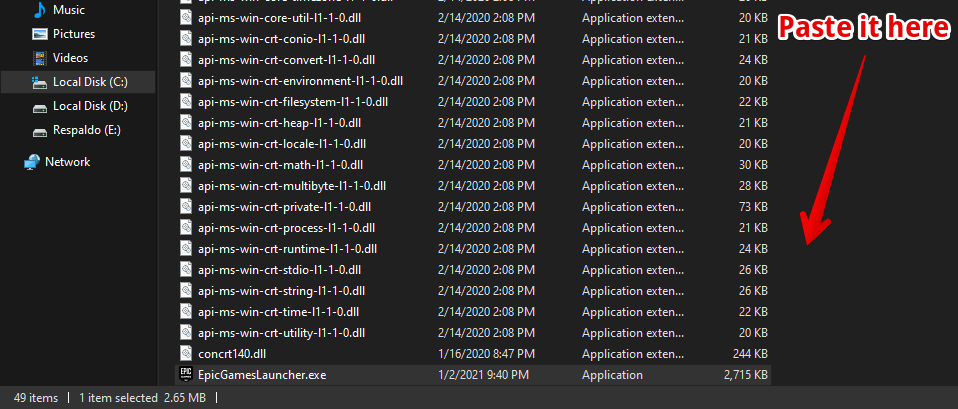
As an additional measure, you can paste the file in the following path:
C:\Windows\System32\
This action will prevent these errors from originating in other programs.
Check & Repair the system files
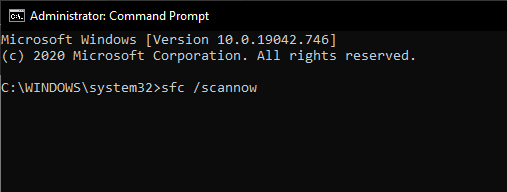
If the error persists, we can resort to the Command Prompt to repair the files related to the Windows libraries. To do this, it is necessary to launch a CMD with administrator privileges.
- With this in mind, press Win+Q and type CMD. Then select the option shown in the image.
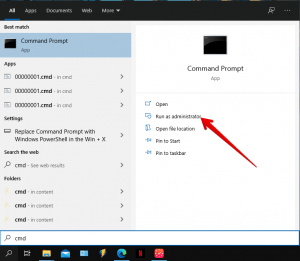
- Then run the following command:
sfc /scannow
- Pressing enter will start the diagnostic tool. It adds missing libraries and repairs files with errors. After finishing the process, it is necessary to restart the computer.
Very well, in this way we have seen several ways to repair the lack of this file. See you soon!