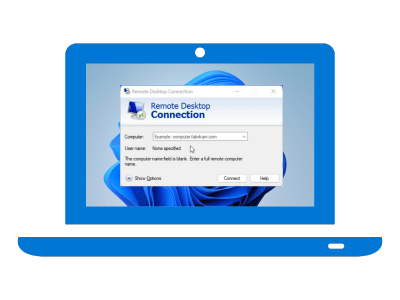
Remote Desktop is a useful tool for users who need to access their Windows 11 computer from another device. Whether you’re working remotely, accessing files from another location, or simply need to control your desktop from another computer or from a different location than your local network.
Enabling Remote Desktop on Windows 11 can be a helpful solution. Although “Remote Desktop” is not easy to use, but enabling and configuring the Remote desktop is very simple. In this guide, I will describe multiple ways of how to enable Remote Desktop on Windows 11 computer.

How to Enable Remote Desktop on Windows 11?
There are multiple ways to enable Remote Desktop on your Windows 11 computer. I have discussed each one of them in this section. You can read all of them one-by-one, then decide which one is the best method for you. All the methods mentioned below are equally effective in enabling the Remote Desktop feature on Windows 11.
Method 1: Enable Remote Desktop on Windows 11 via Windows Settings
The simplest way to enable Remote Desktop on Windows 11 is through Windows settings. Follow the steps given below in their correct order to complete this task without any errors:
- Click on the ‘Start’ icon on the Windows taskbar and select ‘Settings’ from the start menu.

- In the Settings page, choose the ‘System’ option in the left pane, then scroll down to select the ‘Remote Desktop’ option.

- In the Remote Desktop, click to toggle the ‘Off’ option.

- Click on the ‘Confirm’ button to enable the remote desktop feature.

- When this feature is enabled, you will see ‘On’ in front of the Remote Desktop option.

That’s it, the Remote Desktop feature has been successfully enabled on your Windows 11 and your computer is now ready to be remotely connected with other devices. However, it’s better to configure the Remote Desktop feature before using it. Most importantly, you should use the ‘Network Level Authentication’ option so that the remote connection is more secure. When configuring the remote connection option through a router, you may be asked for current Remote Desktop port on the settings page, most of the time this port number is 3389.
Method 2: Enable Remote Desktop on Windows 11 via Control Panel
You can also enable the Remote Desktop feature on Windows 11 through the control panel. In this method, you get a few additional options which you can select. Read the steps given below carefully before starting this process:
- Click on the ‘Start’ button, in the Windows search box, type ‘control’, then click on the ‘Control Panel’ in the search results.

- In the Control Panel window, click on the ‘System and Security’ option.

- Under the System section, click on the ‘Allow remote access’ link.

- In the System Properties, select the ‘Remote’ tab, then under Remote Desktop section, click on the ‘Allow remote connections to the computer’ option and make sure that the ‘Allow connections only from computers running Remote Desktop with Network Level Authentication’ option is enabled. Finally, click on the ‘Apply’, then ‘OK’ button to finalize these changes.

Once you have completed the above-mentioned steps, then your Windows 11 computer is ready to be remotely connected with other devices. As you have read, in this method you get the option to enable or disable the Network Level Authentication, make sure that it’s enabled as it will make the remote connections more secure.
Method 3: Enable Remote Desktop on Windows 11 via Command Prompt
You can use the Command Prompt on Windows 11 to enable its Remote Desktop feature. Use the steps given below exactly in the order they have been mentioned:
- Click on the ‘Start’ button, in the search box type ‘terminal’, then in the search results locate and right click on the ‘Windows Terminal Preview’ or the ‘Command Prompt’ option, both are same. Finally, choose the ‘Run as administrator’ option from the menu.

- In the User Account Control box, click on the ‘Yes’ button to open the Windows Terminal Preview.

- In the Command Prompt window, type or copy-paste the following command ‘reg add “HKEY_LOCAL_MACHINE\SYSTEM\CurrentControlSet\Control\Terminal Server” /v fDenyTSConnections /t REG_DWORD /d 0 /f’, then press the ‘Enter’ key on your keyboard to enable the Remote Desktop protocol.

- In the Command Prompt window, type or copy-paste the following command ‘netsh advfirewall firewall set rule group=”remote desktop” new enable=Yes’, then press the ‘Enter’ key on your keyboard to enable the Remote Desktop through Windows Firewall.

If you have followed the steps mentioned above correctly, then Remote Desktop feature has been enabled on your Windows 11 and the Windows Firewall has been configured to allow remote access to your computer.
Method 4: Enable Remote Desktop on Windows 11 via PowerShell
You can also use Windows PowerShell to enable Remote Desktop on Windows 11. Follow the steps given below in their correct order to complete this task without any problems:
- Click on the ‘Start’ button in the taskbar, in the search box type ‘terminal’, then right click on the ‘Windows Terminal Preview’ option in the search results and select the ‘Run as administrator’ option from the menu.

- In the User Account Control dialog box, click on the ‘Yes’ button to proceed.

- In the Command Prompt window, click on the ‘Down’ arrow next to the plus sign, then choose ‘PowerShell 7’ option from the drop-down list to open the PowerShell window.

- In the PowerShell window, type or copy-paste the following command ‘Set-ItemProperty -Path ‘HKLM:\System\CurrentControlSet\Control\Terminal Server’ -name “fDenyTSConnections” -value 0’, then press the ‘Enter’ key on the keyboard to enable the Remote Desktop protocol on your Windows 11.

- In the PowerShell window, type or copy-paste the following command ‘Enable-NetFirewallRule -DisplayGroup “Remote Desktop”’, then press the ‘Enter’ key to enable the Remote Desktop through the Windows 11 Firewall.

After completing all the steps mentioned above, your Windows 11 computer is now ready to be remotely connected to other devices. You will be able to use this feature on your computer even when the Windows Firewall is active.
Why is Remote Desktop disabled by default?
Remote desktop software is disabled by default for security reasons when a fresh Windows get installed. Enabling Remote Desktop on Windows 11 can offer several benefits to users. Here are some of the top benefits:
- Remote Access: The most significant benefit of enabling Remote Desktop on Windows 11 is that you can access the files and programs on your computer from any other device with an internet connection.
- Increased Productivity: Remote Desktop can also increase your productivity, allowing you to work on your computer from anywhere at any time.
- Collaborative Work: Remote Desktop is a useful tool for collaborative work, allowing multiple users to access the same computer simultaneously.
- Troubleshooting: Enabling Remote Desktop can make it easier to troubleshoot problems on your computer as you can grant someone remote access to your computer to help you resolve the issue.
- Secure Access: Remote Desktop on Windows 11 offers secure access to your computer. With Network Level Authentication, users are required to provide their credentials before establishing a remote connection.
- Remote Printing: Remote Desktop also supports remote printing, allowing you to print documents from your remote computer to a local printer.
Therefore, enabling Remote Desktop on Windows 11 offers a range of benefits. With its user-friendly interface and powerful features, Remote Desktop can be an essential tool both for individuals and businesses.
Now you know how to enable Remote Desktop on Windows 11. Enabling this feature on Windows 11 is a simple process that can be completed in a few easy steps. Once enabled, you can configure the settings to suit your needs and set up Remote Desktop access on other devices. Remote Desktop is a useful feature that can be used to access your desktop or laptop remotely, which can be helpful when you need to work from home or need to access your computer while on the go.


