As we know, we live in a globalized world, permanently connected by the internet. In effect, Windows’ users sometime may own or use several PCs or devices with Windows 10 installed. Windows 10 has introduced a Sync settings. Using the sync settings users get the same settings of their device when they log in to another device. Like the settings of the work PC can be synced with the Laptop or with the home computer.
What is ‘Windows Sync’ ?
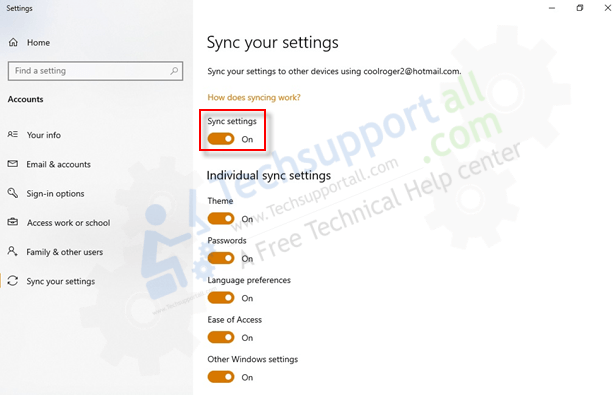
“Windows Sync” Just as its name indicates, this property allows synchronizing between as much as PCs with Windows 10 owns a user. The only requirement is logging with the same account and password in every PC. To work the sync settings you also require to login with Microsoft account and not with the local account. Users can sync theme, passwords, language preferences, ease of access and other windows settings.
How to enable sync settings in Windows 10
To enable the sync settings, follow the below steps.
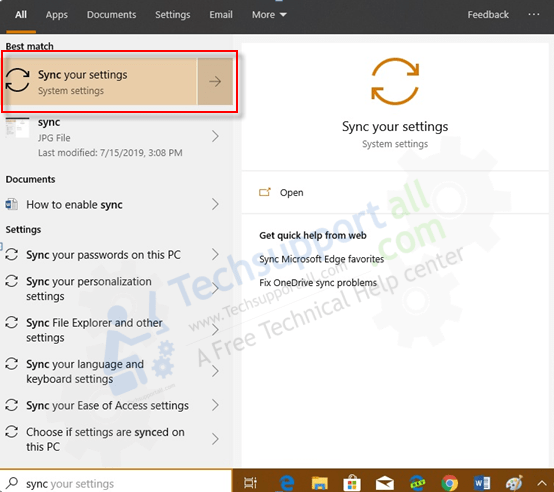
- We are going to type Sync on the search bar and click on sync your settings.
- Turn ON the Sync settings toggle switch. This option is enabled only if you use Microsoft account to login into the computer. If you are using local account, then you can’t enable the Sync service at all. After turning ON the Sync setting, a window will be open with all the options to synchronize. Here user can choose which items should be synced.
- General synchronization.
- Themes.
- Passwords.
- Language preferences.
- Ease of access.
- Other windows settings (like printers or mouse options).

- All we need is to select what component we would like to synchronize or not.
- On the contrary, there are users who want to keep individuals configuration in the various PCs that they have, or just simply do not desire to synchronize at all. It is important to realize, that these settings remain in cloud services too.
How to disable sync settings in Windows 10.
So, now let it see how to disable synchronization and delete settings synced to Microsoft Account.
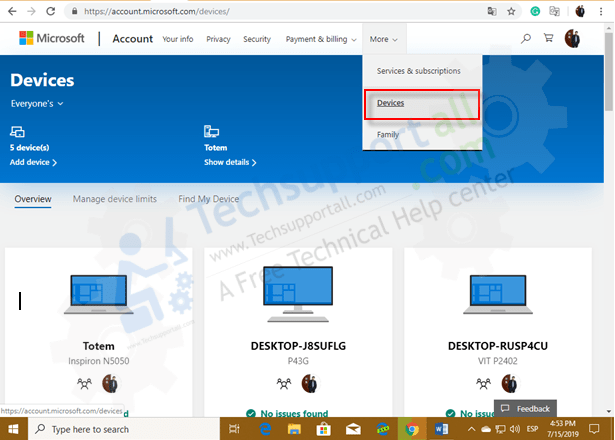
- To do that, we need to repeat former process: go to sync your settings and turn off the Sync settings toggle switch. Please remember, we have to do this proceeds in every PC when we turned on sync settings. In like manner, to stop synchronizing settings and remove them from the cloud, we have to go https://account.microsoft.com, and select devices.
- Then, navigate to the bottom of the site and select clear synced settings.
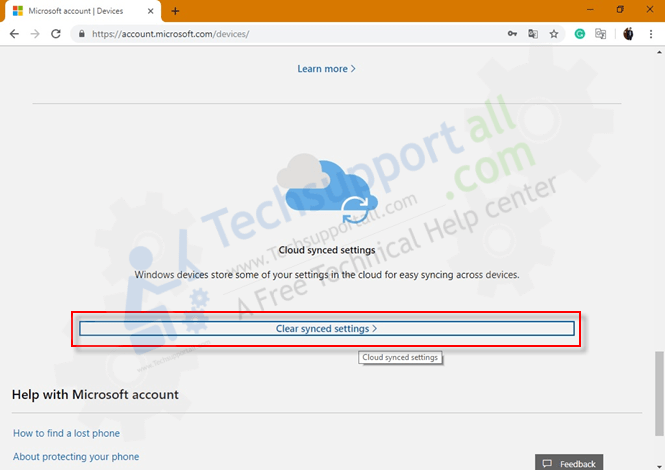
- A warning message will appear, we have to select on clear. We will be redirected to another site, when we need to select Remove.
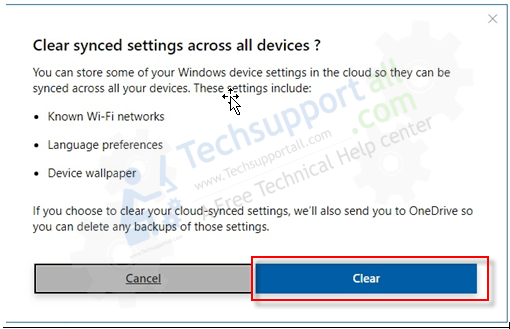
- In the next window, select yes. And this is it! We just erased all sync information.

Share you experience using the below comment box about this feature of Windows 10.

Hi,
Is there exist a GPO, CSP or Registrykey for disabling Windows Sync button ?