It’s well known that Windows is the most popular operating system in the world. Consequently, it has a wider number of users. Some people only make basic use of the computer, but others take full advantage of the hardware’s capabilities. One of those capabilities is the opportunity to use the computer as a multimedia centre. Well, some apps improve their performance if they allow the use of a microphone, such as Skype, Facebook, among others. Under those circumstances, most laptops have a built-in microphone. Similarly, it is possible to install this device on desktop computers. However, sometimes this peripheral does not work properly. And it is not because of a hardware problem. In this post, we will see how to solve microphone problems in Windows 10.
How to Fix Microphone Is Not Working In Windows 10
We have given the 5 most possible methods to fix mic issue in Windows 10. Please opt one by one and check which one works for you.
- Check that the microphone is enabled.
- Enable the microphone in the operating system.
- Enable the microphone for individual applications.
- Update the microphone driver.
- Run the troubleshooter.
Method 1: Check that the microphone is enabled.
Most of these problems are not hardware malfunctions, but configuration issues.
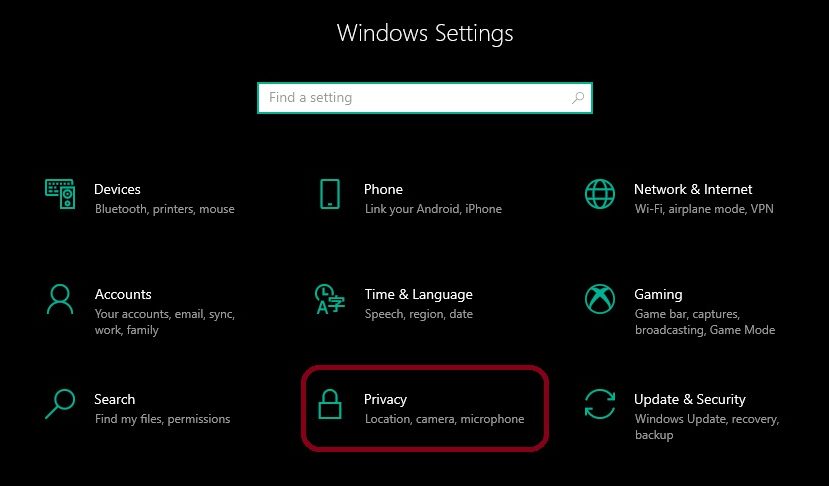
Step 1: In the first place, press the Win + I combination to enter the Windows settings. Once there, go to Privacy.
Method 2: Enable the microphone in the operating system.
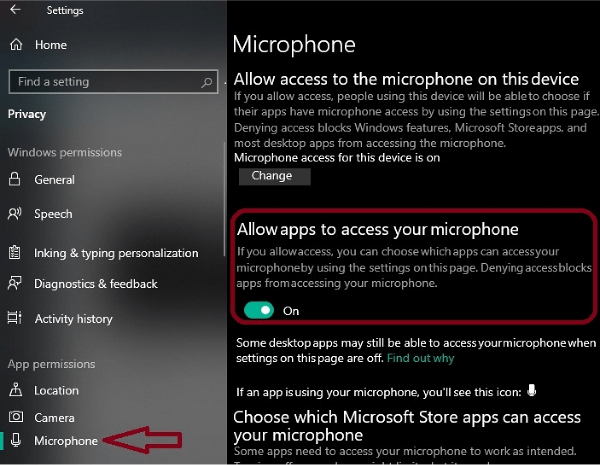
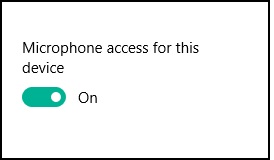
From this configuration screen, it is possible to enable the microphone in the operating system. Please verify that this value is correctly activated. If not, click on the Change button in the same screen of method1.
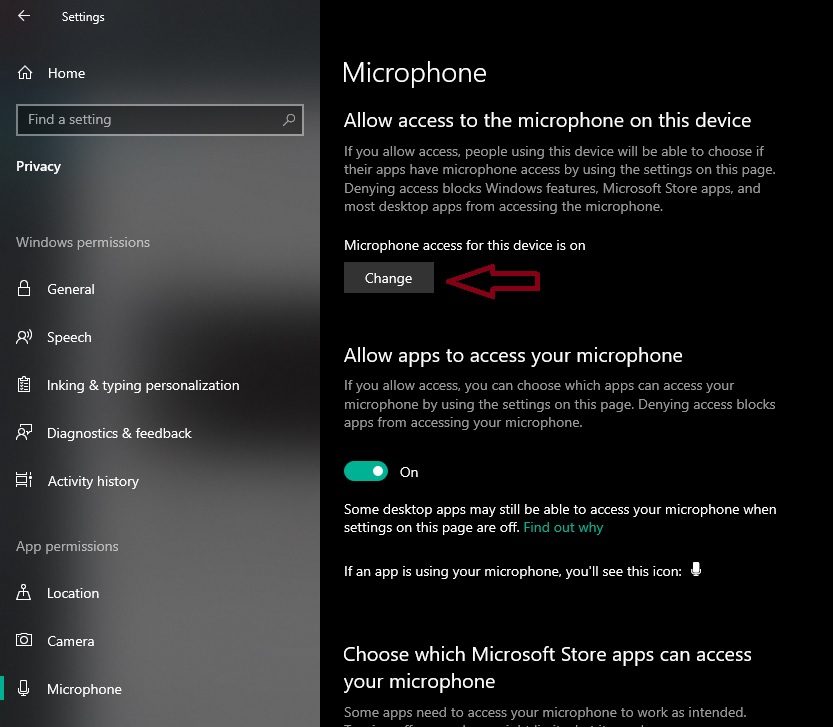
A pop-up window will immediately appear. Please activate (turn it ON) the microphone.
Method 3: Enable the microphone for individual applications.
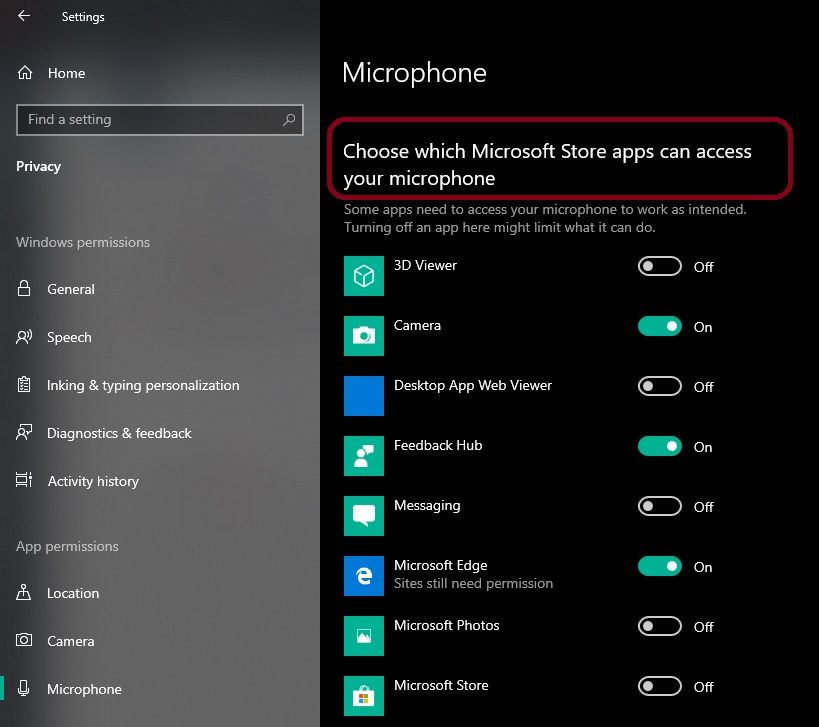
In this menu, you can also control which application can access the microphone. In that case, select which app can use the peripheral. The procedure is as simple as enabling or disabling.
Method 4: Update the microphone driver.
It is also possible that the problem with the microphone is due to an out-of-date driver. Consequently, the driver needs to be updated.
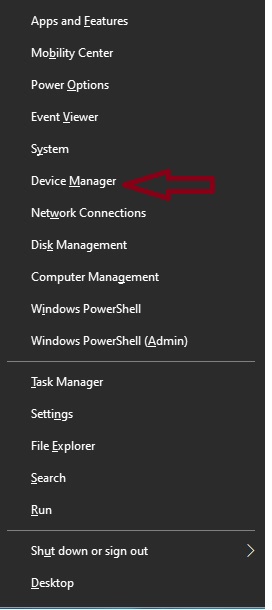
Step 1: With this in mind, please press the Win + X combination and enter the Device Manager.
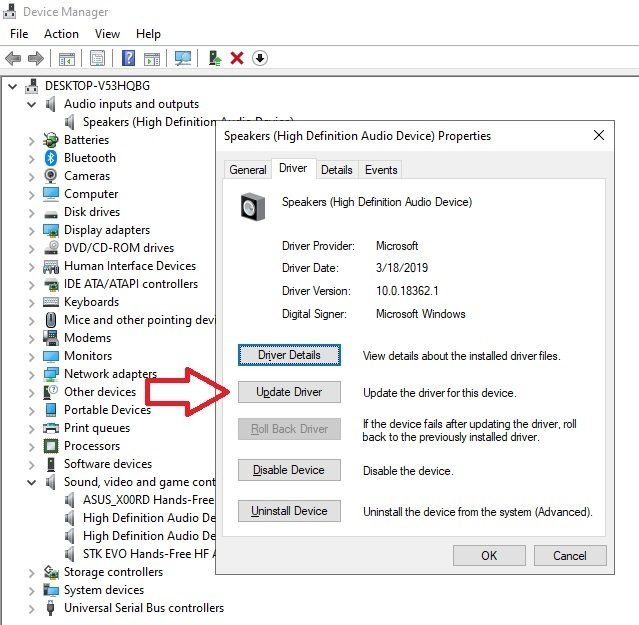
Step 2: Once the device manager is displayed, please right-click on the Microphone from the “Audio input and outputs” and click on update driver. Press OK and wait for the wizard to do the job. Here’s the guide on how to update drivers through Windows update.
Method 5: Run the troubleshooter.
If all these solutions don’t work, then you can run the troubleshooter that Windows comes with.
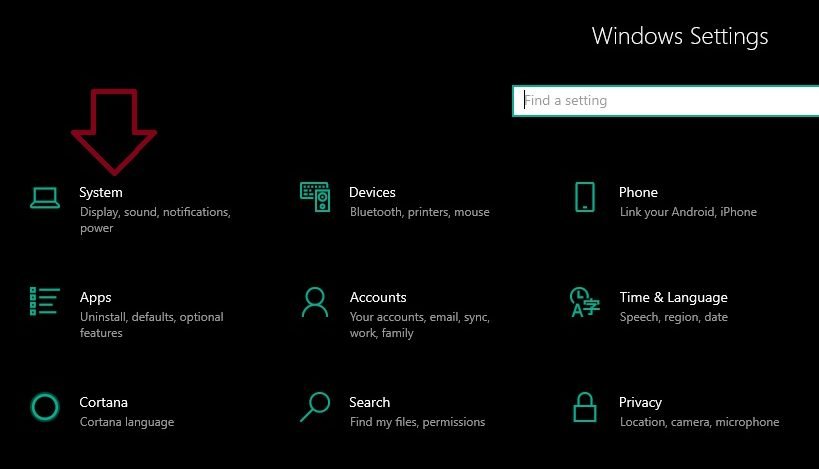
Step 1: With this in mind, please press the Win + I in combination to enter the Windows settings. Once there, log in. Once there, select System.
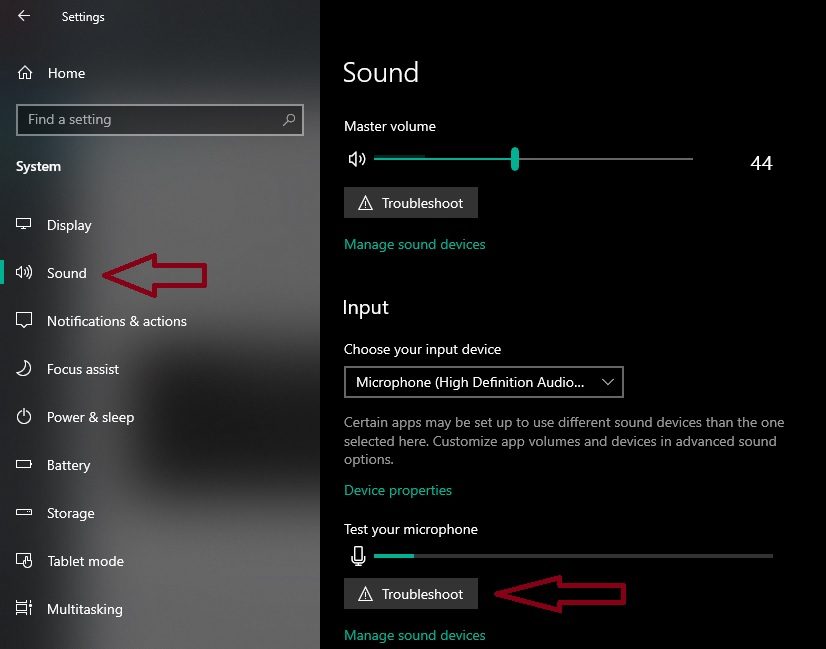
Step 2: Then go to the Sounds menu in the left column. Then scroll down until you reach Input. Now click on Troubleshoot and let him do his job.
Finally, we have seen how to solve the problem of the microphone in Windows 10. All right, that’s it for now. I hope you enjoyed this post. Greetings!