Windows 10 usually demonstrates stability. However, it can occasionally exhibit crashes. In fact, these crashes can compromise the performance of the system. On the other hand, the system itself provides tools to repair it. Today we will talk about one of those options. Specifically, the SFC command.

What is the SFC command and how it works?
System File Checker (SFC) is a native Windows system command since Windows 98 versions. This tool allows you to examine all system files in detail. As a result, it can detect changes or any type of error. However, its function goes beyond error detection. Indeed, it may be able to repair them. These errors can compromise system files, registry keys and folders, and files critical to system operation. Its operation is based on the Windows Resource Protection (WRP) functionality.
By means of this technology, a data cache is created with the original state of critical system files. SFC is able to detect changes in critical Windows files. And consequently, extract a copy of this cache to restore system order. Windows 10 stores this backup in C:\Windows\WinSxS. This protection system will prevent external applications from modifying the stored files. Logically, since they are dll files as registry keys necessary for the system. SFC also checks and refills the cache folder.
How to use the SFC command to repair damaged system files.
The first thing you need to know is that SFC is managed through the command line. Therefore, it is necessary to use the command prompt or PowerShell. In any case, you have to run it with administrator privileges. This time, we will use PowerShell with administrator privileges. With this in mind, press the Win+X combination:

To test the operation of the tool, we will use the following command:
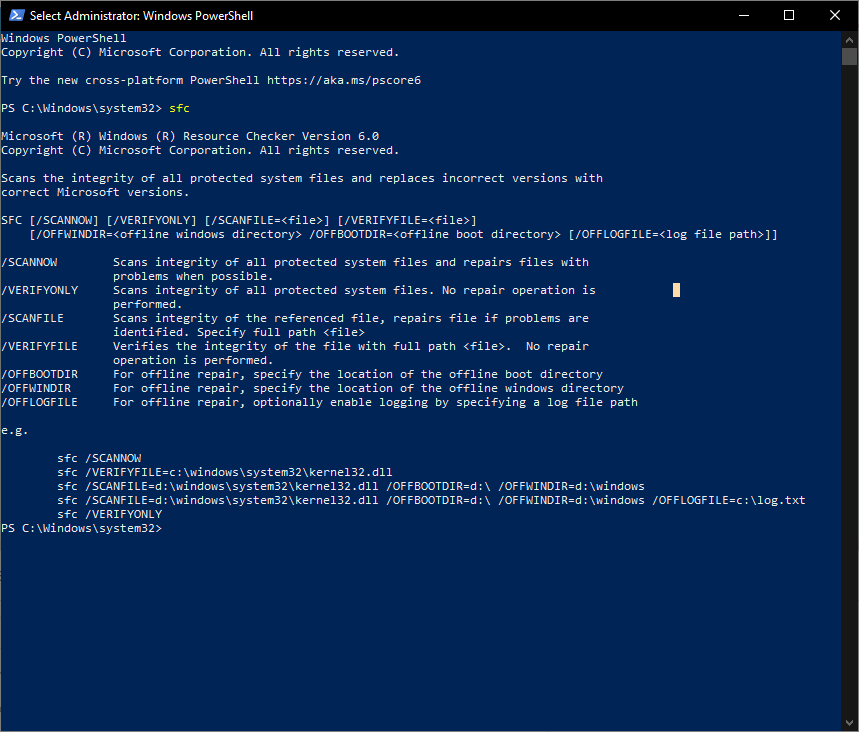
sfc

The image shows the available command parameters. Below, we will detail them:
- /SCANNOW: Examines the integrity of all protected files on the system. In addition, it repairs problem files whenever possible. These are the files that are located in C:\Windows\WinSxS
- /VERIFYONLY: Examines the integrity of all protected files on the system, but does not perform any repairs. This is a faster option than the previous one. It only shows possible damaged files.
- /SCANFILES: Examines the integrity of the referenced file and repairs it if problems are detected. Consequently, it is necessary to specify the path to the file. The command syntax is as follows: /SCANFILE=<path file>
- /VERIFYFILE: checks the integrity of the file, but does not take any repair action. Its syntax is SFC /VERIFYFILE=<file path>.
- /OFFBOOTDIR: This option is for repairing Windows boot offline. Which means that it means that we will access a hard disk that is not running. Consequently, this option is available for Windows installation media. The syntax is: SFC /OFFBOOTDIR=<full file path>.
- /OFFWINDIR: Function the same as the previous parameter, but for a specific directory on the hard disk.
- /OFFLOGFILE: repair of a log file under the same conditions as in the previous case.
Using the SFC/ SCANNOW command
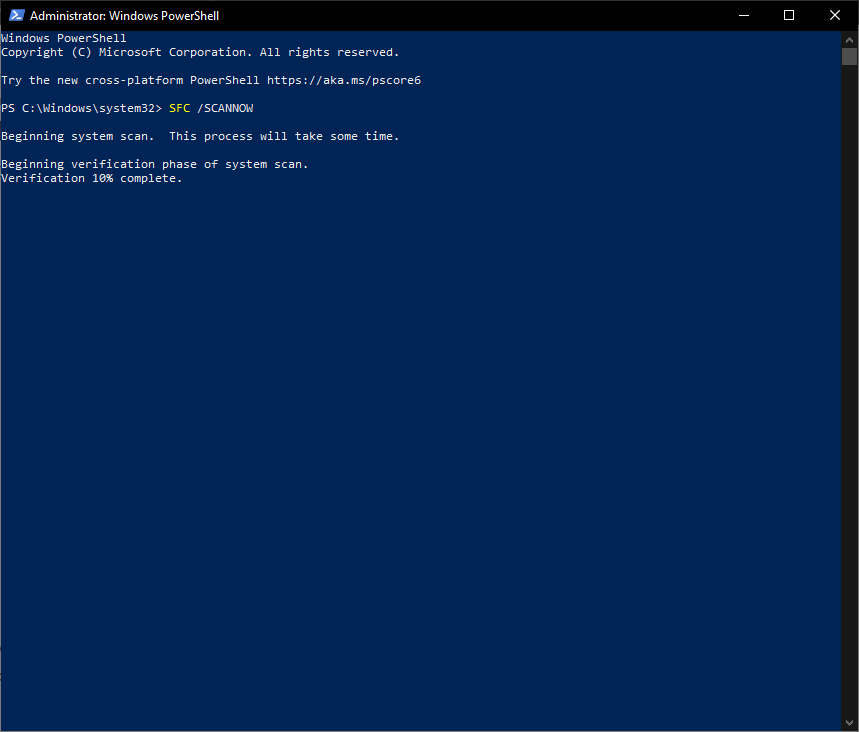
Most of the time it is sufficient to use SFC/SCANNOW, as this command encompasses the others. Consequently, it performs a complete system search for errors. In addition, it attempts to perform repairs within the system.

This process takes between 20 to 30 minutes depending on the size of the disc. Finally, we will see a report with the actions performed by the command. Here are some other examples of use:
sfc /SCANNOW
sfc /VERIFYFILE=c:\windows\system32\kernel32.dll
sfc /SCANFILE=d:\windows\system32\kernel32.dll /OFFBOOTDIR=e:\ /OFFWINDIR=e:\windows
sfc /VERIFYONLY
Very good! Finally, we have seen how to use the SFC command. This tool usually works well for fixing system errors. So it is a great option before formatting the system completely. See you soon!