In the previous article, we have seen how to modify the permissions to access the folders. This is really useful, as it allows you to modify the elements or even delete them. However, there are files inside the system that should not be modified manually. This is the case of Windows system files. In fact, as a security measure, these files are hidden by default. Even they cannot be modified by users with administrator privileges. To do this, Windows assigns permissions to an owner named TrustedInstaller. This is the default user to safeguard the integrity of these sensitive files. Sometimes we need to take over the ownership from the troubleshooter to modify the file/folder. For that reason, in this post, we are going to see How to restore TrustedInstaller as an owner for system files in Windows 10.
System files in Windows 10
These are files of any type with a hidden attribute activated from the system. Several types of files fall into this category: hardware drivers, configuration files and the dynamic link libraries (DLL) and the files that make up the Windows 10 registry.
TrustedInstaller on Windows
TrustedInstaller is a user that is created in the installation of our operating system. Additionally, it is part of the Windows Resource Protection (WRP). This protocol is responsible for protecting files, directories and certain registry keys that are vital to the system. This is because any modification in them can cause serious and unexpected errors in the operating system.
How to Restore TrustedInstaller as an owner of the file / Folder
As we mentioned at the beginning of the article, there are several files that can be considered as Windows system files. For this particular example, we will work with the files located at the following address: C:\Program Files\WindowsApps.
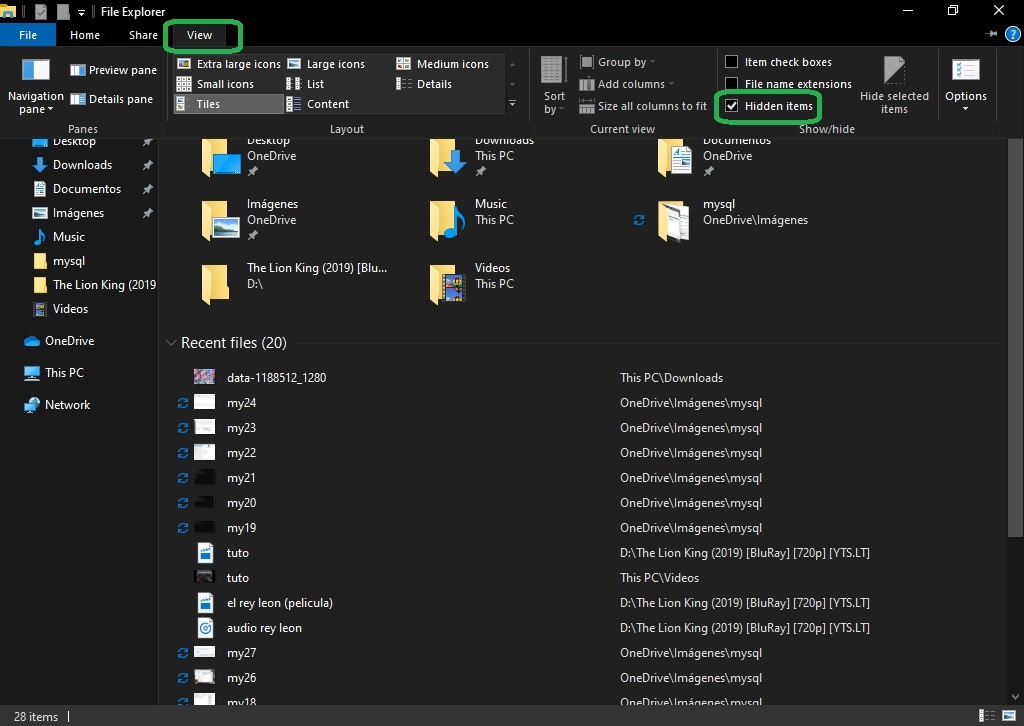
- With this intention, please enter the file explorer. Then click on the View tab located in the upper-left corner, and then select the box corresponding to Hidden Items.
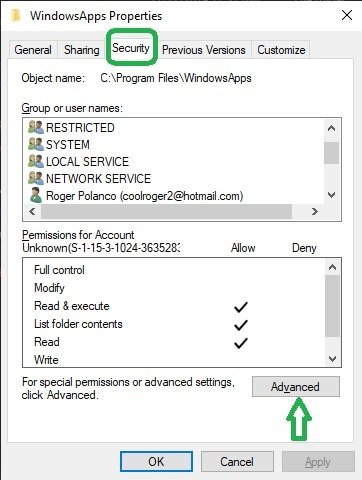
- Then follow the path: C:\Program Files\ Once there you can see the Windows App folder. You have to modify the folder permissions, so right-click the mouse and enter the properties. Then go to the Security tab, and then to Advanced.
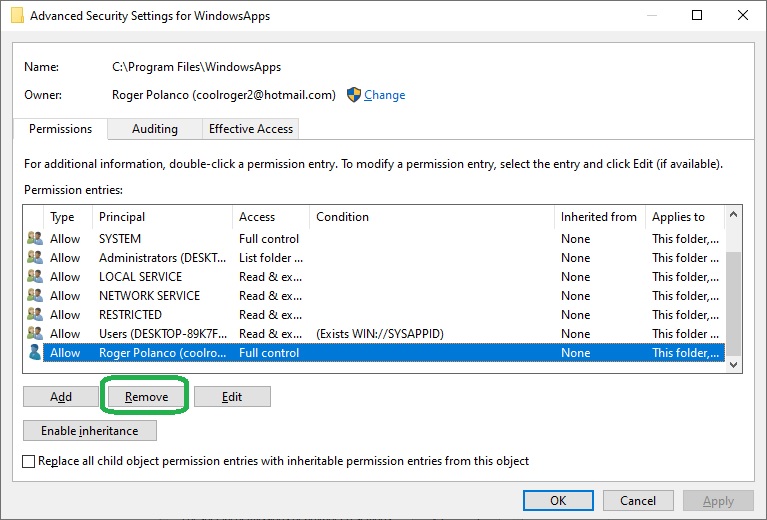
- It then removes the local user who has access to the folder. With this in mind, select the user you want to remove, and then click on Remove.
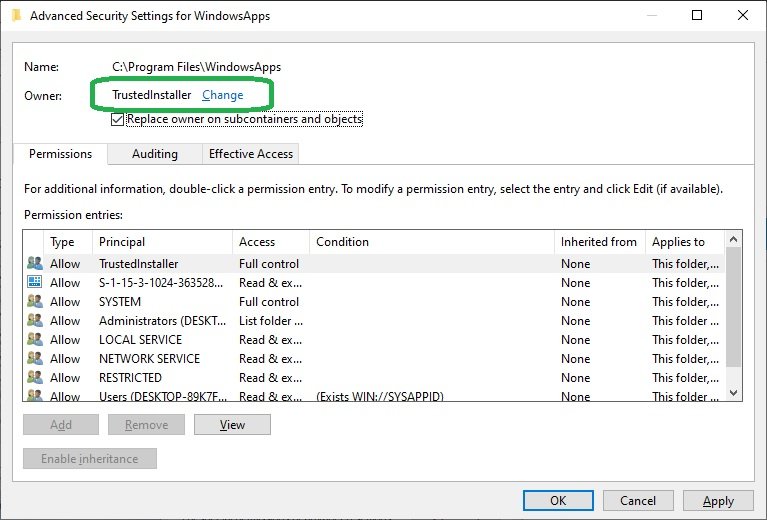
- Now we are going to change the owner of the folder, and we are going to replace it with TrustedInstaller. To do this, go to the owner section and click on change.

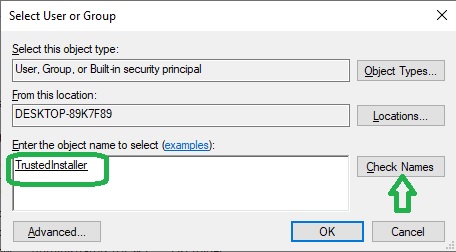
- In the following window please add the following name in the corresponding box: NT Service\TrustedInstaller. Then click on check names and finally click on OK.
- Go back to the previous screen, please tick the box to “replace the owner in all folders and sub-containers and objects“. And then press Apply and OK.
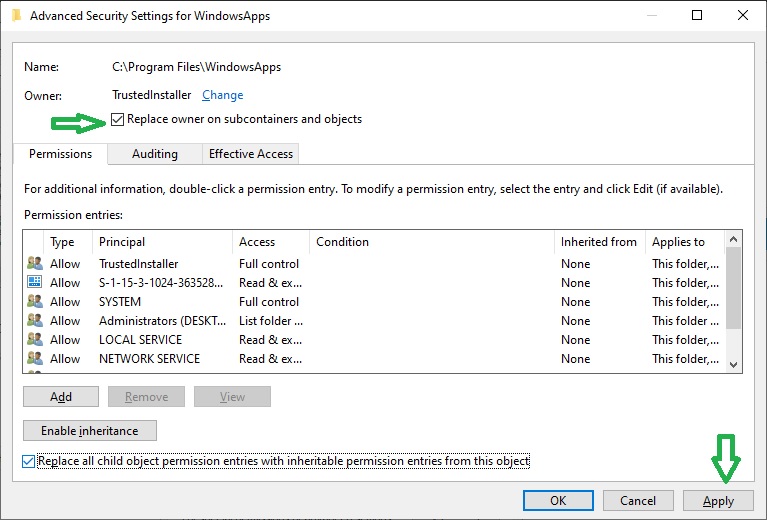
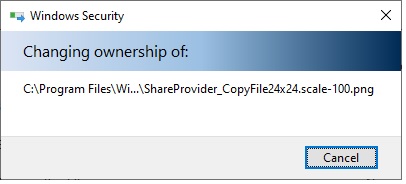
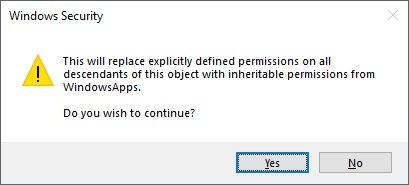
Finally, we can see how TrustedInstaller owns the folder. With this action, the property of this user over the Windows system files is restored. If you want to modify it in other folders of the system, you only have to repeat this procedure. The only change you have to make is to change the folder.
Finally, we have seen how to modify the ownership of the system files. By restoring the TrustedInstaller attributes we prevent these sensitive files from being changed. This way we guarantee system stability. We’ve come to the end, see you next time.
