

Microsoft has released Windows 11 for everyone thus offering an opportunity to get first-hand experience of their next generation operating system. However, there are some limitations, like you can only upgrade an existing Windows 10 OS which has a valid product key. Therefore, users who don’t want to upgrade their existing Windows 10 OS, but still want to try the new Windows 11 are left in the dark by Microsoft. Well, not anymore. In this guide, we will describe in detail how to install Windows 11 fresh installation on a computer.

Why Perform Windows 11 Clean Install?
One logical question is why perform a clean install of Windows 11, when Microsoft recommends upgrading to Windows 10? Well, there are many reasons, but two reasons are more important.
- Better Experience: If you upgrade your existing Windows 10 to Windows 11, then all the files, settings and programs of your existing installation will be preserved in Windows 11 as well. This means that several broken registry entries, junk files, etc. will be transferred to Windows 11. Therefore, when you perform a clean install of the latest Windows, then you will be able to judge its performance in a much better way.
- Questionable Reliability: Since Windows 11 is a new operating system its reliability is under doubt and untested. Therefore, it’s better to perform fresh installation of Windows 11 instead of upgrading the existing Windows 10 operating system. This way you can continue to work on a reliable Windows 10 OS and also test Windows 11 on a different computer or hard drive.
Now that you know the benefits of fresh installation of Windows 11, let’s see how to perform this task.
How to Install Windows 11
As mentioned before, Microsoft has only provided access to Windows 11 in the Windows Insiders program to upgrade to Windows 10. Therefore, to successfully complete the clean installation of Windows 11 we will have to follow a three step method.
Step 1: Download Windows 11 ISO file
Step 2: Create Windows 11 bootable USB drive
Step 3: Perform Clean Install of Windows 11
Although, Microsoft doesn’t give direct access to Windows 11 ISO files, there are ways to get those files directly from Microsoft servers. You can learn about this below. So, let’s start.
Steps
Before you start the installation of Windows 11 you should make sure that the computer where you want to install Windows 11 fulfills the minimum requirements for this operating system. Once you are sure about this, then start the installation method given below. Don’t miss any step and follow the instructions carefully in the correct order.
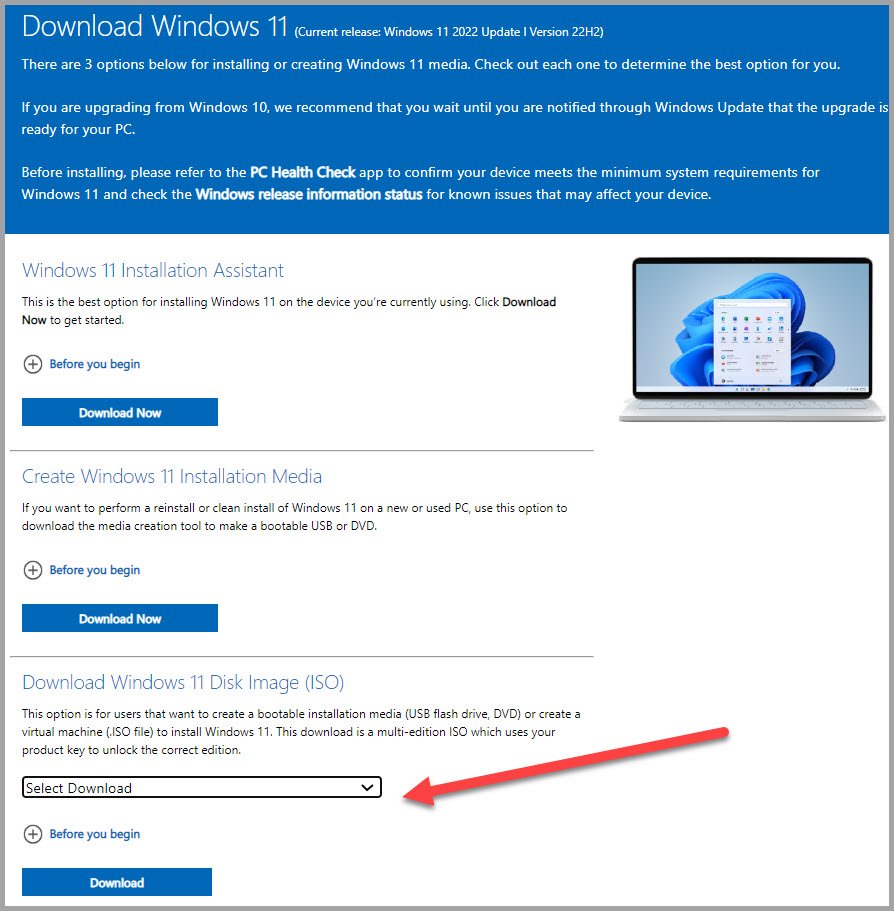
Step 1: Download Windows 11 ISO File
If you want to download the Windows 11 ISO file for clean installation of this OS, then you will have to use the services of a third-party website. UU Dump is one such site that is trustworthy, safe and doesn’t require you to register for the download of the windows 11 ISO file.
- Visit this page and click on download Windows 11 ISO file to download the Windows 11.
- Go to 3rd option and download the Windows 11 Disk Image.
- After that select which bit do you want to download. Click on 64bit-download.
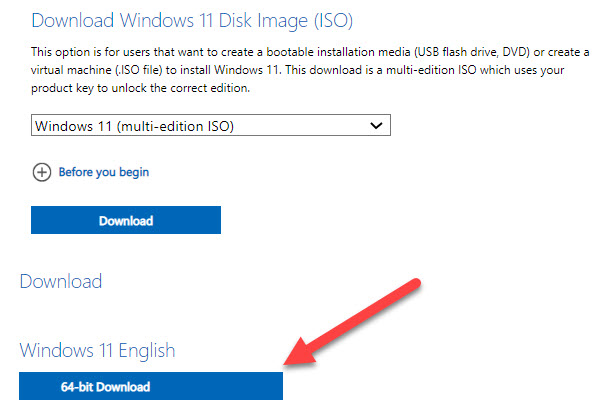
- That’s it, the Windows 11 ISO file will be downloaded successfully.


Step 2: Create Windows 11 bootable USB drive
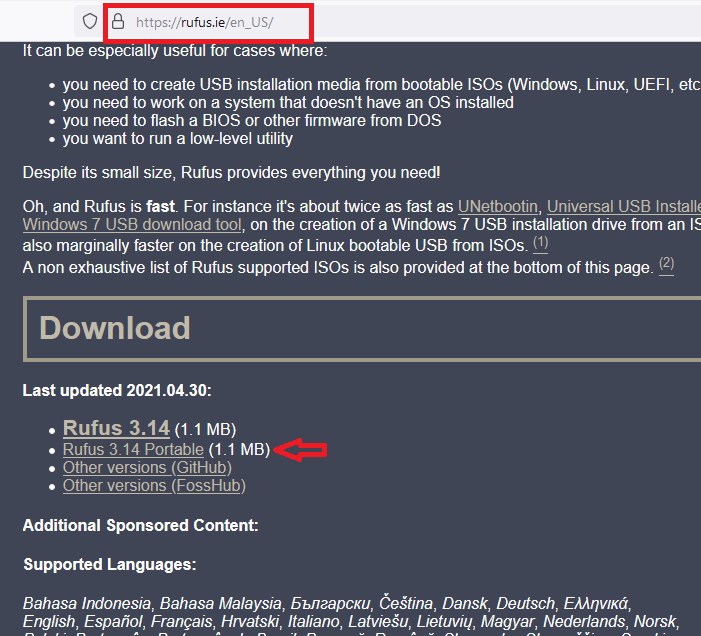
For creating the Windows 11 bootable USB drive you need a USB pen drive of at least 8 GB capacity. To complete this step you will have to download a completely free software, named Rufus. Using this small-sized software you can create the USB bootable drive in a few clicks.
- Visit Rufus Website to download the software. Since, you want to create a USB bootable driver, you should scroll down on the website home page and click on the ‘Rufus Portable’ link to download the version of this software designed for portable drives, like USB pen drives.
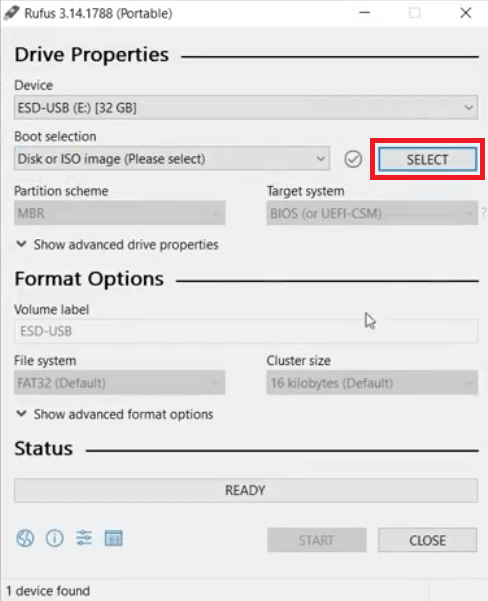
- After downloading the software connect your USB drive with your computer. Now, run the Rufus executable file and click on the ‘Select’ button to load the Windows 11 ISO file.
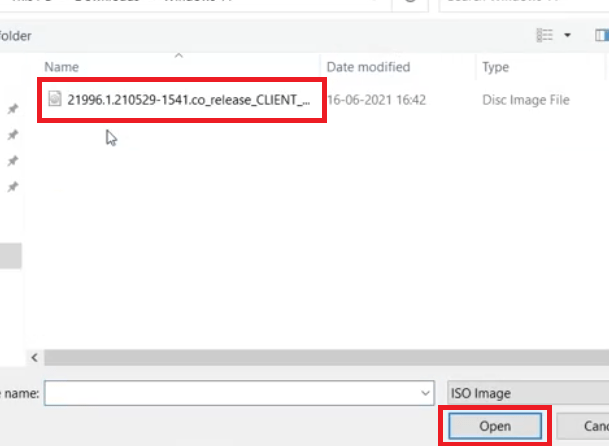
- Browse to the folder where Windows 11 ISO file is saved. Select the Windows 11 ISO file and click on the ‘Open’ button.
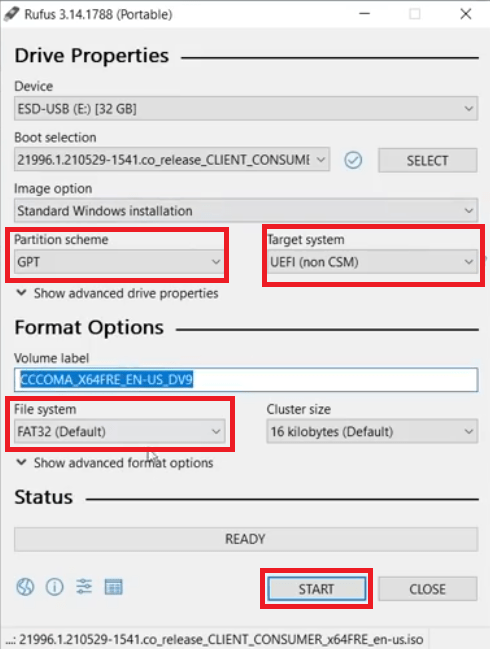
- Make sure that Partition scheme is ‘GPT’, Target system is ‘UEFI’ and File system is ‘FAT 32’. Finally, click the ‘Start’ button.
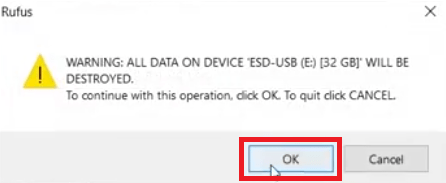
- You will be warned that all the data from the drive will be destroyed. Click on the ‘OK’ button to proceed.
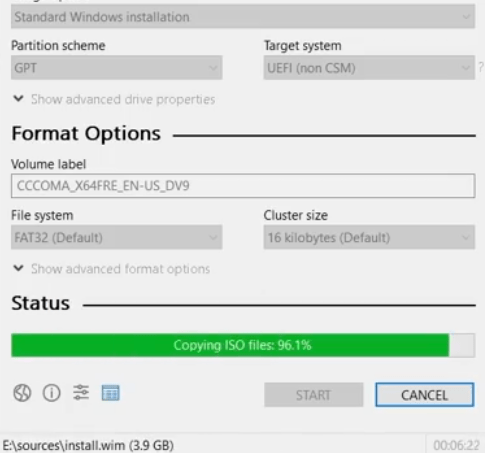
- Wait for the software to create the bootable drive.
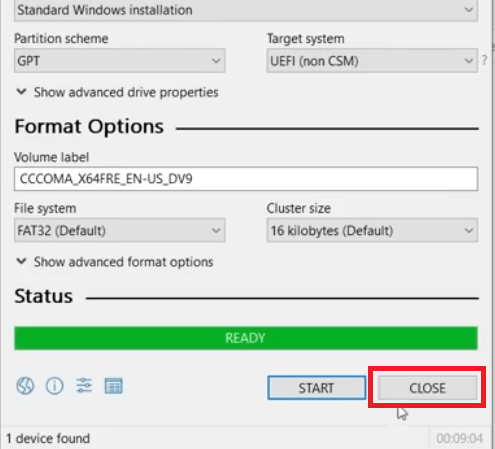
- When the Windows 11 bootable USB drive has been created you will see ‘READY’ in the Status. Click on the ‘Close’ button to close the software.


That’s it, now you have Windows 11 bootable drive and it’s time to start the fresh installation of Windows 11 on your computer.
Step 3: Install Windows 11
Although Windows 11 haven’t been installed on your target computer yet, but trust us the difficult part of this installation method is over. You should connect your Windows 11 bootable drive to the computer where you want to install Windows 11, then follow the steps given below to start the installation of Windows.
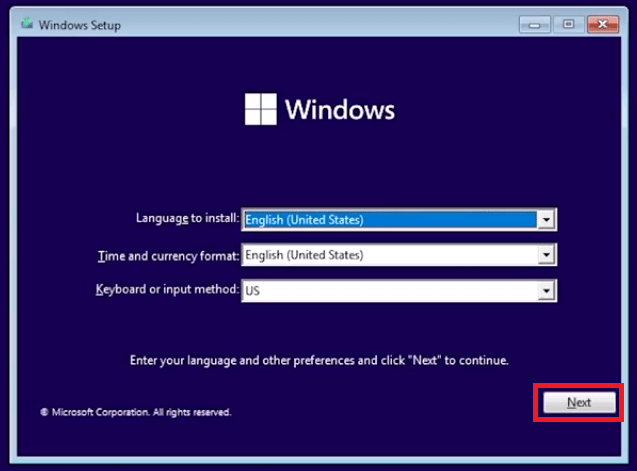
- Start/restart your computer and press the relevant key to make it boot from the USB drive. Usually, you have to press F2, F10, F12 or Esc key depending upon your motherboard or computer manufacturer. When the Windows will boot from the USB drive you will see the Windows 11 logo.
- Select your preferences and click on the ‘Next’ button to proceed.
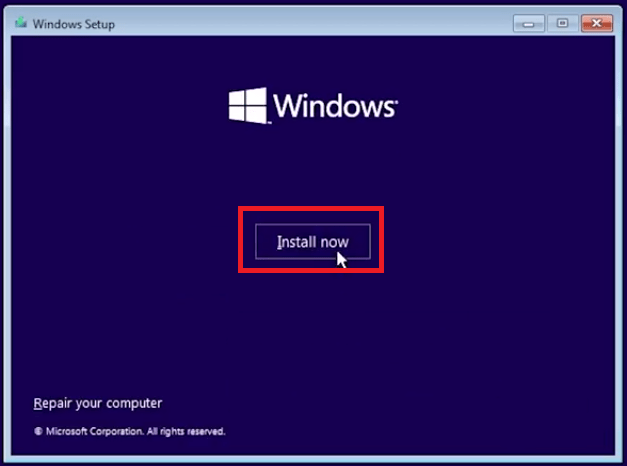
- Click on the ‘Install now’ button to begin the OS installation.
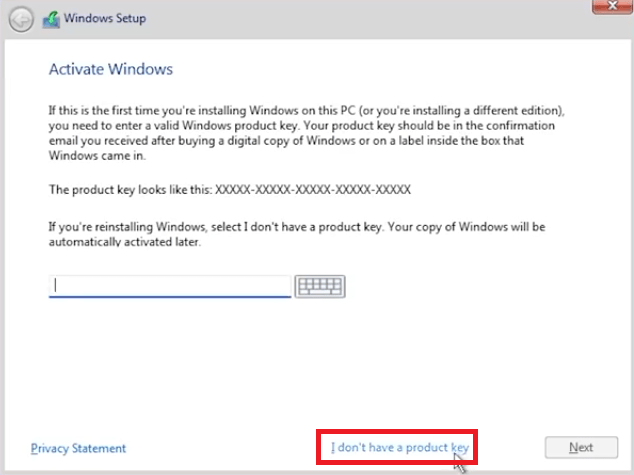
- Skip this step by clicking on ‘I don’t have a product key’ link.
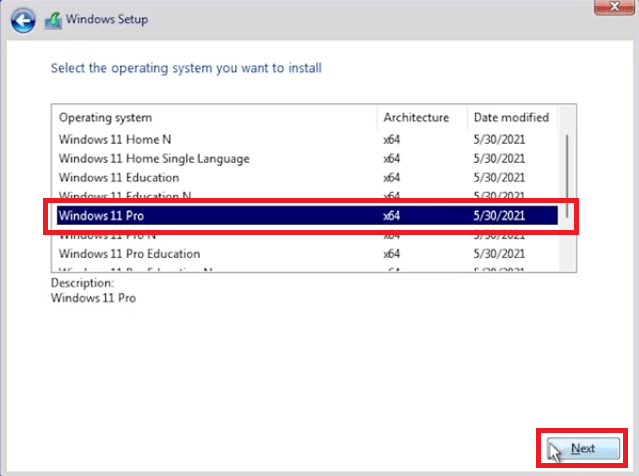
- Select the Windows version you want to install. We have selected ‘Windows 11 Pro’. Then, click on the ‘Next’ button to proceed.
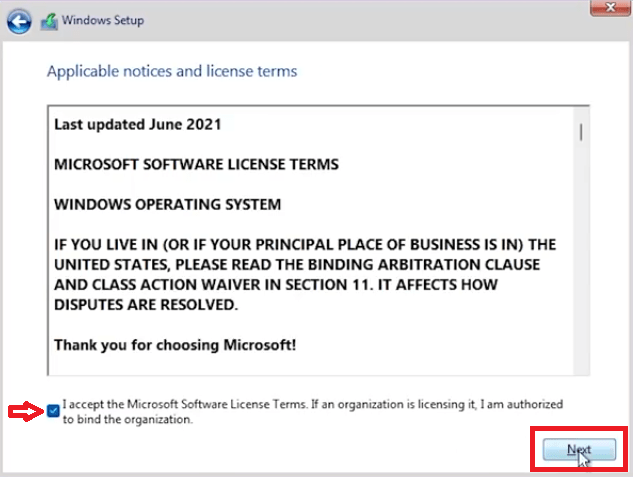
- Accept the license agreement by selecting the checkbox, then click on the ‘Next’ button.
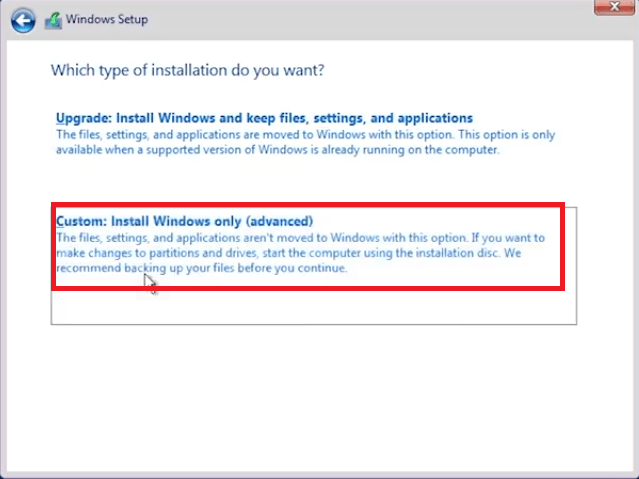
- Choose ‘Custom Install Windows only’ option to continue.
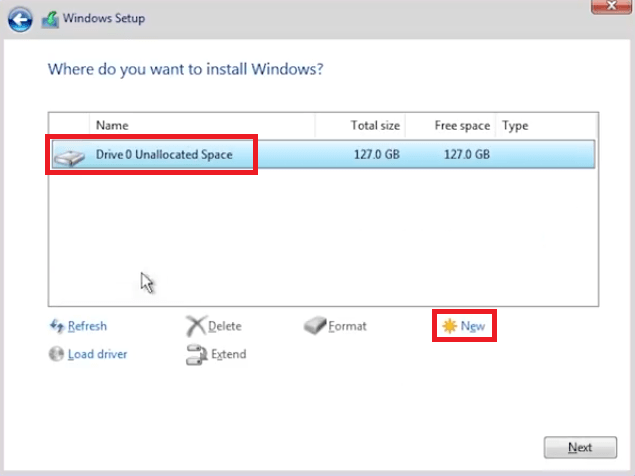
- Now you must create disk partition. For that, choose the disk drive and click on the ‘New’ link. If your drive is already partitioned, then choose the ‘Primary’ partition and proceed accordingly.
- Enter the Size of your primary partition and click on the ‘Apply’ button.

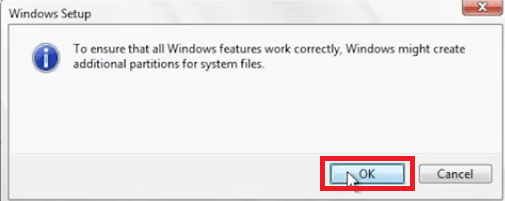
- Click on ‘OK’ button to give the permission for creating additional partitions.
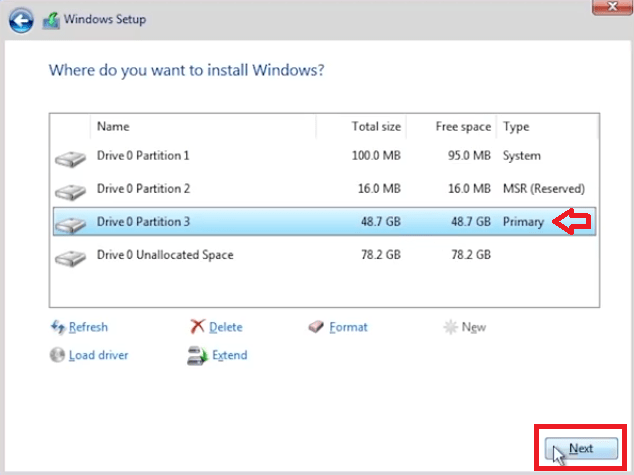
- New disk partitions have been created. Select the ‘Primary’ partition and click on the ‘Next’ button.
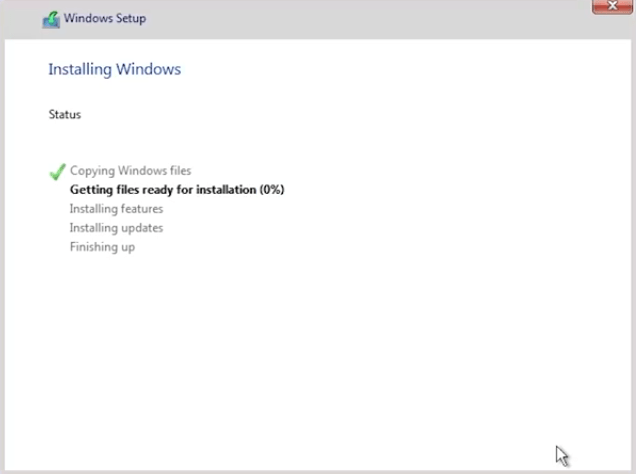
- Wait for the installation files to be copied and let the installer finish the installation. This may take a few minutes.
- Click on the ‘Restart now’ button to reboot your computer.

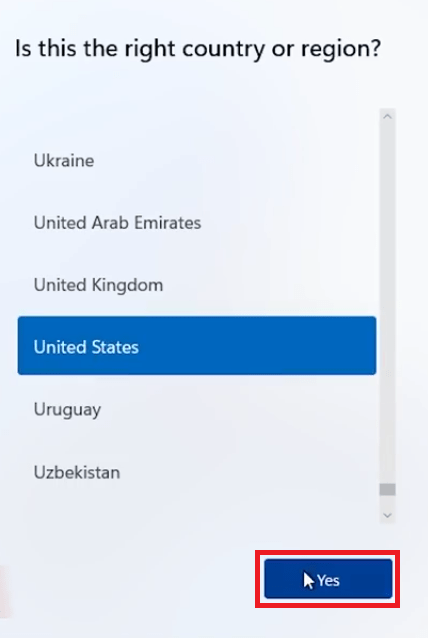
- Wait for the Windows 11 to restart and perform the necessary steps. Finally, you will get the option to choose your country, just make your selection and click on the ‘Yes’ button.
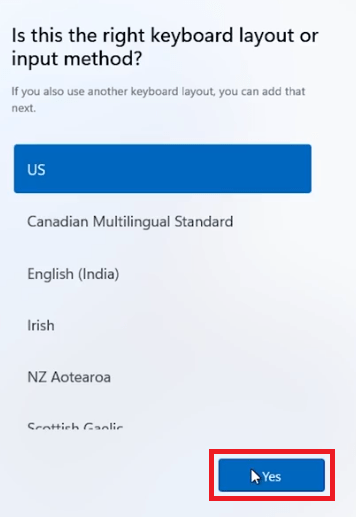
- Choose the keyboard layout method and click on the ‘Yes’ button.
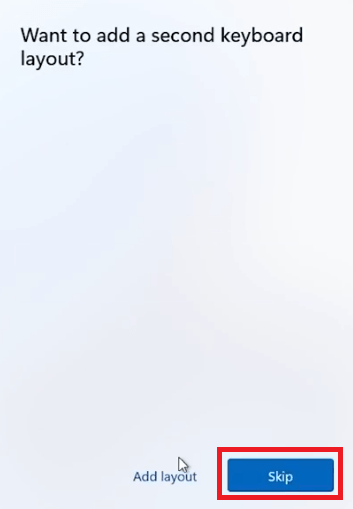
- If you want to add another keyboard, then click on ‘Add layout’, otherwise, click on the ‘Skip’ button.
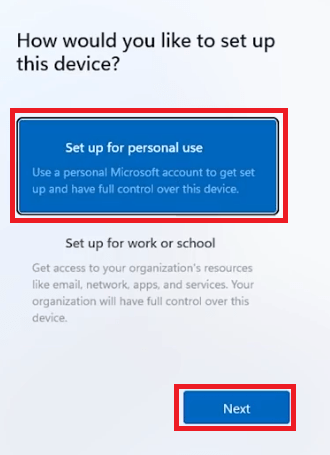
- Choose ‘Set up for personal use’ option, then click on the ‘Next’ button.
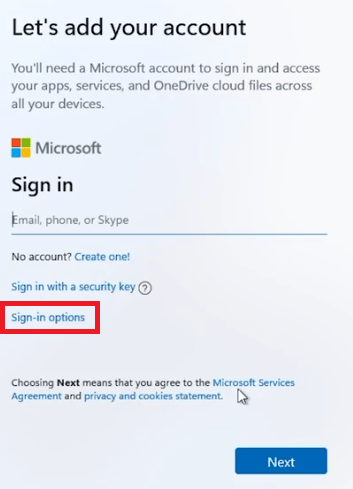
- If you have Microsoft account, then you can use it to login. Otherwise, you can click on the ‘Sign-in options’ link.
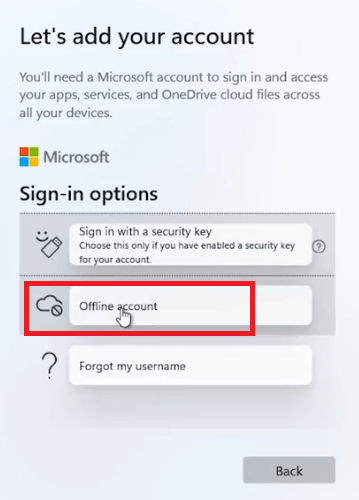
- Click on the ‘Offline account’ option.
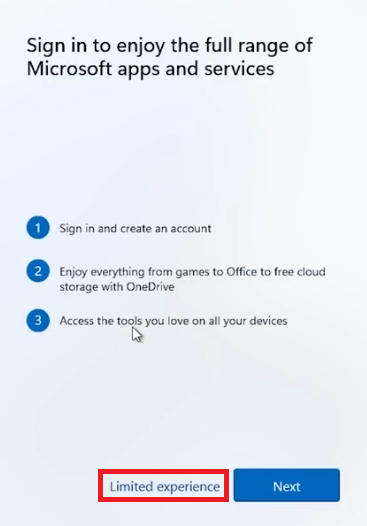
- If you install offline mode, then you will be unable to use some Microsoft applications, but Windows 11 features will be fully active. So, click on the ‘Limited experience’ to proceed.
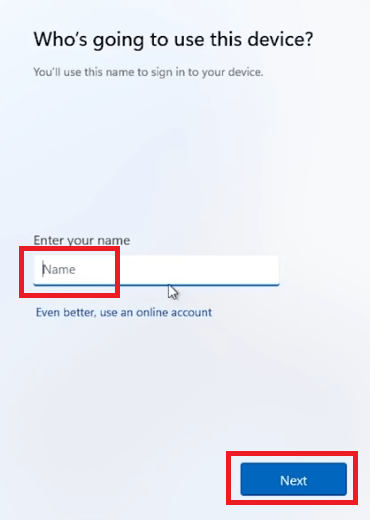
- Enter the name for your computer, then click on the ‘Next’ button.
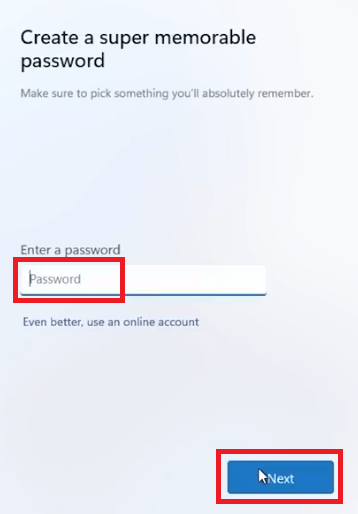
- Enter the password for your computer, then click on the ‘Next’ button.
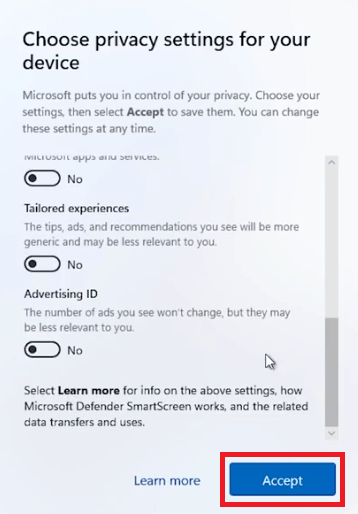
- Choose your privacy settings and click on the ‘Accept’ button.
- When you see ‘Hi’ on your screen it’s a sign that your Windows 11 is welcoming you.

- Wait for the Windows 11 to setup your computer for use.

- Finally, Windows 11 installation is completed and you will see the Windows 11 Home Screen.
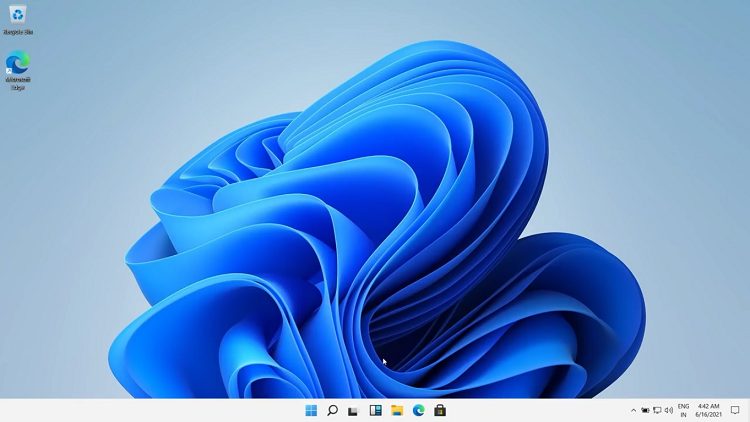


That’s it, you have successfully performed the fresh installation of Windows 11 on your computer.
Also check: Install Windows 11 on unsupported device
Windows 11 is available now, but only as an upgrade to the Windows 10 users. Therefore, many users want to know how to install Windows 11 fresh installation without any product key. To help you solve this problem we have described an installation procedure which you can use to easily install Windows 11 on any computer without creating any account, not even Microsoft’s login account. Our installation method not only helps you bypass the Windows Insider Program, but also allows you to perform clean installation of Windows 11.