
This time we’re going to see how to disable scheduled tasks in Windows. Sometimes we need to disable or enable the scheduled task on the computer. To achieve this, it is necessary to enter the Windows task scheduler.
In the task scheduler, you’ll see many tasks listed there. Some tasks related to the operating system’s functionality, and some tasks created by the 3rd party applications. Most of the 3rd party applications used a scheduled task to update their software at a specific time interval. As you can see this is very useful functionality, but the bad fact is; some viruses are also using the task scheduler to keep their virus process running in the background. So let’s see how to disable and then delete the scheduled task from the computer.
Steps to Disable scheduled tasks in Windows 10
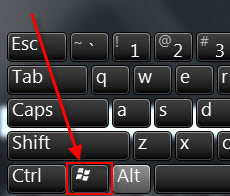
- First, enter the task scheduler. With this intention, press the Windows flag + R key together (simultaneously) from your keyboard to launch the run box.
- Type taskschd.msc and then click on the OK button. It will open up the task scheduler.

- In the task schedule, click on “Task Scheduler library” from the left-side pane.

- Now, look at the middle of the screen, you’ll see all the scheduled tasks are listed there. Here, right-click on the task which you want to disable and then click on disable option from the right-click menu. (You may select the task and then look at the right-side pane and click on disable.)

- If you want to delete the task completely then you can delete it as well. Click on delete button instead of disable.


As you can see, there are several tabs in the box. In this case please click on the Triggers tab.
After selecting the tab, the trigger will be shown. Then double-click on it. Well, in this box you can directly disable the trigger by clicking on the corresponding box. Similarly, you can program the trigger to stop if it is executed for more than a certain time.
With these options, we’ve disabled the triggers. Consequently, since they are not present, then the task is not executed. This method is useful if you want to enable the task later. Additionally, it is a very safe method in case you are not sure about removing an essential task. In effect, by editing the triggers it is possible to restart the task.
Please note that this procedure is identical for Windows 7, 8 and 10. With these actions, you can improve productivity in your system. Additionally, you increase control over what Windows do in the background. It’s a great idea to save energy. I hope you find it useful. Share the post on your social networks. See you later!

not work