Today we are going to talk little advanced about the Windows Registry. In this article, we’ll show how to change the owner of a registry key, so that we can change its permissions as you would like.
As you know the registry is an essential component of the functioning of the operating system. Its correct manipulation can improve the performance of the system. However, you have to be careful when modifying the registry because a wrong change can damage the whole Windows 10. So please make a backup of the registry if you want to change anything in the registry. And this is because the Registry contains information that Windows uses as a constant reference, such as user profiles, applications installed on your computer, and the types of documents that each application can create. In addition, settings of property sheets for folders and application icons, hardware items in the system, and ports being used.
On the other hand, during attempting to modify these values, some users have reported not being able to do so. This impossibility is related to access permissions problems. In other words, the user who tries to modify the registry key does not have the necessary credentials to do so. In other words, he is not the owner. Here, I’m going to show you how to take ownership of the registry key of Windows 10.
Modifying the owner of the registry key.
- The first thing we’re going to do is into the registry editor. With that intention, please press the Win + R combination and type Regedit in the box. Click OK to continue.

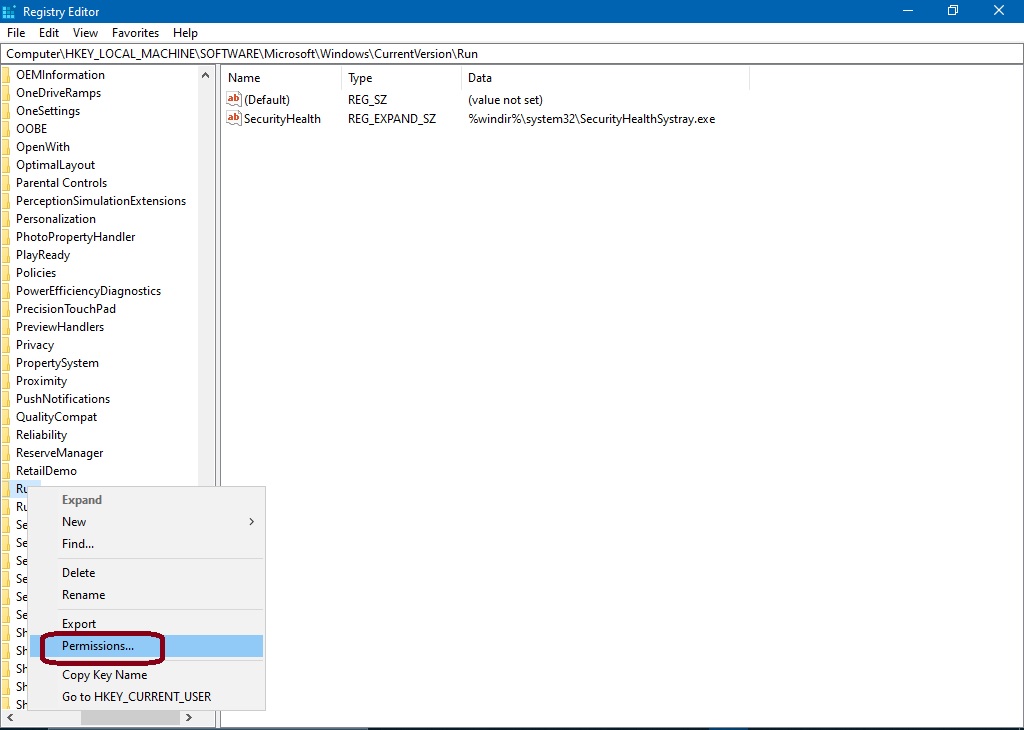
- Then right-click on the registry key, and click on Permissions.

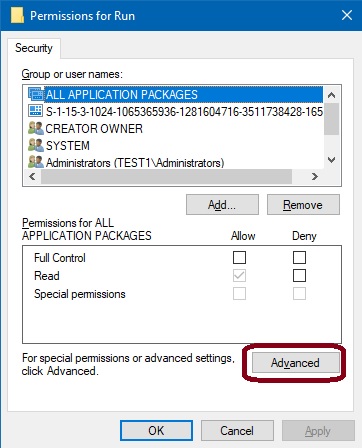
- Please click on Advanced.

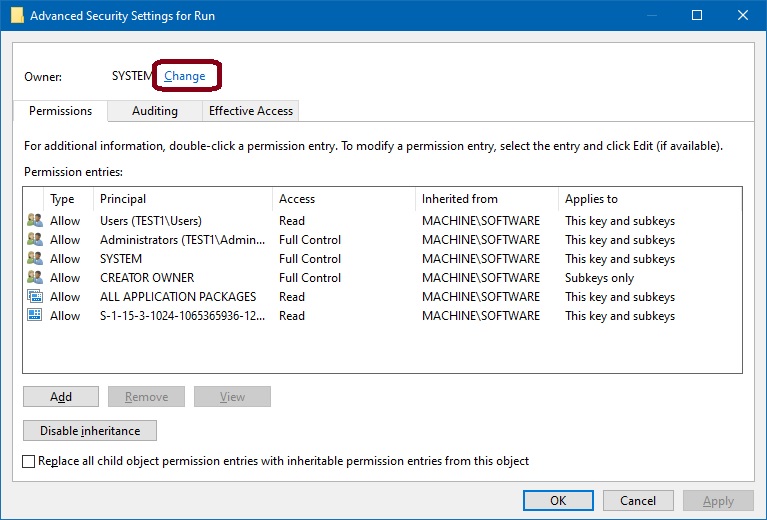
- Next, locate the Owner section. Right next to it click on the link Change.

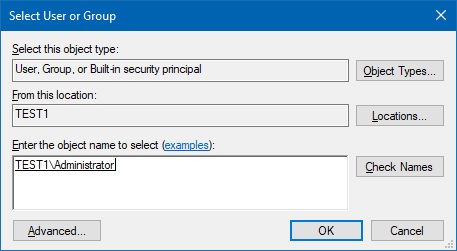
- What we’re going to do now is modifying the owner. To do this, please enter the word Administrator or Administrators in the field. Next, check the name to verify the existence and press OK to continue.

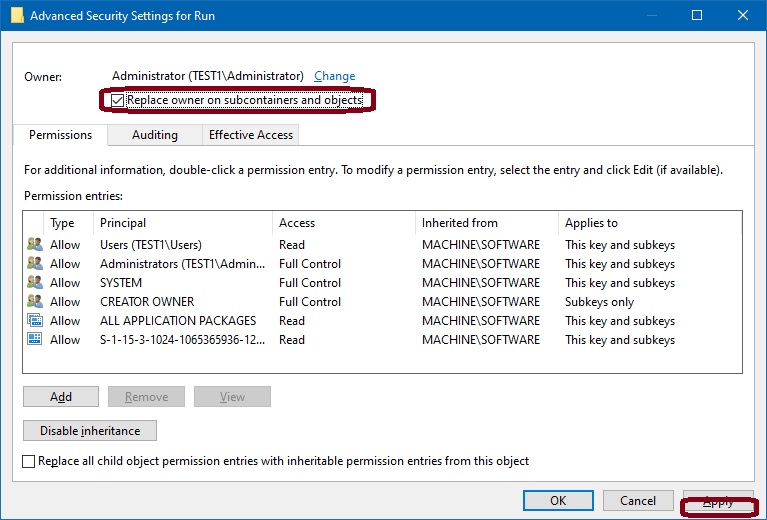
- We’re about to complete the process. Just check the box Replace owner on subcontainers and objects and press apply to take effective possession of the key.

Finally, we have seen how to take possession of a registry key in Windows 10. With the process that we have described, we effectively change the owner of the registry key. This will allow you to successfully access and modify the registry.

