Do you know that your laptop’s lid can do more than sleep when you move it down? Yes, there are lots of options available for that like hibernating, shutting down, sleeping or simply doing nothing on the lid to close down action settings. It allows you to specify the default action settings to be performed when you close your laptop lid. Let’s learn more about it.

By default, Windows 11 is configured to sleep down when the Windows laptop lid is closed to save power. In this article, I’ll tell you how to change laptop lid closing action settings in Windows 11/10.
This feature has not been innovative since Windows 10/11, even though it has always been part of the Windows platform for so so long. You can simply disable it so that when you close the screen or lid of your laptop, it does not go to sleep. In other words, nothing needs to be done; your computer will continue to run even with the closed lid.
This is not recommended because when your laptop lid is down and it is in a running state, it is very obvious that your laptop vents will become obstructed and your laptop will become over-heated. It is recommended to avoid it, this is my personal opinion. So without waiting time, let’s learn how to change laptop lid closing action settings in Windows 11/10.
How to Change Lid Close Action settings in Windows 11/10
To change the lid action settings, there are two methods to change this settings. Let’s explore them.
Method 1: Change the lid closing action settings using the control panel
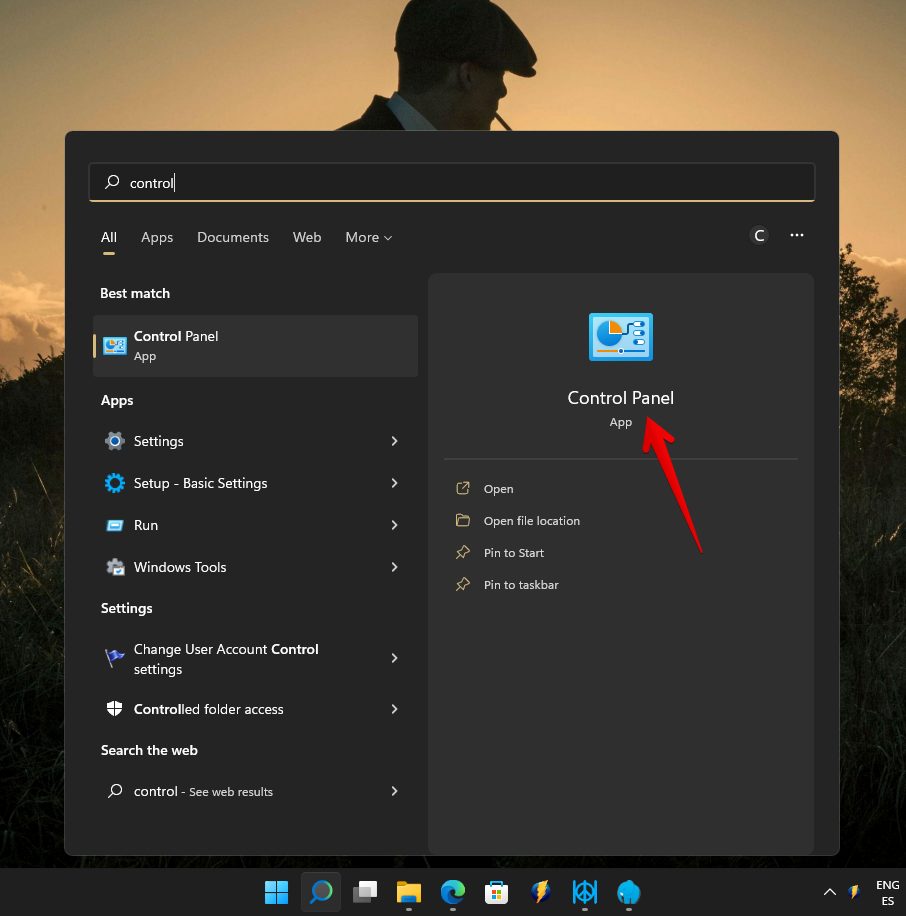
- Open the Control Panel on a Windows 11 PC through the Windows search box.

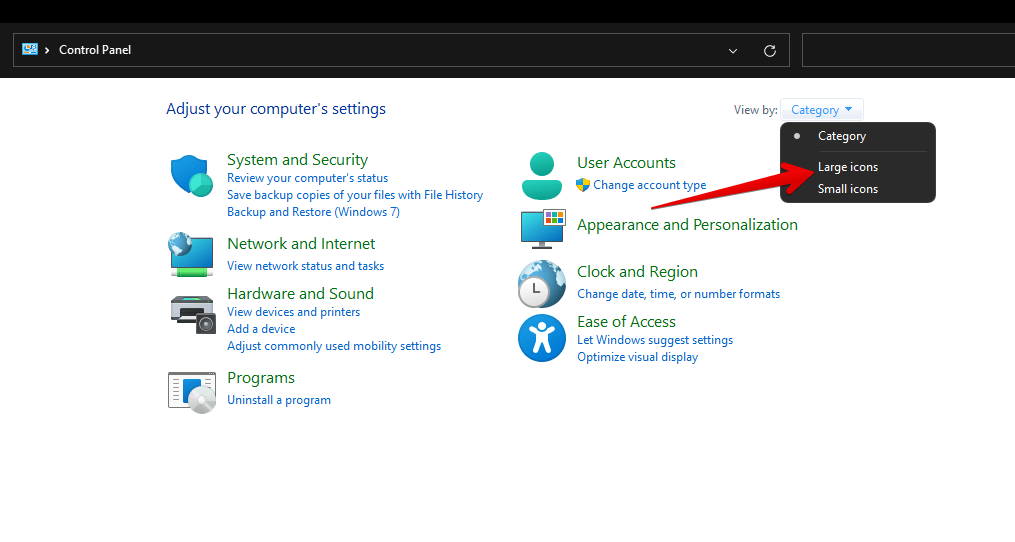
- Now, click on the upper-right corner of the screen and select Large Icons.

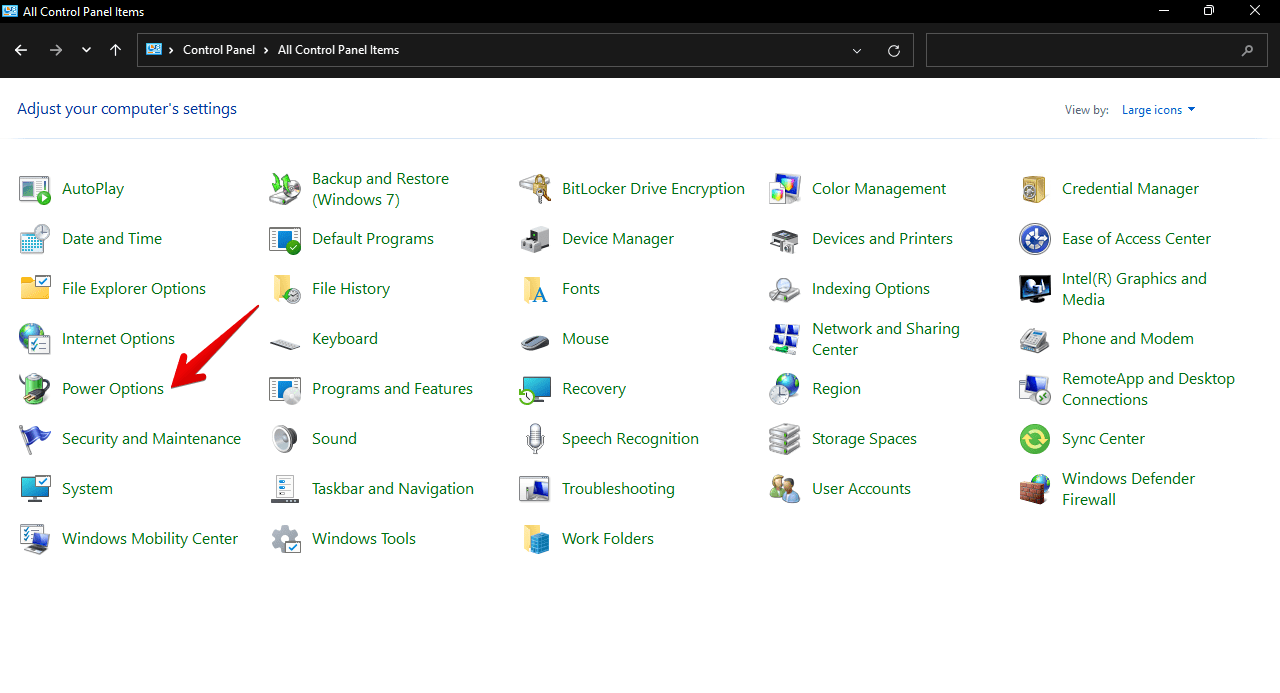
- Then click on Power Options.

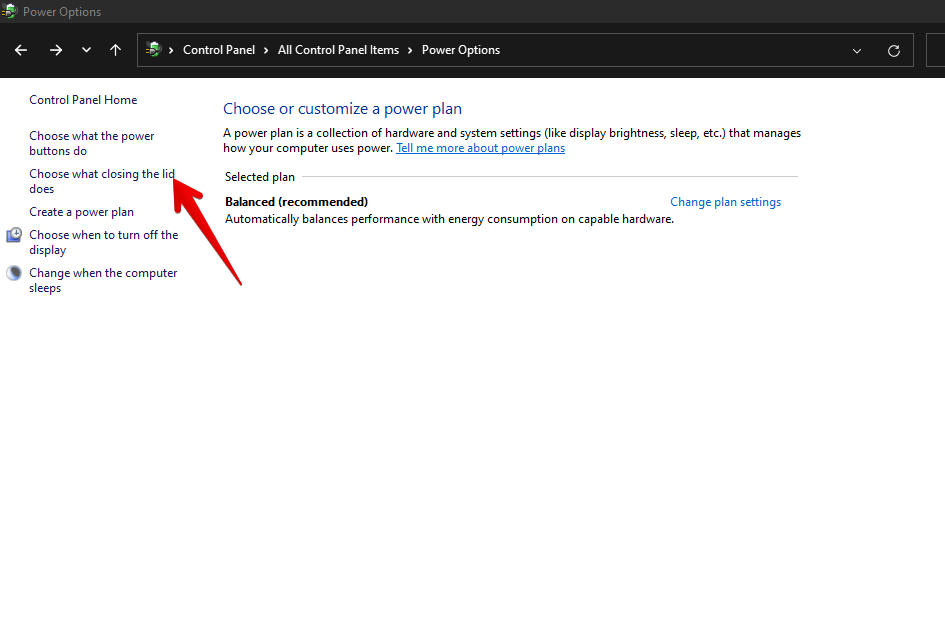
- In the following window, please click on Choose what closing the lip does.

- Look for the When I close the lid option in the window. Now click on the drop-down menu for On battery and select the option Do nothing. Then do the same for the Plugged in option. Finally, click on the Save changes button at the bottom.
Method 2: Change lid action settings through advanced settings.
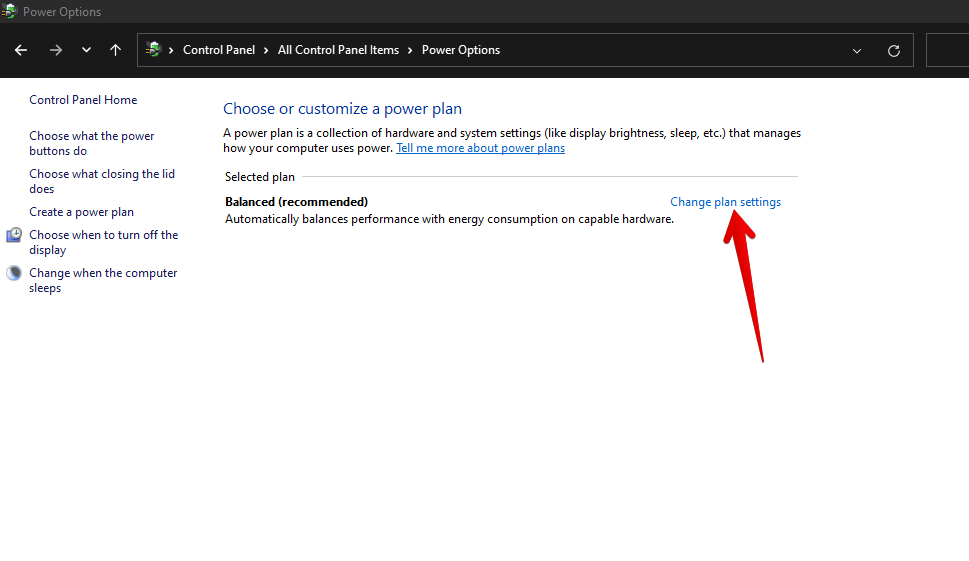
- Open the Power Options window using the above method.

- On the next screen, please click on Change plan settings.

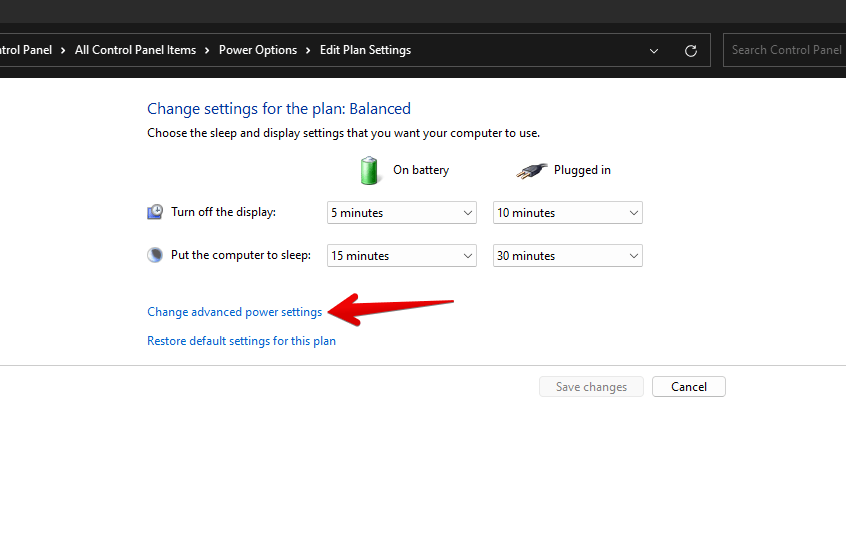
- Next, please click on Change advanced power settings to open a small new window.

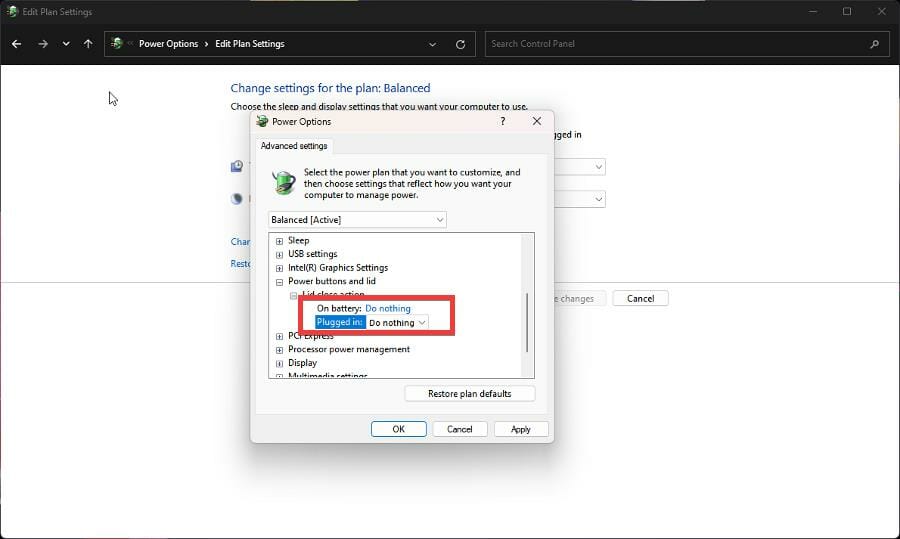
- Click the Power Buttons and lid option in the new Power Options window, and then click Close Cover Action settings. Now click On Battery and Connected, and select Do nothing for both entries, and then press the OK> Apply button to save the changes.

- That’s it.
Ultimately, we have learned how to Change Lid Close Action settings in Windows 11. Bye! If you have any doubts or questions, do let me know in the comments section below.
