Microsoft OneDrive is a free cloud storage service offered by Microsoft. It allows you to save and synchronize documents, photos, and many other types of files and folders that you want to sync or backup.
Yes, this is Windows 10’s default and most basic option for backing up your files. To avail this service, you only need to have a Microsoft account to start using it.

If you are currently using another 3rd party backup service (other than OneDrive), you may want to disable OneDrive completely, then here is the step-by-step guide to disable the OneDrive App.
How to Disable Microsoft OneDrive
To disable OneDrive from your computer, you just have to follow the following steps. These method for Windows 10 but you can use the same steps for Windows 7 and Windows 8 operating system.
1. Disable OneDrive from Task Manager
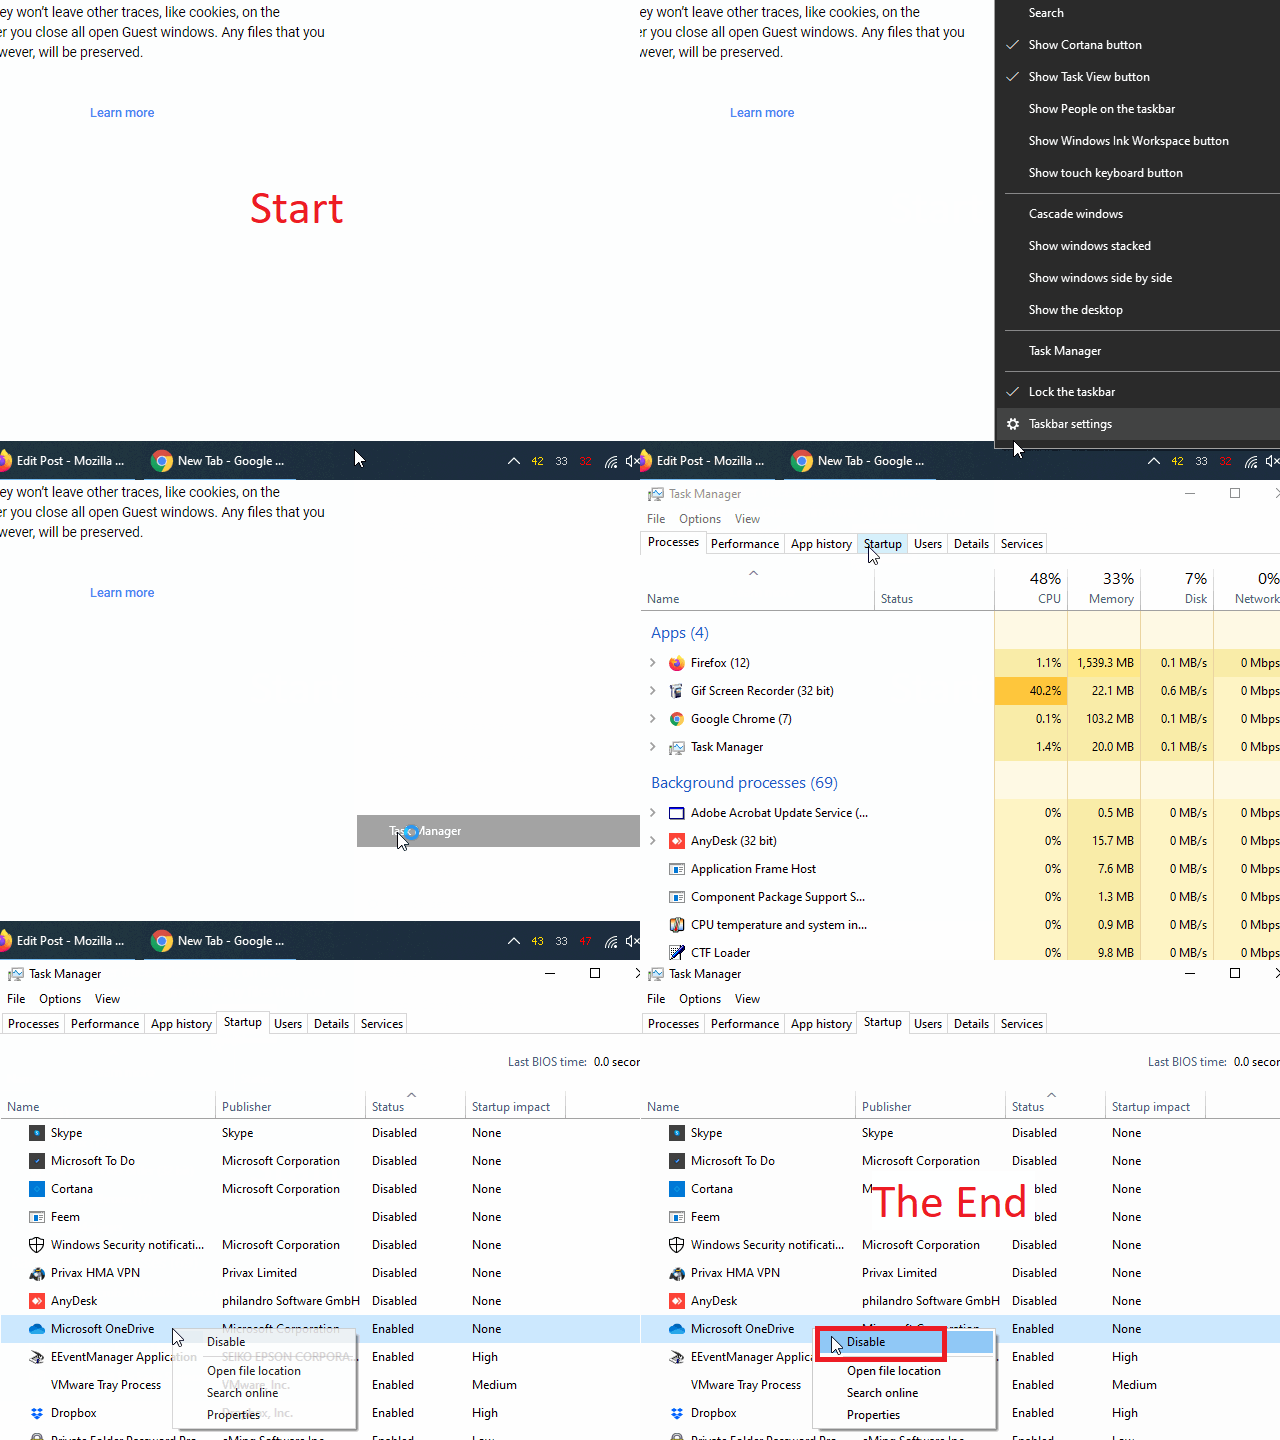
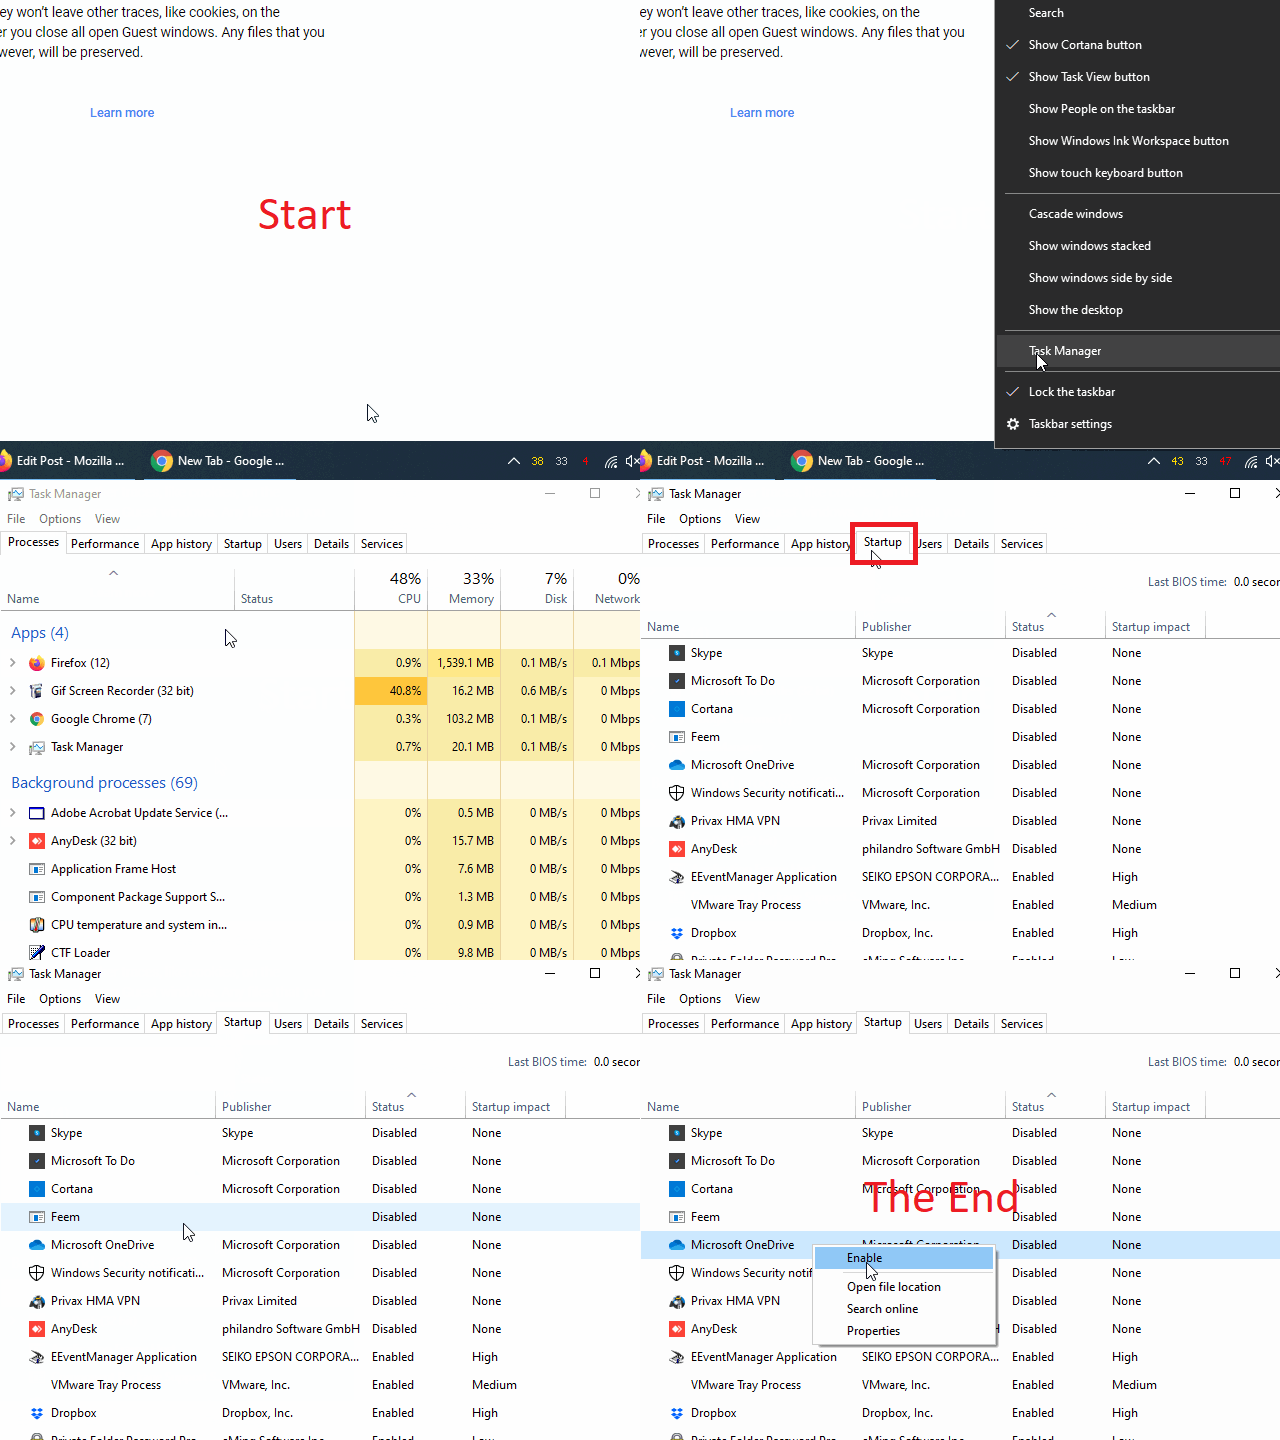
- Right-click on the taskbar and click on the task manager. OR press control+Shift+Esc button together to open the task manager directly.
- In the task manager, go to the startup tab and the find for “Microsoft OneDrive“
- Right click on “Microsoft OneDrive” and click on Disable.

2. Unlink OneDrive account from the PC
The first method we will see is to unlink the OneDrive account from the computer. Consequently, local files will remain available. However, the files in the cloud will no longer be accessible from the computer.
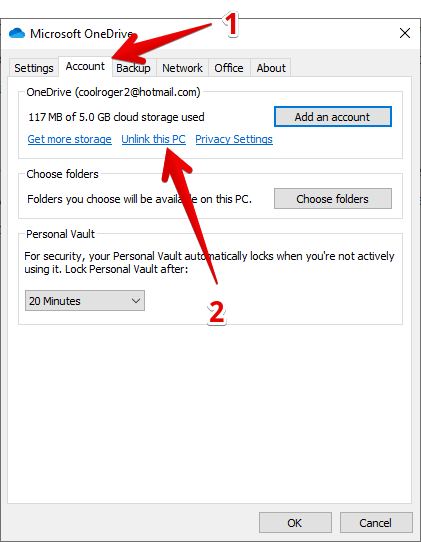
- Right-click on the OneDrive icon in the taskbar. Then select Settings:

- Once there, press the Account tab. Then click on Unlink this PC.

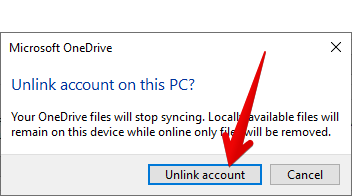
- Then confirm the action on the warning signal. Click on “Unlink Account” button.

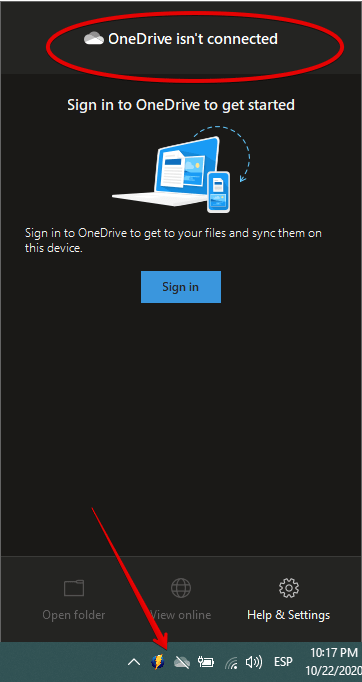
- You can check if the account has been successfully unlinked by clicking on the OneDrive icon in the taskbar.

- To re-link your OneDrive account, just click on Sign in
3. Stop OneDrive synchronization
Depending on the version of Windows you have, you may not be able to use the above method. In these cases, what we will do is stop all types of synchronization between the cloud and the computer.
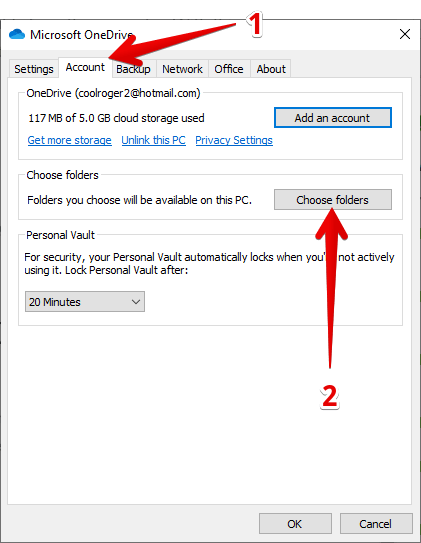
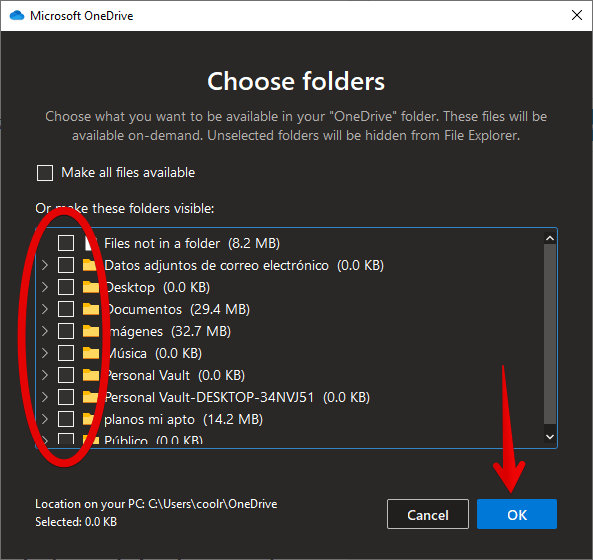
- Go back to the OneDrive settings. Once you’re there, click on the Accounts tab. Then click on Choose Folders.

- Then uncheck all the boxes corresponding to the folders. Press OK.

- This action deletes all files in the local folder. However, they remain available in the cloud.
4. Delete OneDrive Folder Using File Explorer
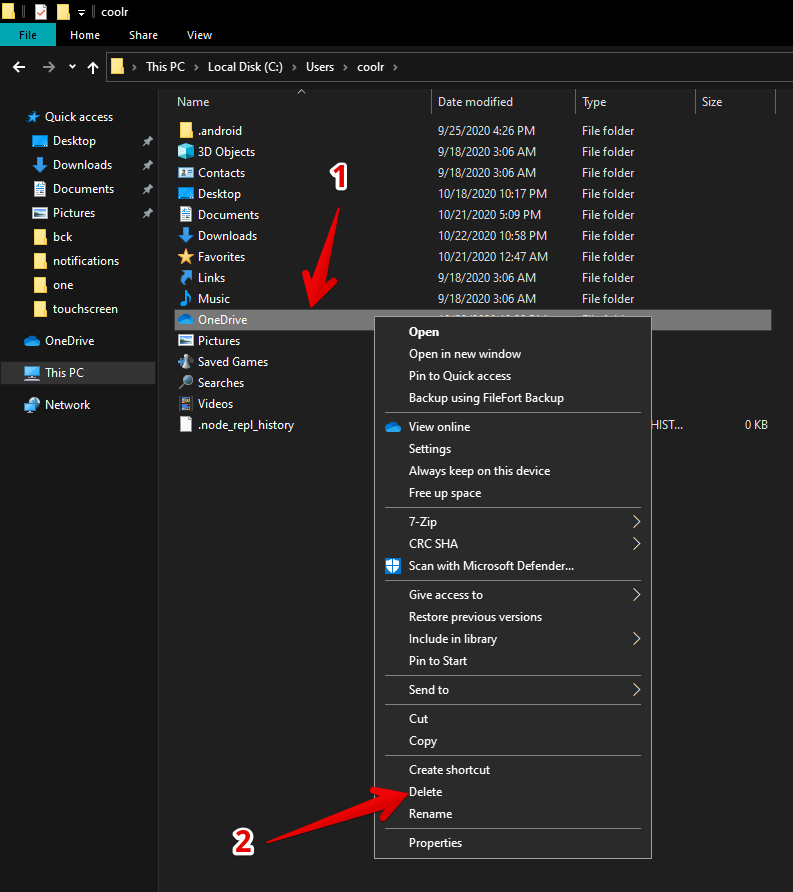
Delete the OneDrive folder from your PC’s user profile folder. Let’s see how to do it.
- Go to Windows hard drive partition – usually it is in C: then go to USERS and then double-click on your user-profile’s folder name. In my case it is coolr, so my path is: “c:\users\coolr“. Delete the OneDrive folder from there.

5. Uninstall OneDrive from Windows 10
The most recent versions of Windows 10, allow you to uninstall OneDrive easily.
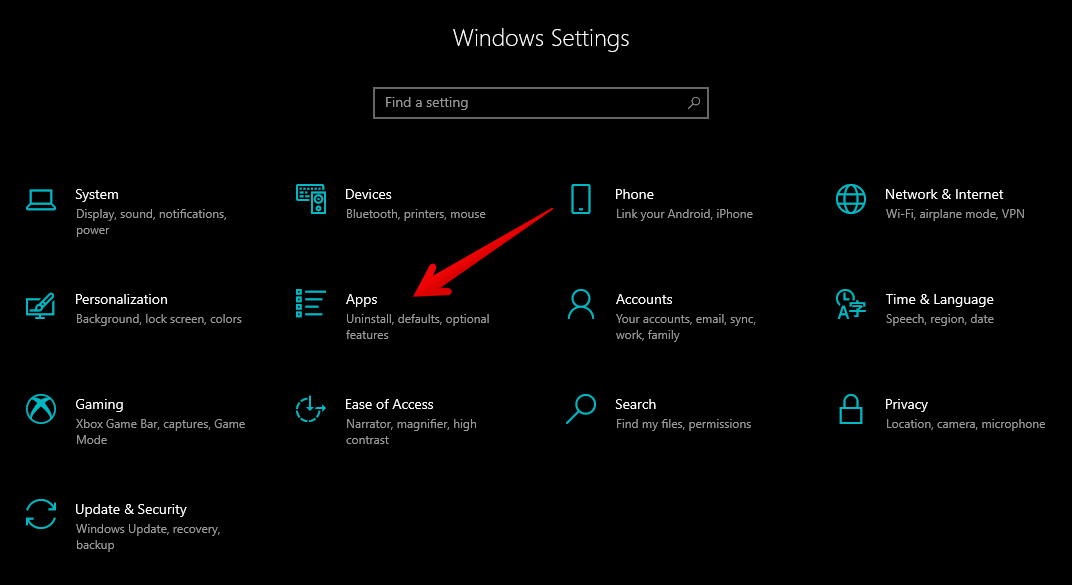
- To do this, you need to enter Windows Settings. With this in mind, press the Win+I in the combination. Once you’re there, click on Apps.

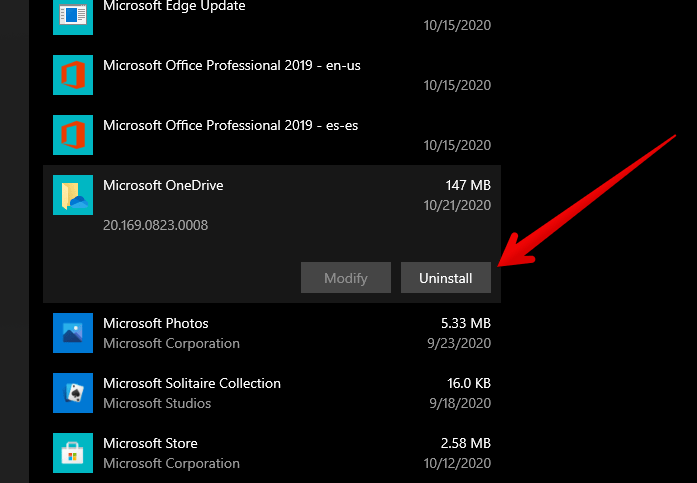
- A list of available apps and features will be displayed immediately. Please scroll down to get Microsoft OneDrive. Then click on Uninstall.

How to Enable Microsoft OneDrive
To re-enable OneDrive on your computer, you just have to follow the following steps:
1. Enable OneDrive from Task Manager:
- Right-click on the taskbar and click on the task manager. OR press control+Shift+Esc button together to open the task manager directly.
- In the task manager, go to the startup tab and the find for “Microsoft OneDrive“
- Right click on “Microsoft OneDrive” and click on Disable.

2. Reinstall OneDrive from Task Manager:
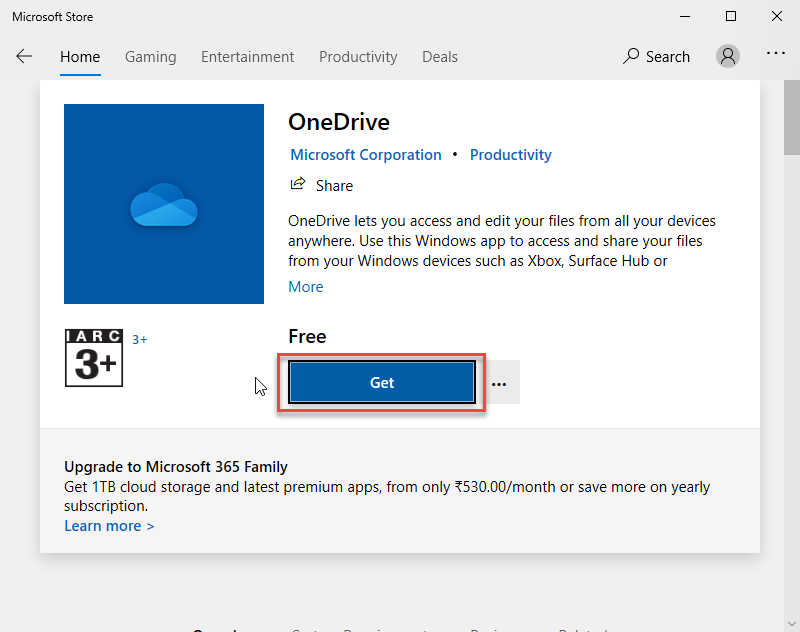
To reinstall it, you need to go to the Microsoft store and search for OneDrive and re-install it from there.
3. Link OneDrive to your PC
To do that, you just need to login to your Microsoft account and then you’ll be linked and start synchronization.
Finally, we have seen how to disable and enable OneDrive in Windows 10. Stay tuned for more news about our favorite operating system.
