

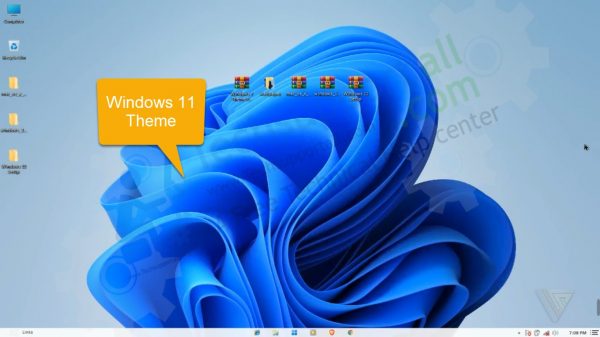
Windows 11 has been released by Microsoft and most users are highly impressed by the Windows 11 GUI (Graphical User Interface). The hardware requirements for running Windows 11 are a bit high for the users who have an old computer which can run only Windows 7. However, such users can enjoy the GUI of Windows 11 on their existing low-power computer by installing the Windows 11 theme. In this tutorial, we will describe in simple steps how to download Windows 11 theme for Windows 7 and then how to set Windows 11 theme so that you can enjoy its user-friendly interface.

Benefits & Risks of Installing Windows 11 Theme
When you install Windows 11 theme on your computer, then you get certain benefits, but you also expose your computer to certain risks. Therefore, you must know about both these factors before starting the installation of Windows 11 theme on Windows 10, 8, 7 operating systems.
A) Benefits
- Low Risk Install: The foremost benefit of installing Windows 11 theme is that you can enjoy its user interface on your computer without taking the risk of installing Windows 11. Maybe your computer doesn’t support Windows 11 or your data may get damaged while installing the new OS. However, you can save yourself from these situations by installing only the Windows 11 theme.
- Saves Time: The installation of Windows 11 theme gets completed in just a few minutes. While installing the new Windows 11 OS can take a lot of time depending upon the operating system which you are upgrading from.
- Hardware Doesn’t Matter: The minimum hardware requirements for Windows 11 are quite high for users who are running low-power computers. However, when you install Windows 11 theme, then your computer is basically running the old OS, but only its GUI has been altered.
B) Risks
- Install Carefully: While following the installation procedure, make sure that you follow the steps in the right order. Otherwise, the original GUI of your OS may be damaged. However, you can easily counter this problem by creating a restore point before starting the installation of the Windows 11 theme.
Now that you know the benefits and risks involved with the installation of Windows 11 theme on Windows 7, 8, 10 operating systems. It’s time to learn about the whole process.
Create System Restore Point before start
You must create a system restore point before installing the Windows 11 theme. This step is extremely important because if the Windows 11 theme installation goes bad, then you can easily restore the original settings and start using your computer normally. Follow the steps given below to create a system restore point in the Windows 7 OS. You can follow the same steps for the other versions of the Windows operating system as well.
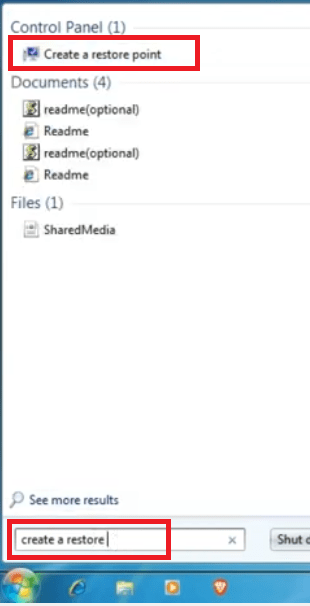
- Click the ‘Start’ button, in the search box type ‘create a restore’ and choose ‘Create a restore point’ from the search results.
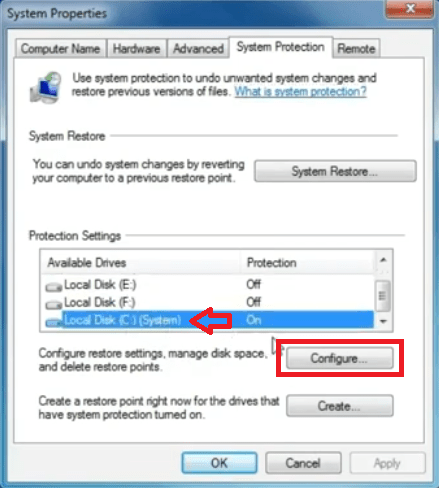
- In the System Properties window, choose ‘C’ drive and click on the ‘Configure’ button.
- In the Configure window, make sure under Restore Settings the ‘Restore system settings and previous versions of files’ option is selected, then click on the ‘OK’ button.

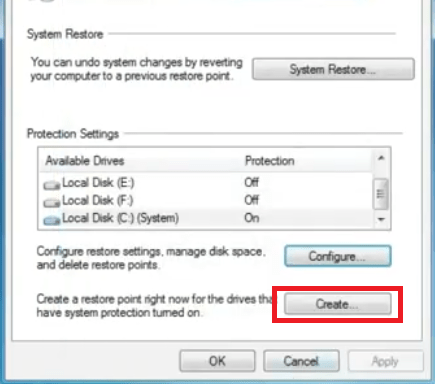
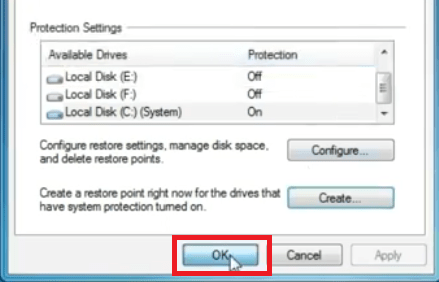
- Click on the ‘Create’ button to proceed.
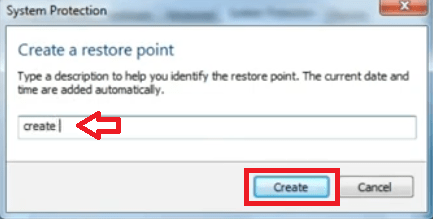
- In the Create a restore point window, type a name for the restore point, we typed ‘create’, then click on the ‘Create’ button.
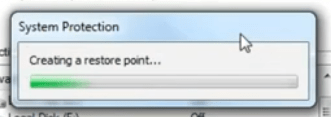
- Wait for the creation of the restore point.
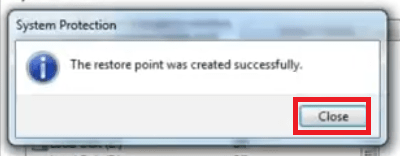
- When the restore point is created successfully, then click on the ‘Close’ button.
- Click on the ‘OK’ button on the System Properties window.


That’s it, you have successfully created a system restore point. Now you can start the installation of the Windows 11 theme and if something goes wrong, then you can always use the recently created restore point to get back to the present state.
Download Windows 11 Theme For Windows 7, 8, 10
The complete process to install the new Windows 11 theme is a multi-stage operation. You will have to complete the process using multiple applications, which you can download by using the links provided below. We have described the steps for Windows 7 operating system, but you can follow the same steps for Windows 8 and Windows 10 OS as well.
At any stage, if you feel something is wrong, then you can use the previously created Restore Point to reset your Windows to its normal condition.
1) Install Windows Theme Patcher
You should start the Windows 11 theme installation by patching your Windows OS theme. Before patching your Windows OS theme, you must download the Windows 7 theme patcher application. Follow the steps given below.
- Download the Windows 7 Theme Patcher zip file from this link and save the zip file on your Windows desktop.
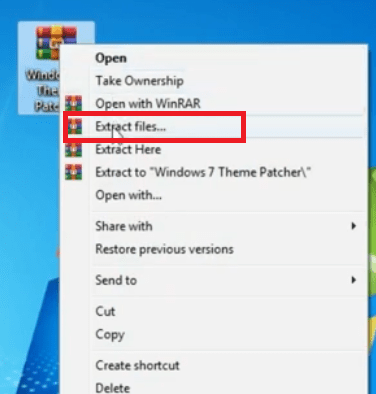
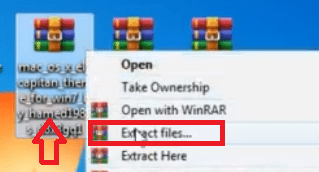
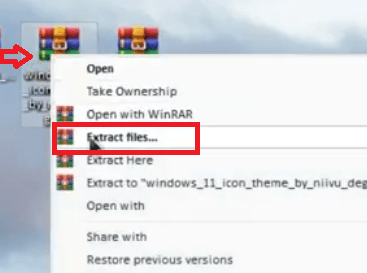
- Right click the Windows 7 Theme Patcher zip file and select ‘Extract files’ from the options.
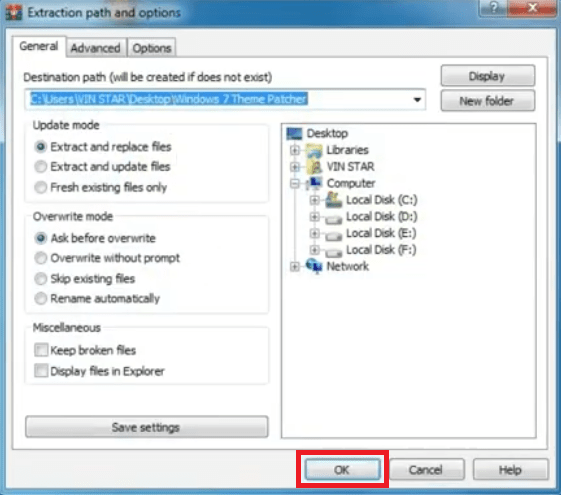
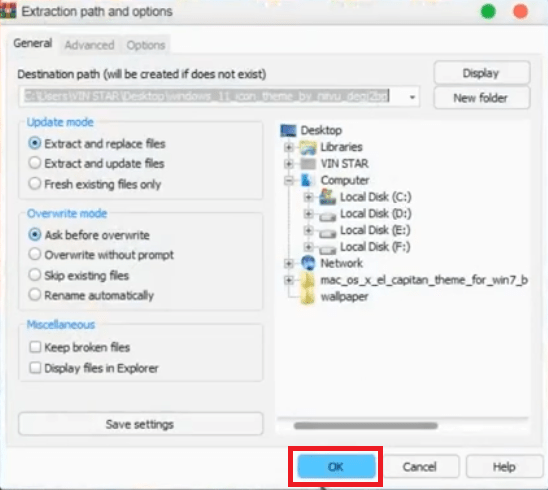
- In the Extraction window, make sure that the extraction folder will be on Windows desktop, then click on the ‘OK’ button.
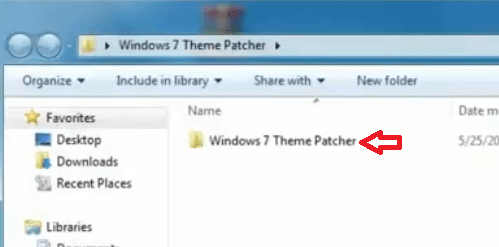
- Go into ‘Windows 7 Theme Patcher’ folder and double click the ‘Windows 7 Theme Patcher’ folder inside it.
- Locate and double click the ‘Theme resource changer’ folder.

- Inside the Theme resource changer folder, you will find two files one for x64 OS and the other for the x86 OS. Choose and right click the file which suits your OS type, then select ‘Run as administrator’ from the options.

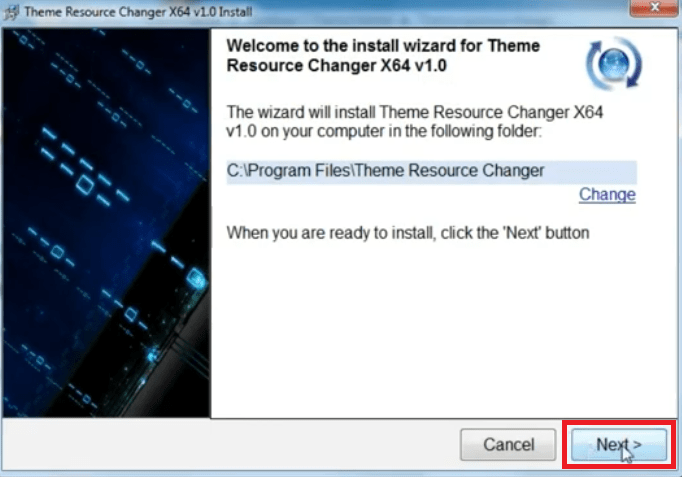
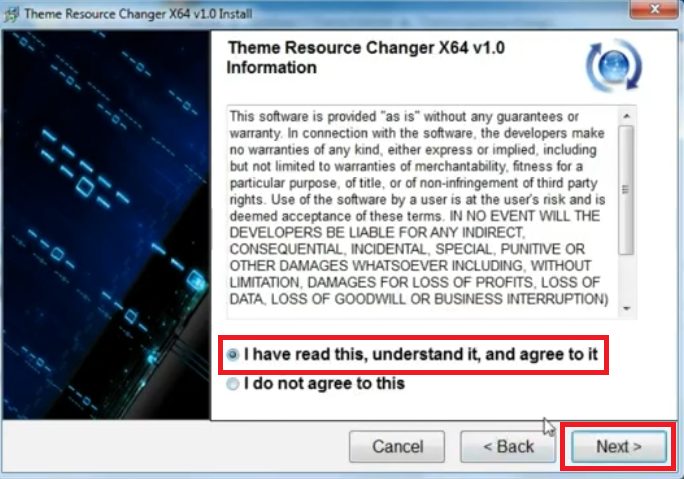
- In the Theme Resource Changer application, click on the ‘Next’ button to proceed.
- Accept the agreement by clicking on the ‘I have read this, understand it, and agree to it’ option, then click on the ‘Next’ button.
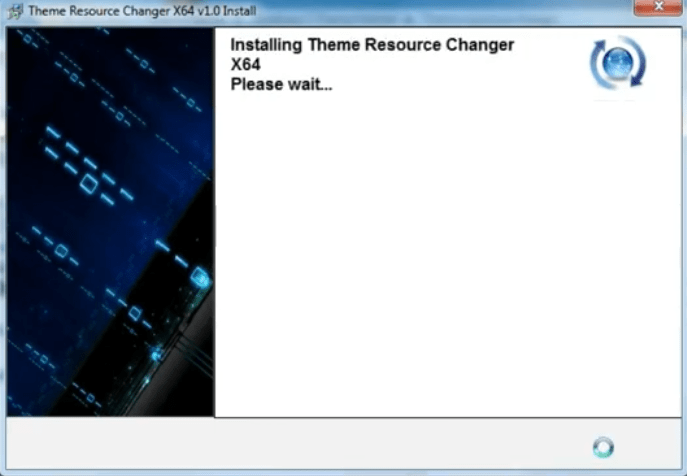
- Wait for the installation of the Theme Resource Changer on your computer.
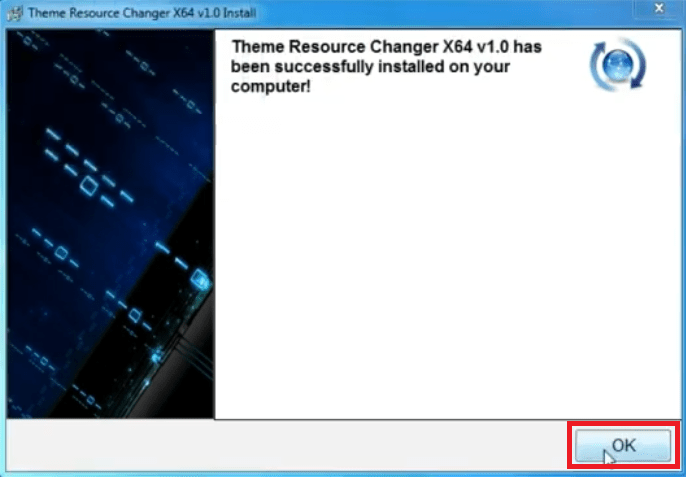
- When you see the message that the installation is successful, then click on the ‘OK’ button to close the application.


That’s it, you have installed Theme Resource Changer on your computer. Now, you need to patch the relevant DLL files on your Windows.
2) Run Universal Theme Patcher
Follow the steps given below to patch the DLL files which are necessary for the alteration of the default theme on your Windows operating system.
- Open the ‘Windows 7 Theme Patcher’ folder on your desktop, then, inside it, double-click to open the ‘Windows 7 Theme Patcher‘ folder.
- In the Windows 7 Theme Patcher folder, locate and double click the ‘Universal Theme Patcher’ folder.
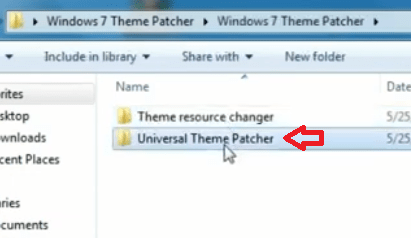
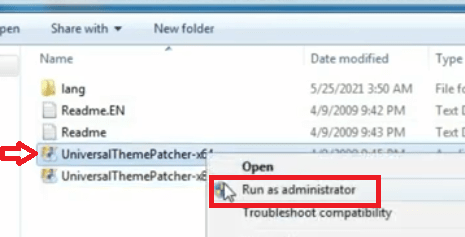
- Inside the Universal Theme Patcher folder, you will find two files, named the ‘UniversalThemePatcher-x64’ and the ‘UniversalThemePatcher-x86’. Choose and right click the file which is related to your OS version, then select ‘Run as administrator’ from the options.
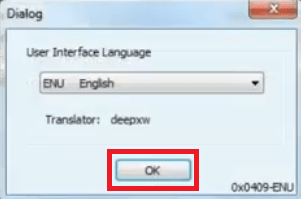
- In the Dialog box, choose your preferred language, then click on the ‘OK’ button.
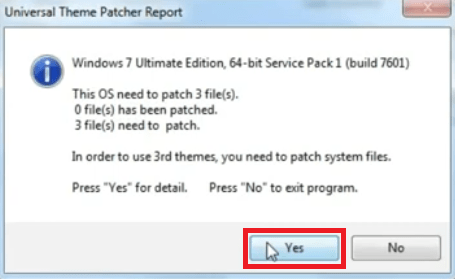
- Click on the ‘Yes’ button to proceed.
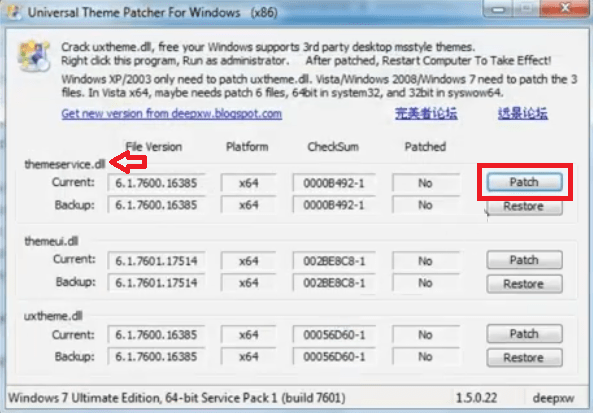
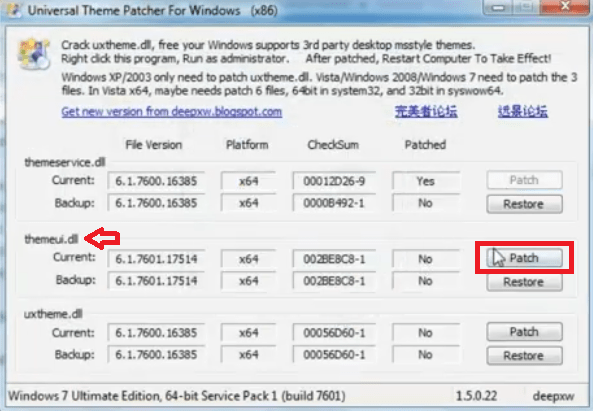
- In the Universal Theme Patcher application, patch the ‘themeservice.dll’ file by clicking on the ‘Patch’ button associated with it.
- Click on the ‘OK’ button to confirm the patch is successful.

- Patch the ‘themeui.dll’ file by clicking on the ‘Patch’ button related to it.
- Click on the ‘OK’ button to confirm the patch.
- Patch the ‘uxtheme.dll’ file by clicking on the ‘Patch’ button associated with it.
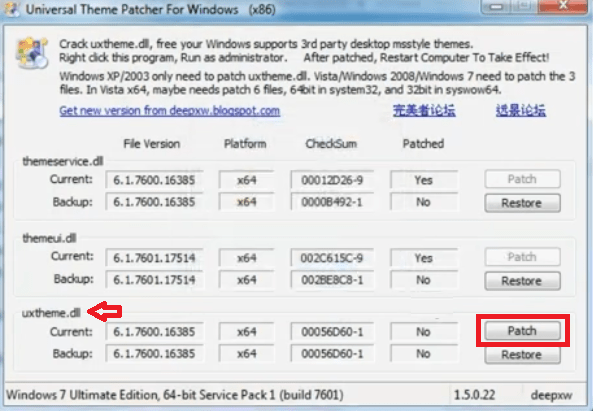
- Click on the ‘OK’ button to confirm the patch.
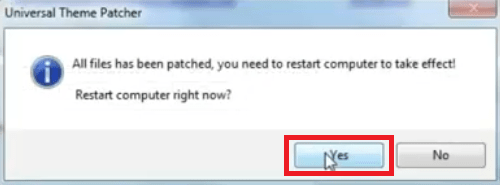
- Click on the ‘Yes’ button to restart your computer so that the changes can take effect.


That’s it, you have successfully patched the Windows theme on your Windows computer.
3) Install Windows 11 New Theme
Now that you have successfully patched your Windows theme, it’s time to install the new theme. Follow the steps given below.
- Download the Mac OS X Theme file from this link and save the zip file on the desktop of your Windows.
- Right click on the Mac OS X Theme zip file and choose “Extract files” from the options.
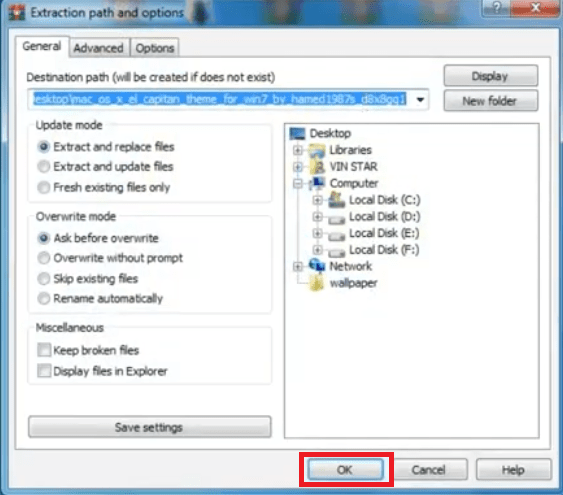
- In the Extraction window, make sure that the extraction folder is on Windows desktop, then click on the ‘OK’ button to proceed.
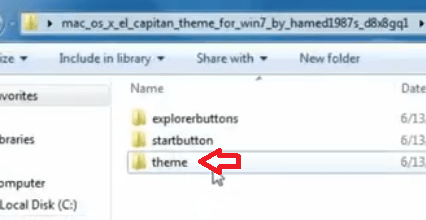
- Go into ‘mac os x el capitan’ folder on your desktop and double click the ‘theme’ folder inside it.
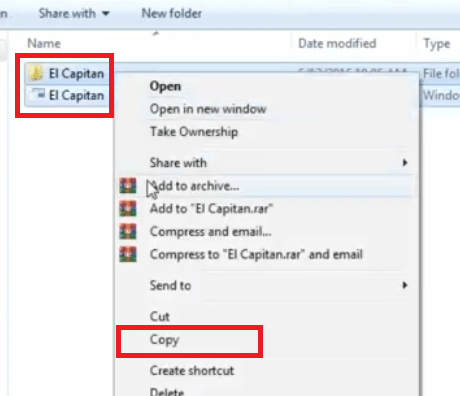
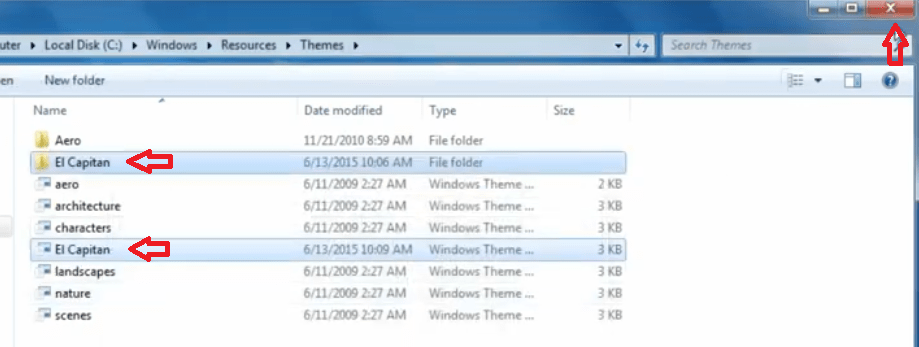
- Inside the Theme folder, select and right click the ‘El Capitan’ folder and the ‘El Capitan’ theme file, then choose ‘Copy’ from the options.
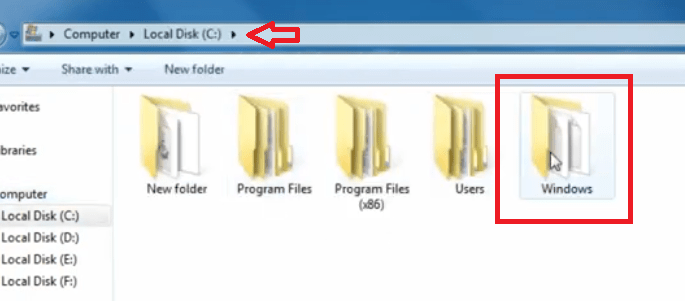
- In the Windows Explorer, go inside the ‘C’ drive and double click to enter ‘Windows’ folder.
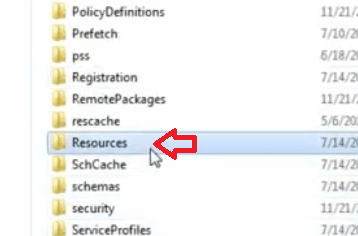
- Inside the Windows folder, locate and double click to enter the ‘Resources’ folder.
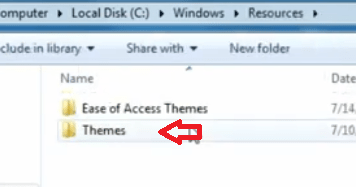
- Inside the Resources folder, double click to enter the ‘Themes’ folder.
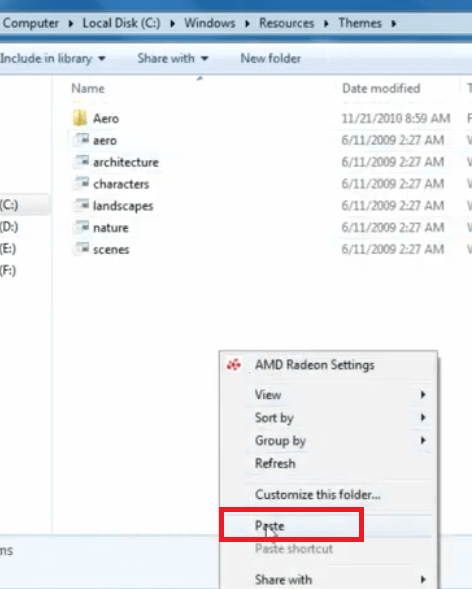
- Inside the Themes folder, right click and select ‘Paste’ from the options to paste the files copied in Step 5.
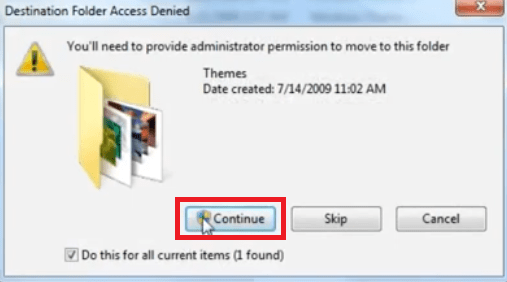
- Click on the ‘Continue’ button to confirm the action.
- When you see that the El Capitan folder and file have been copied into the Themes folder, then ‘Close’ the Themes folder.
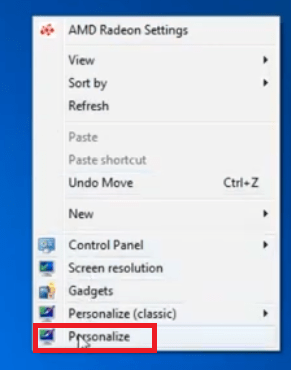
- Now is the time to apply the new theme you just now copied in the Theme folder. To do this, right click on the Windows desktop and choose ‘Personalize’ from the options.
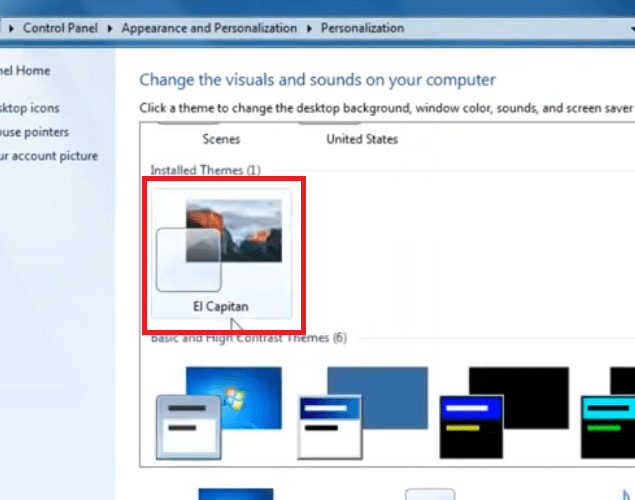
- In the Personalization folder, scroll to the ‘Installed Themes‘ section, then locate and select the ‘El Capitan’ theme.
- Wait for the theme to apply.
- When the theme has been successfully applied, then click on the ‘Close’ button to close the Personalization window.


That’s it, you have successfully installed a new Windows theme. This theme may look like Mac OS, but you need to make some other changes to make this new theme look exactly like the Windows 11 GUI.
4) Install Windows Icons Pack
Although you have installed a new theme that looks very similar to the Windows 11 theme, but there are some important details that doesn’t match with the Windows 11 GUI. One such detail is the icons used in this theme. Therefore, we should first change the icons before moving to other steps.
- Download the Windows 11 Icon Theme file from this link and save the zip file on your Windows desktop.
- Right click on the Windows 11 Icon Theme zip file and choose ‘Extract files’ from the options.
- In the Extraction window, make sure that the extraction folder is on the Windows desktop, then click on the ‘OK’ button to proceed.
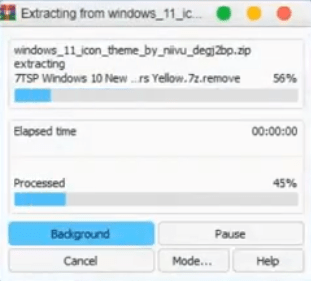
- Wait for the files to extract in the designated folder.
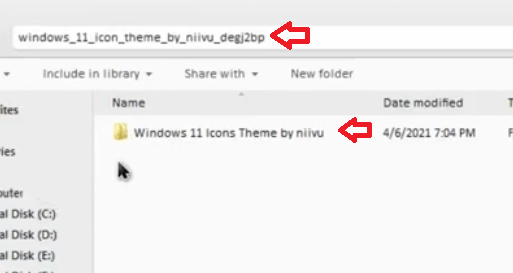
- Go into ‘windows 11 icon theme’ folder on your desktop and double click the ‘Windows 11 Icons Theme’ folder inside it.
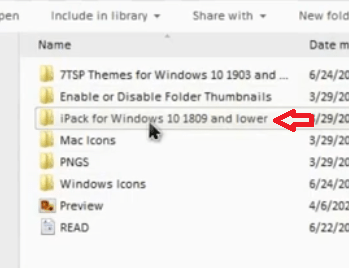
- In the Windows 11 Icons Theme folder, double click to open ‘iPack for Windows 10 1809 and lower’ folder.
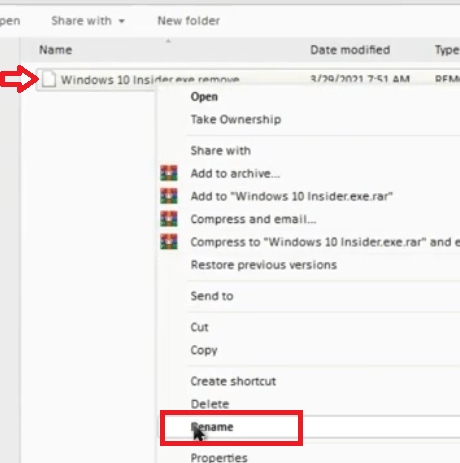
- Right click the file inside the folder and choose ‘Rename’ from the options.
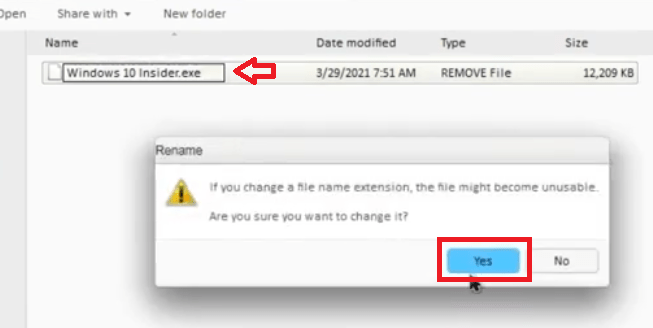
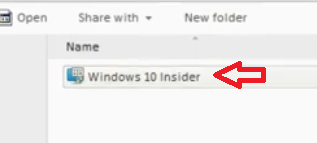
- Rename the file to ‘Windows 10 Insider.exe’, then click on the ‘Yes’ button to confirm the new name.
- Double click the ‘Windows 10 Insider’ file to run it.
- Wait for its files to extract on your computer.
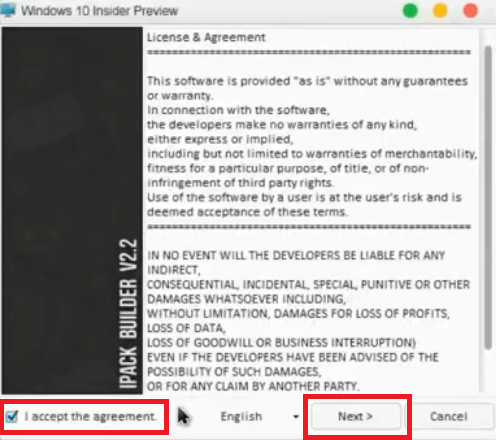
- In the Welcome screen, choose the ‘I accept the agreement’ option, then click on the ‘Next’ button.
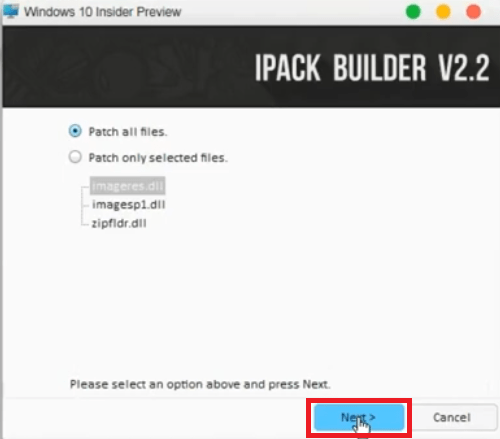
- Select the option ‘Patch all files’, then click on the ‘Next’ button to proceed.
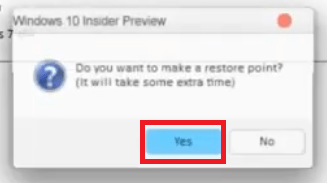
- Click on the ‘Yes’ button to create the restore point.
- Wait for the creation of the restore point.
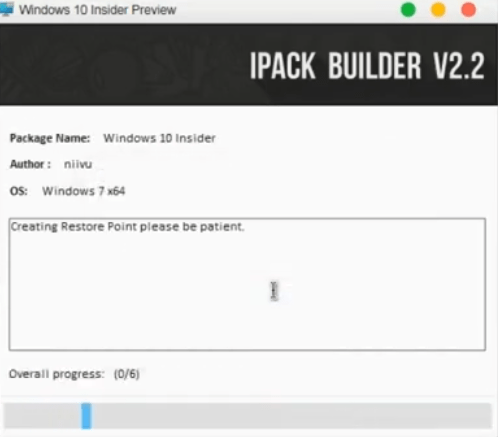
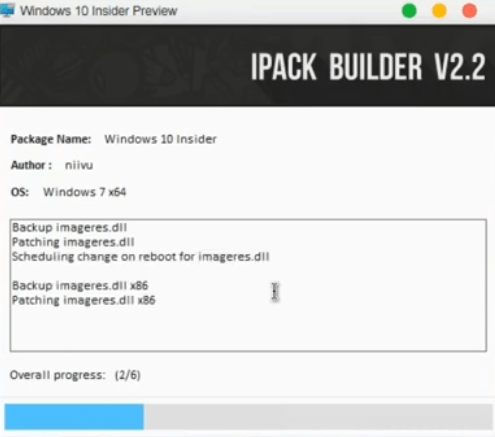
- Wait as the application to complete its operation.
- When the operation is finished, then click on the ‘Finish’ button to restart your computer.


That’s it, you have successfully patched the Windows icons on your computer and they are ready to be replaced. Now is the time to update the wallpaper, then we will replace the old icons with the new ones.
5) Set up Windows 11 Wallpaper
Windows 11 uses a unique set of wallpapers which gives a distinct look to the OS. Follow the steps given below to arrange and update these wallpapers.
- Visit this link and you will find ‘img0’ and ‘img19’ files, which are similar to Windows 11 generic wallpapers. Select, copy, and save these wallpapers in the “wallpaper” folder on your Windows desktop. You may download Windows 11 wallpaper as well.
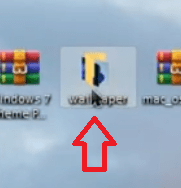
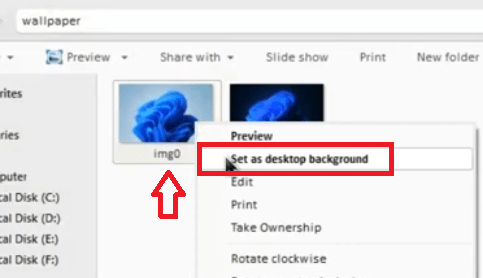
- Double-click the “wallpaper” folder on the desktop.
- Select and right click the ‘img0’ file and choose ‘Set as desktop background’ from the options.


That’s it, you have changed your default Windows wallpaper to the Windows 11 wallpaper.
6) Execute Windows 11 theme Setup
Now that you have changed your Windows wallpaper, it’s time to makes some other minor changes which are necessary to create a look which is exactly like Windows 11. Follow the steps given below.
- Download the Windows 11 Setup file and save the zip file on your Windows desktop.
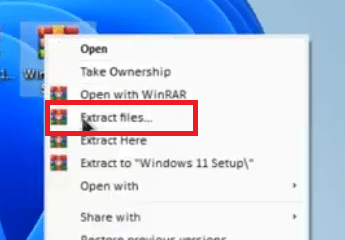
- Right click the Windows 11 Setup zip file and choose ‘Extract files’ from the options.
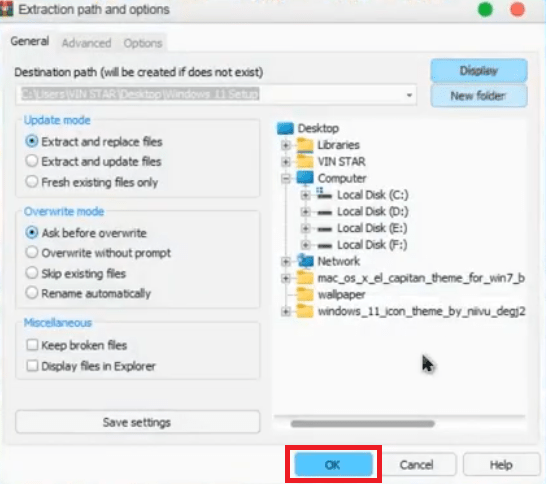
- In the Extraction window, ensure that the extraction folder is on the Windows desktop, then click on the ‘OK’ button to proceed.
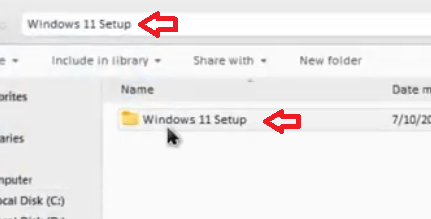
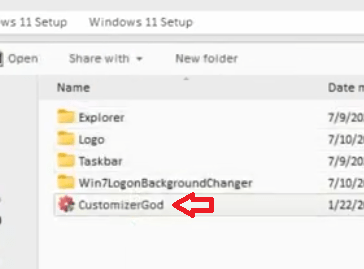
- Go into ‘Windows 11 Setup’ folder on your desktop and double click the ‘Windows 11 Setup’ folder inside it.
- In the Windows 11 Setup folder, double click to run the ‘CustomizerGod’ application file.
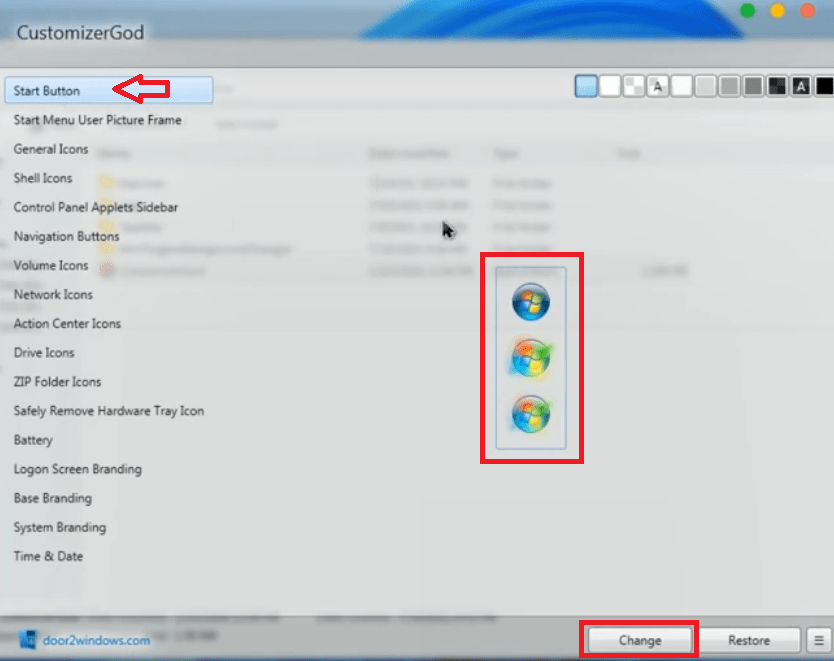
- In the CustomizerGod window, choose the ‘Start Button’ option, select ‘start button‘ icons, then click on the ‘Change’ button.
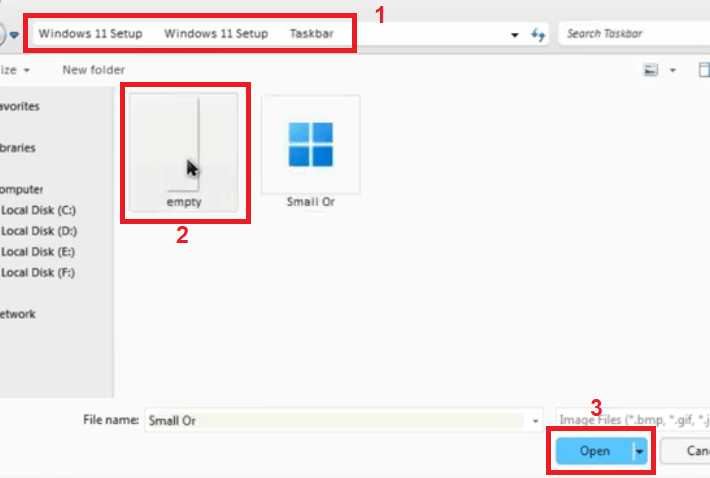
- In the Browse window, go to ‘Windows 11 Setup\Windows 11 Setup\Taskbar’ folder, then click to select ‘empty’ file. Finally, click on the ‘Open’ button.
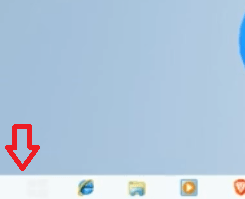
- You will see that the ‘Start button icon’ will be removed from your Windows Taskbar, just like in Windows 11.
- In the CustomizerGod window, choose the ‘Navigation Buttons’ option, select ‘Frame’ icon, then click on the ‘Change’ button.
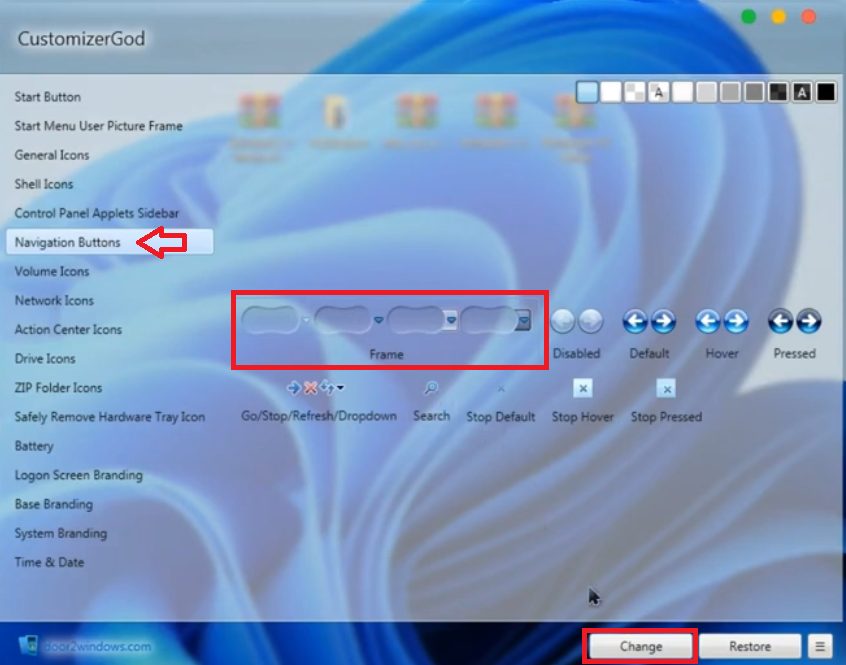
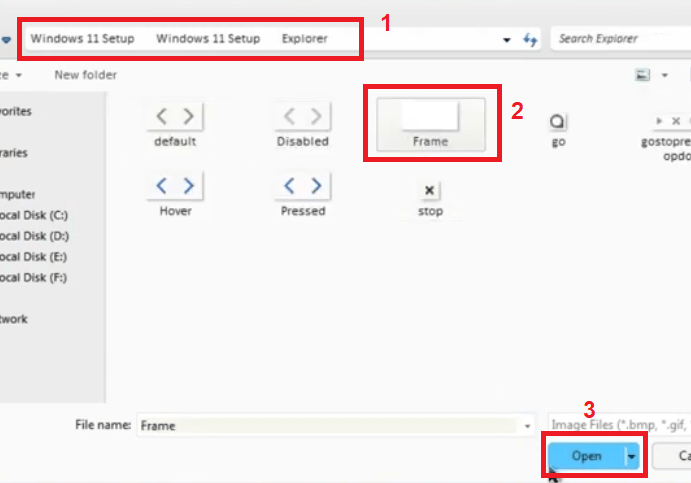
- In the Browse window, go to ‘Windows 11 Setup\Windows 11 Setup\Explorer’ folder, then click to select ‘Frame’ file. Finally, click on the ‘Open’ button.
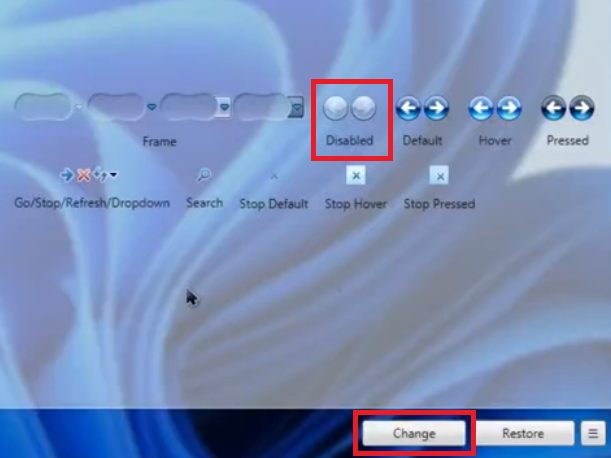
- Under Navigation Buttons option, choose ‘Disabled’ icon, then click on the ‘Change’ button.
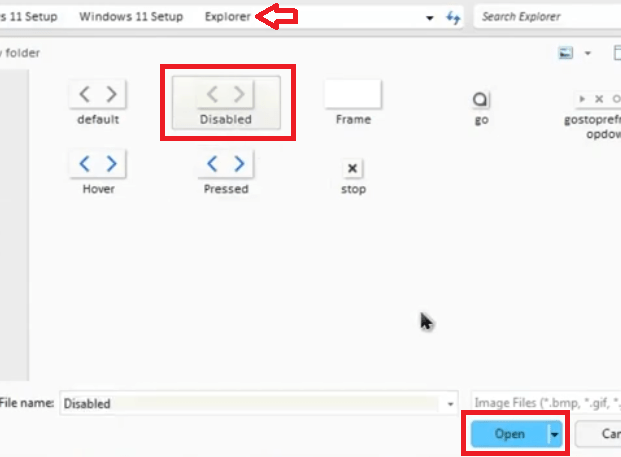
- Under ‘Windows 11 Setup\Windows 11 Setup\Explorer’ folder, select ‘Disabled’ file, then click on the ‘Open’ button.
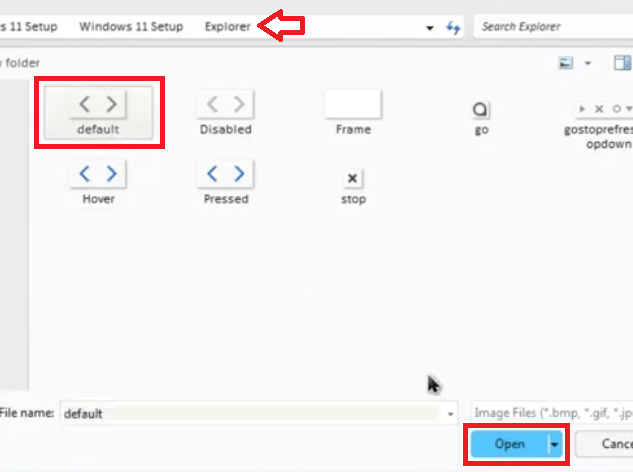
- Under Navigation Buttons option, choose ‘default’ icon, then click on the ‘Change’ button.

- Under ‘Windows 11 Setup\Windows 11 Setup\Explorer’ folder, select ‘default’ file, then click on the ‘Open’ button.
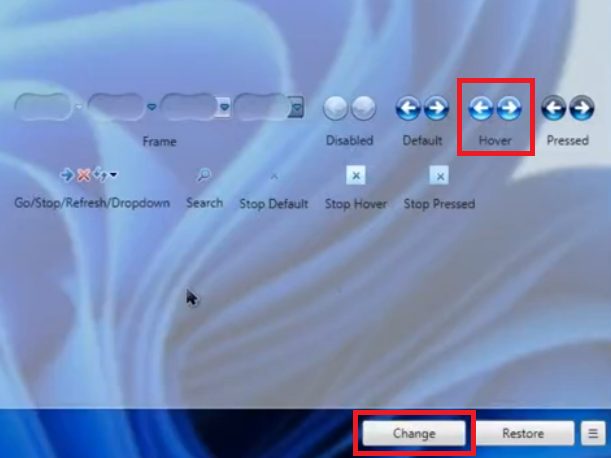
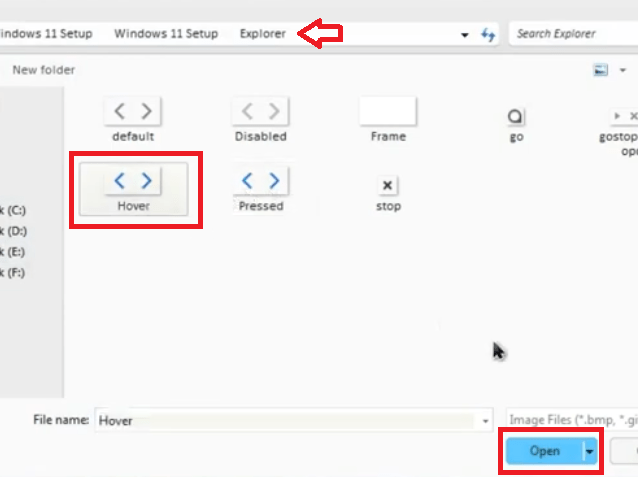
- Under Navigation Buttons option, choose ‘Hover’ icon, then click on the ‘Change’ button.
- Under ‘Windows 11 Setup\Windows 11 Setup\Explorer’ folder, select ‘Hover’ file, then click on the ‘Open’ button.
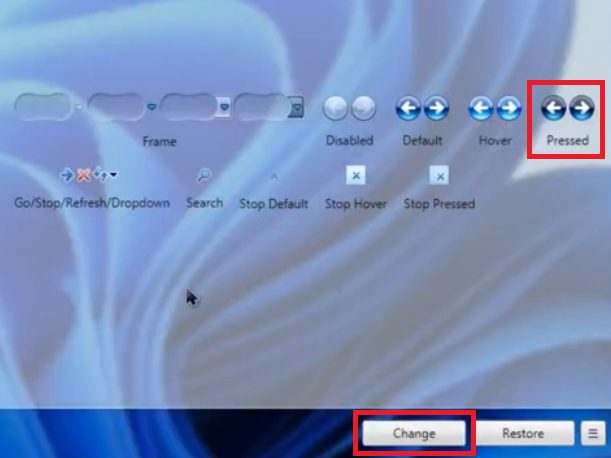
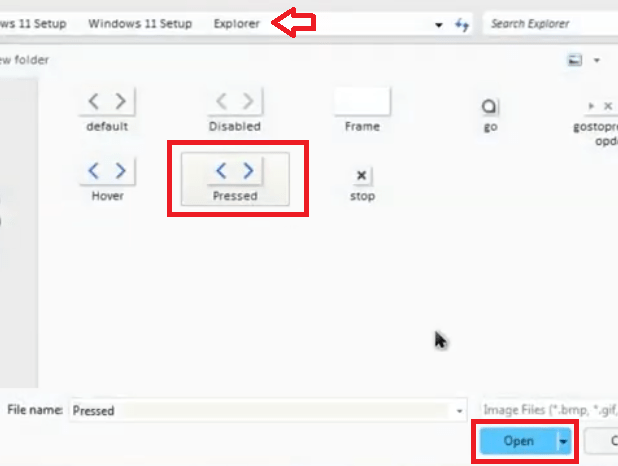
- Under Navigation Buttons option, choose ‘Pressed’ icon, then click on the ‘Change’ button.
- Under ‘Windows 11 Setup\Windows 11 Setup\Explorer’ folder, select ‘Pressed’ file, then click on the ‘Open’ button.
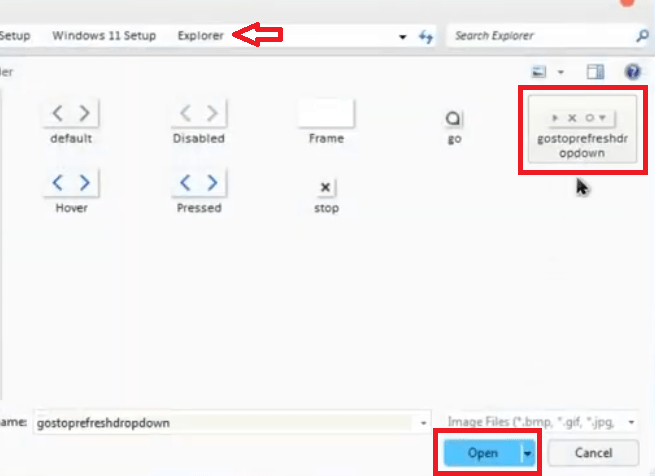
- Under Navigation Buttons option, choose ‘Go/Stop/Refresh/Dropdown’ icon, then click on the ‘Change’ button.
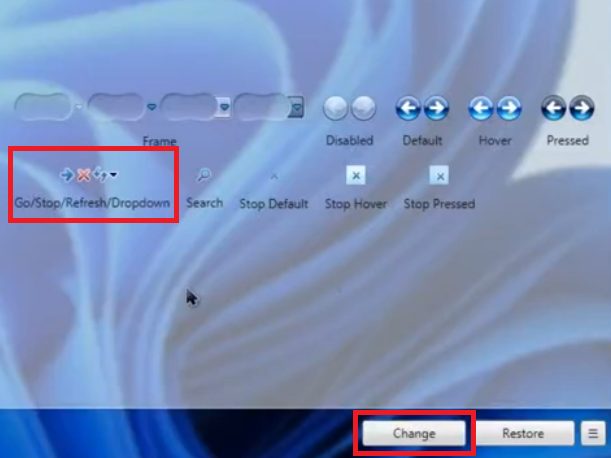
- Under ‘Windows 11 Setup\Windows 11 Setup\Explorer’ folder, select ‘gostoprefreshdropdown’ file, then click on the ‘Open’ button.
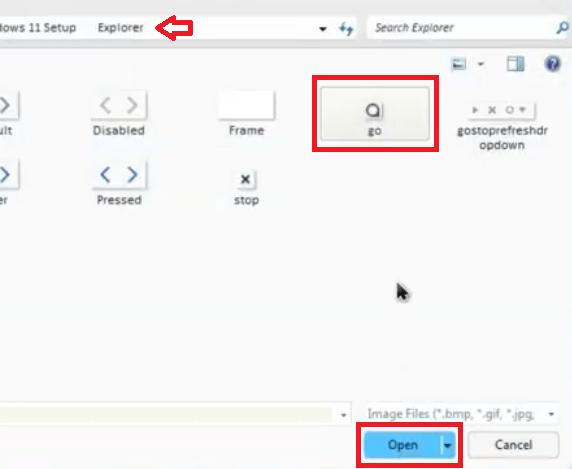
- Under Navigation Buttons option, choose ‘Search’ icon, then click on the ‘Change’ button.
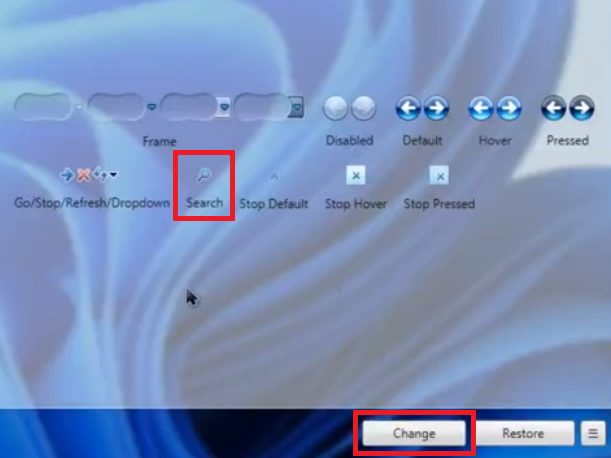
- Under ‘Windows 11 Setup\Windows 11 Setup\Explorer’ folder, select ‘go’ file, then click on the ‘Open’ button.
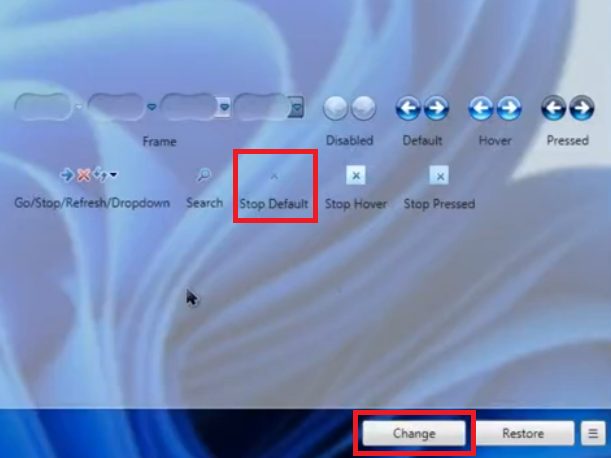
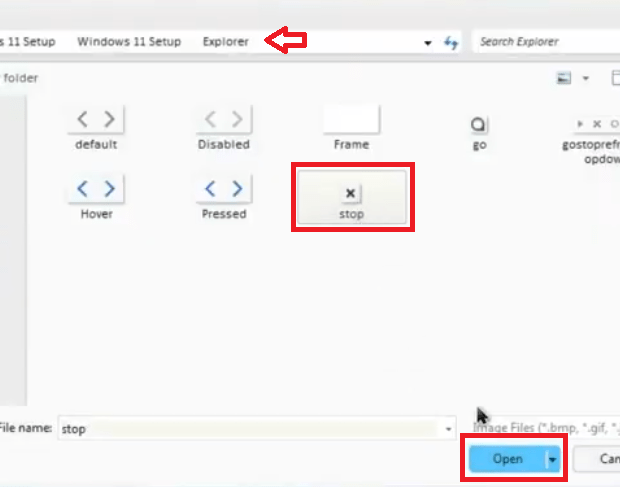
- Under Navigation Buttons option, choose ‘Stop Default’ icon, then click on the ‘Change’ button.
- Under ‘Windows 11 Setup\Windows 11 Setup\Explorer’ folder, select ‘stop’ file, then click on the ‘Open’ button.
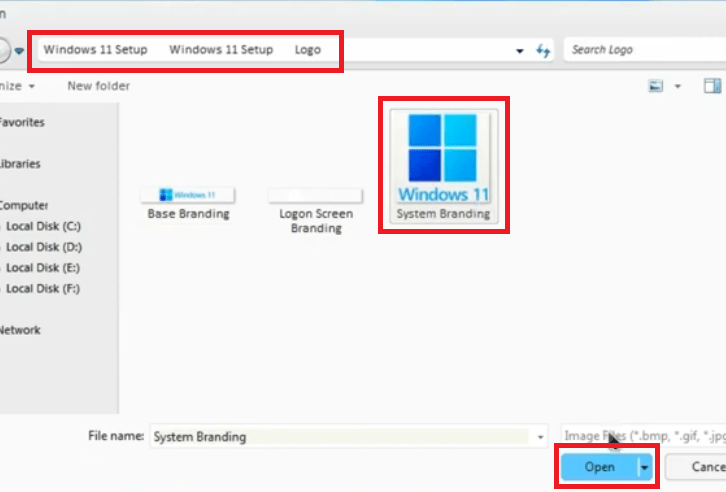
- In the CustomizerGod window, choose the ‘System Branding’ option, select ‘Windows Logo’ icon, then click on the ‘Change’ button.
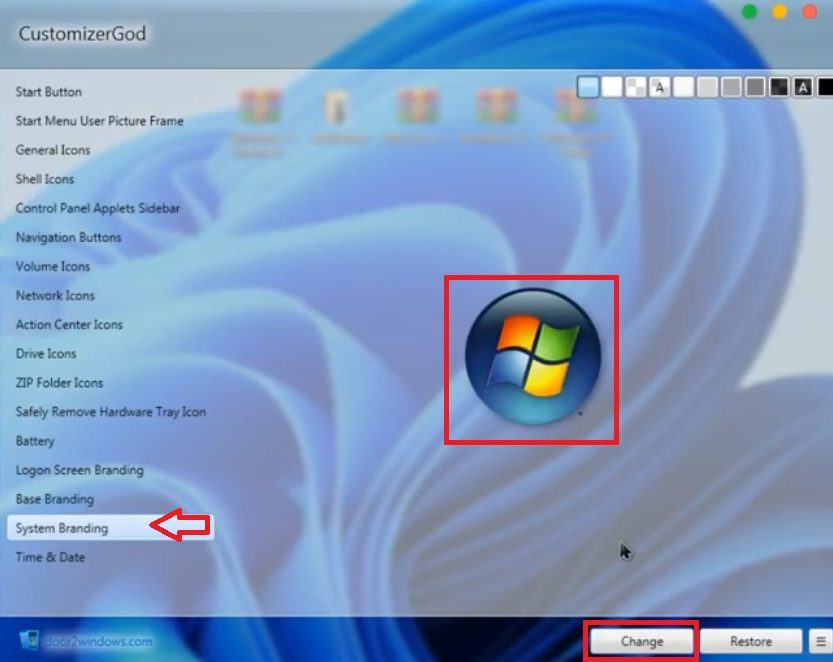
- In the Browse window, go to ‘Windows 11 Setup\Windows 11 Setup\Logo’ folder, then click to select ‘System Branding’ file. Finally, click on the ‘Open’ button.
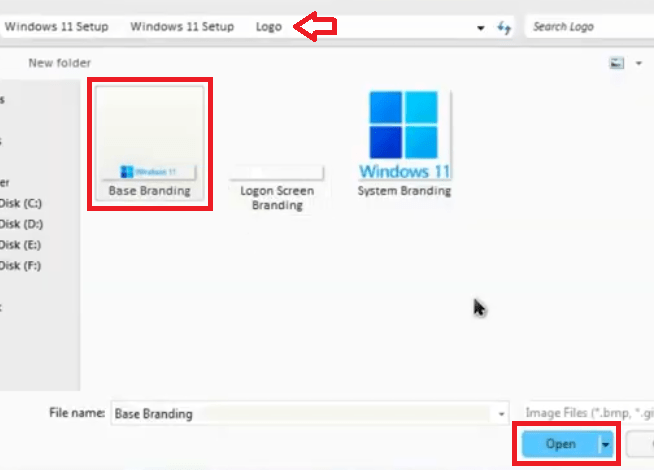
- In the CustomizerGod window, choose the ‘Base Branding’ option, select ‘Windows Branding’ icon, then click on the ‘Change’ button.
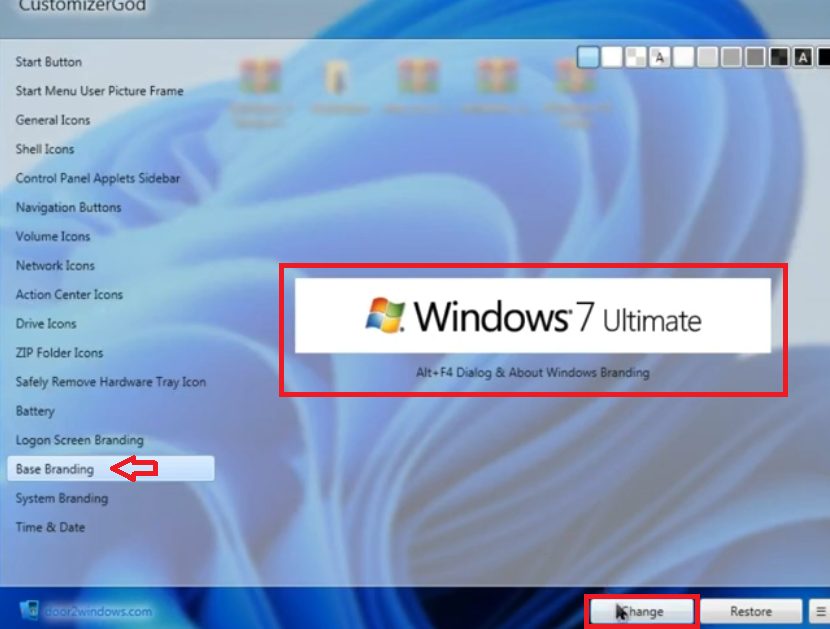
- Under ‘Windows 11 Setup\Windows 11 Setup\Logo’ folder, choose the ‘Base Branding’ file, then click on the ‘Open’ button.
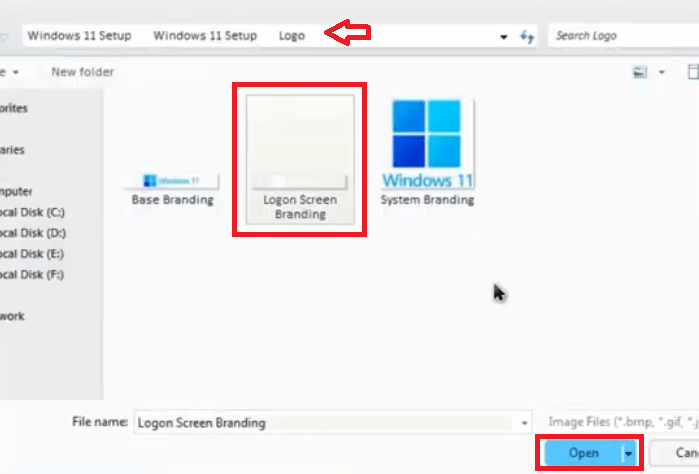
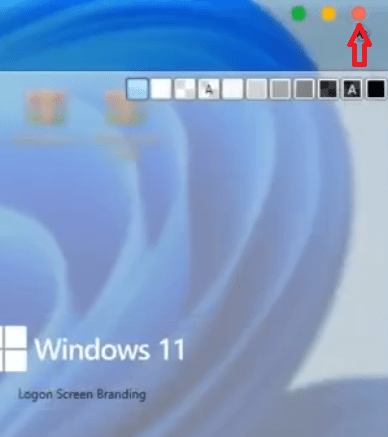
- In the CustomizerGod window, choose the ‘Logon Screen Branding’ option, select ‘Windows Logon’ icon, then click on the ‘Change’ button.
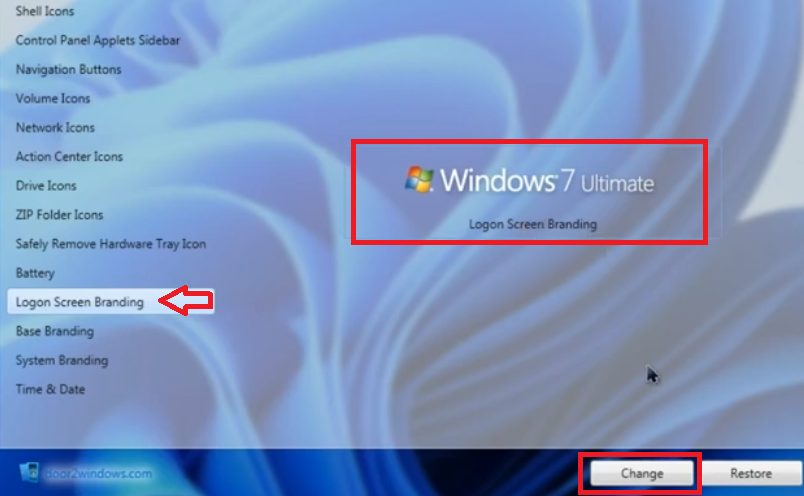
- Under the ‘Windows 11 Setup\Windows 11 Setup\Logo’ folder, choose the ‘Logon Screen Branding’ file, then click on the ‘Open’ button.
- Finally, click on the ‘Close’ button to close the CustiomizerGod application.
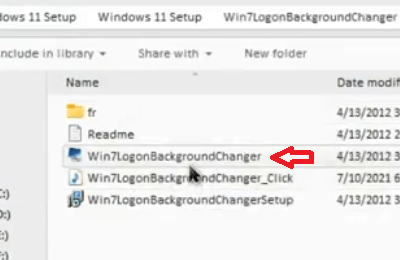
- Go inside ‘Windows 11 Setup\Windows 11 Setup’ folder on the desktop, then double click to enter the ‘Win7LogonBackgroundChanger’ folder.
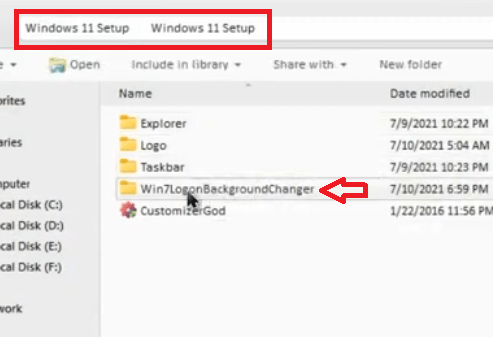
- Double click to run the ‘Win7LogonBackgroundChanger’ file.
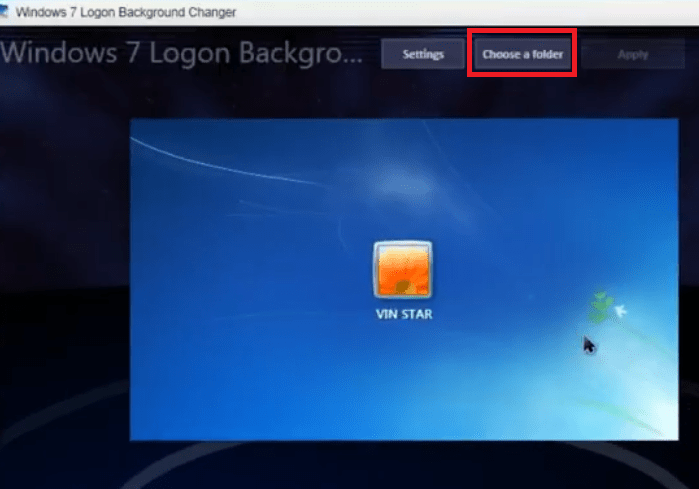
- In the Windows 7 Logon Background Changer application, click on the ‘Choose a folder’ button.
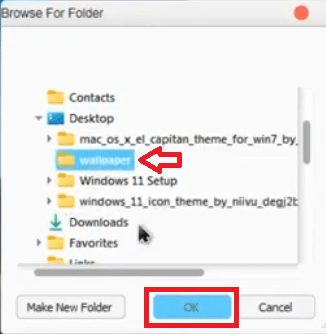
- In the Browse window, browse to ‘wallpaper’ folder on your desktop where you saved Windows 11 wallpapers, then click on the ‘OK’ button.
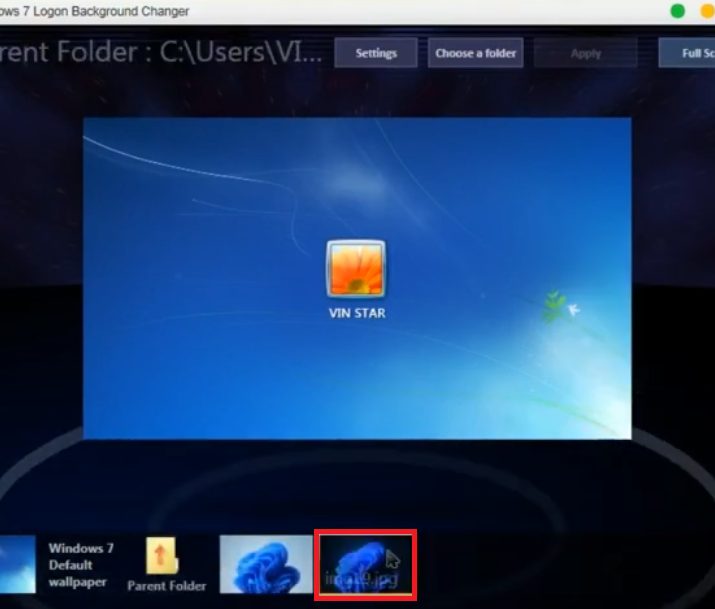
- Select the ‘img19’ file.
- Click on the ‘Apply’ button.
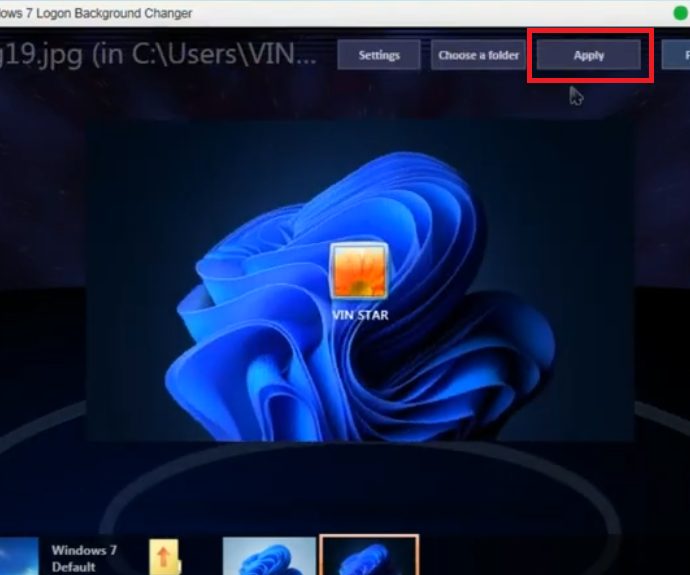
- Wait for the wallpaper to apply.
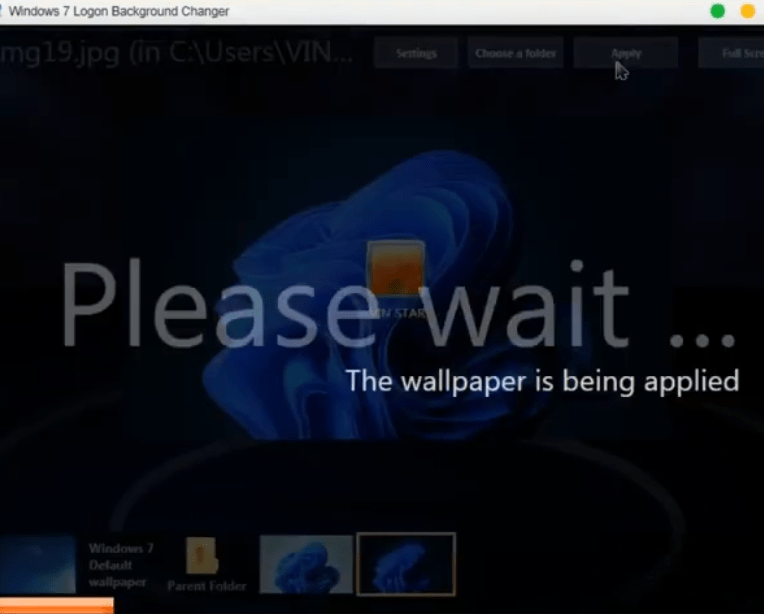
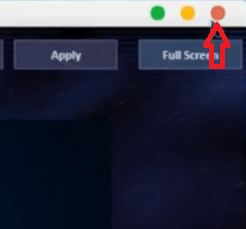
- Finally, close the application by clicking on the ‘Close’ button.


That’s it, you have successfully changed all the icons, logos and wallpapers on your Windows 7 to the ones which are identical to the Windows 11 interface. Now is the time to make the Windows Taskbar look exactly as in the Windows 11.
7) Set your Taskbar as like Windows 11
In the Windows 11, the Start button is at the center of the Taskbar along with other quick launch icons, which gives a distinct look to the Windows Desktop. Follow the steps given below to make your Taskbar look like that.
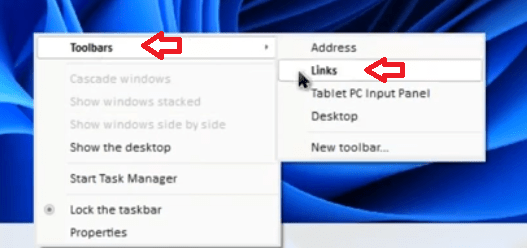
- Right-click on the Windows Taskbar, click on ‘Toolbars’ and select ‘Links’ from the options.
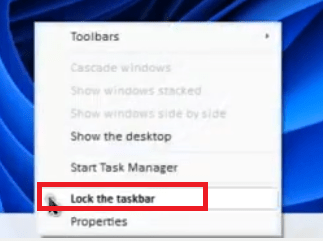
- Right click on the Windows Taskbar, select ‘Lock the Taskbar’ from the options.
- Click, press and hold the ‘Links’ on the Taskbar and drag it to the right side towards the Quick Launch icons.
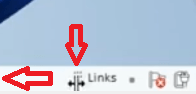
- Now, click, press and hold the ‘Quick Launch’ on the Taskbar and drag it to the left side towards Links, until it crosses over to the left side of the Links.
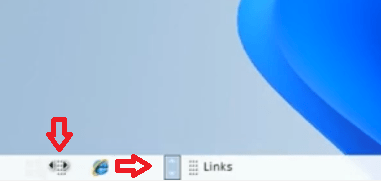
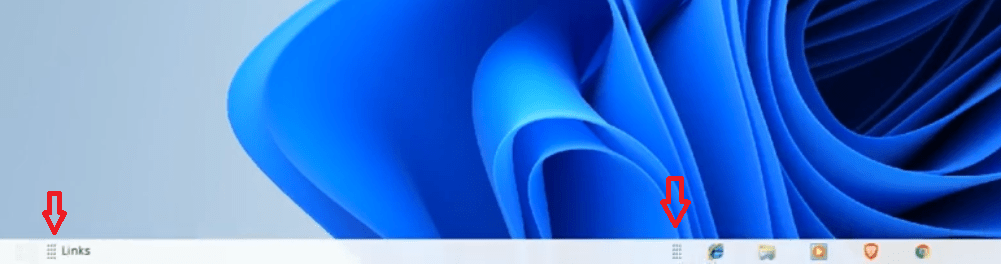
- Make sure that Quick Launch icons are placed in the middle of the Windows Taskbar and on the left side of the Links.
- Go inside ‘Windows 11 Setup\Windows 11 Setup’ folder on the desktop, then locate and right click the ‘Taskbar’ folder and choose ‘Copy’ from the options.
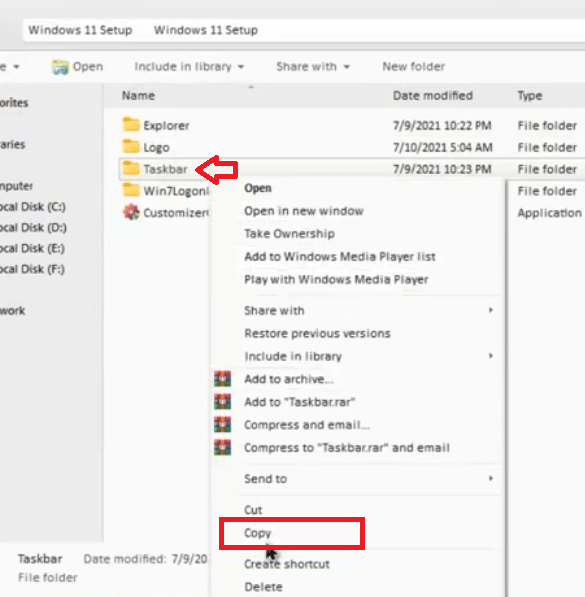
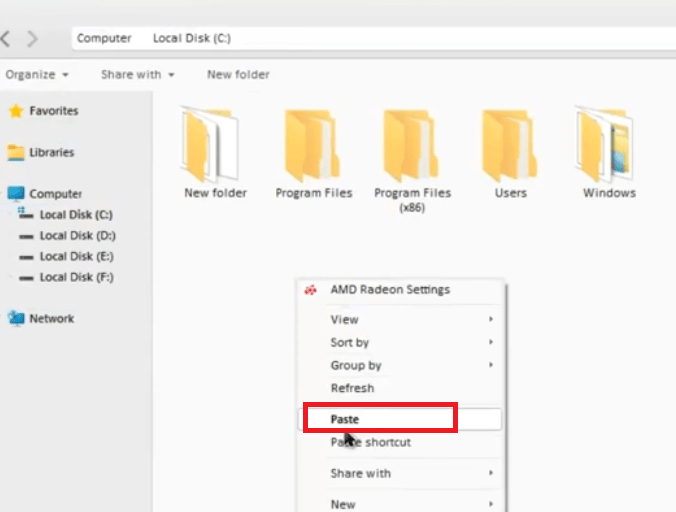
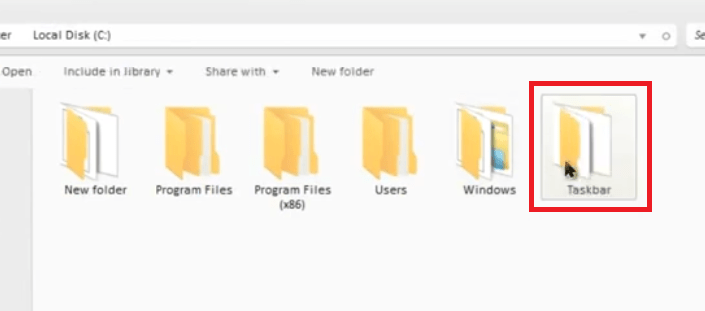
- In the Windows Explorer, go to the ‘C’ drive, right click and select ‘Paste’ from the options.
- Double click the newly copied ‘Taskbar’ folder to open it.
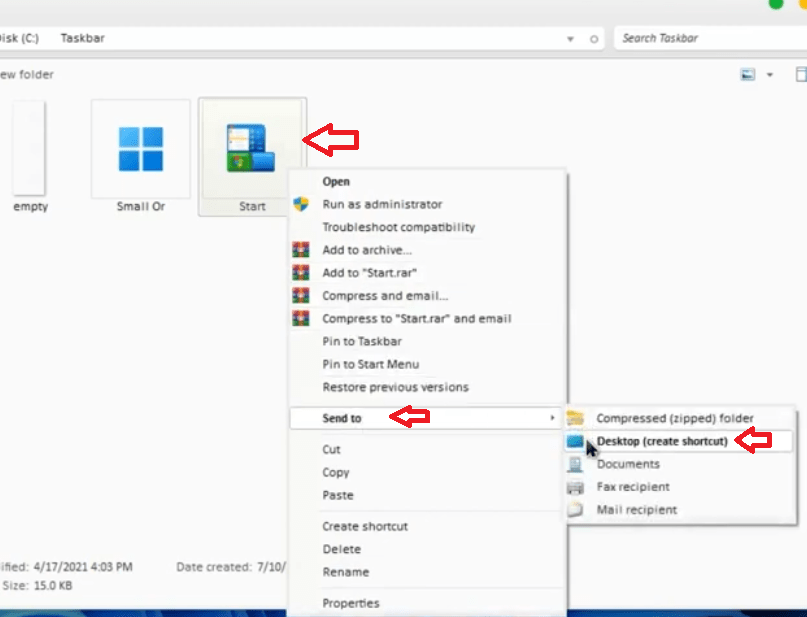
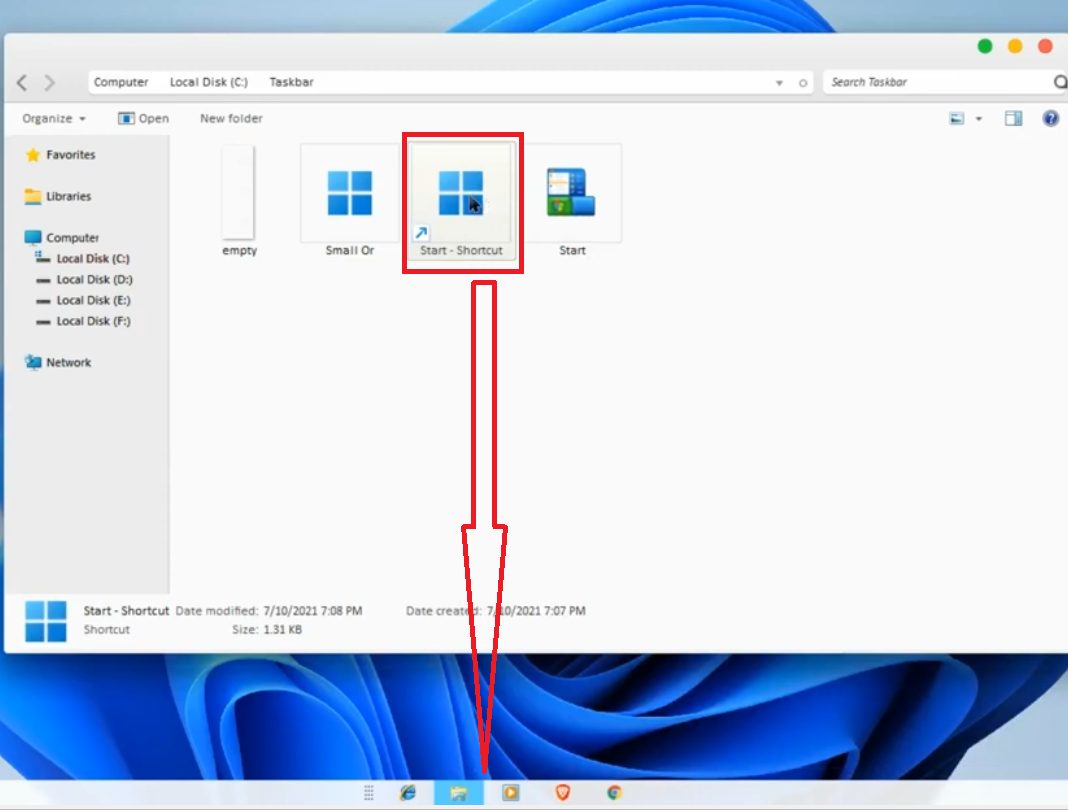
- Locate and right click the ‘Start’ file, choose ‘Send to’ option, then click on the ‘Desktop (create shortcut)’ option. This will create a Start Shortcut on your Windows Desktop.
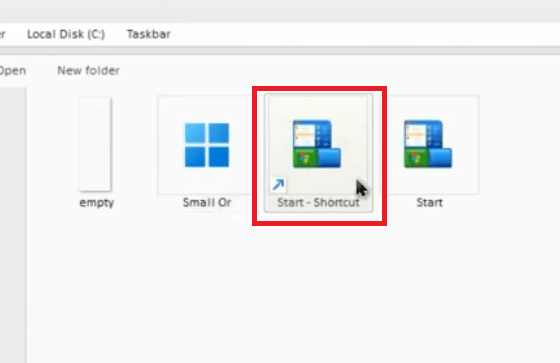
- Copy and Paste the ‘Start – Shortcut’ from your Windows Desktop into the Taskbar folder.
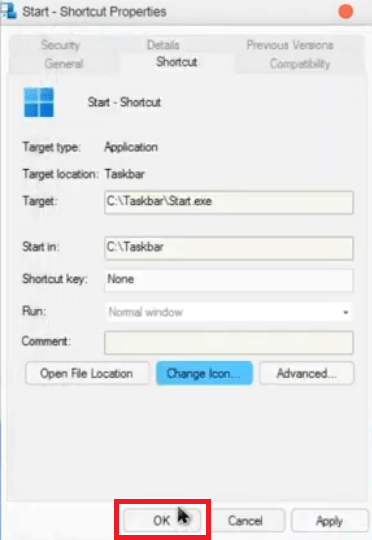
- Right click the ‘Start – Shortcut’ file and choose ‘Properties’ from the options.
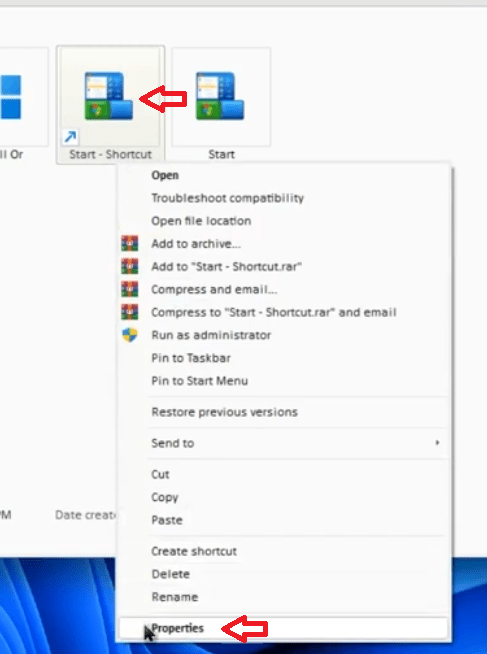
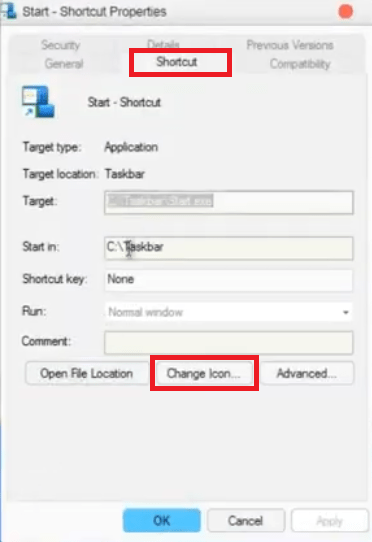
- In the Properties window, under the ‘Shortcut’ tab, click on the ‘Change Icon’ button.
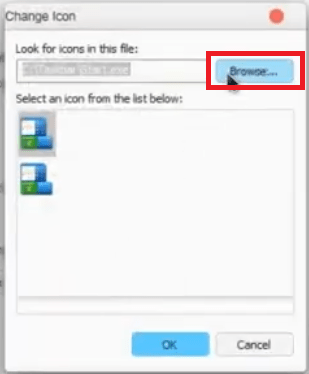
- In the Change Icon window, click on the ‘Browse’ button.
- Browse to ‘C:\Taskbar’ folder and choose ‘Small Or’ icon, then click on the ‘Open’ button.
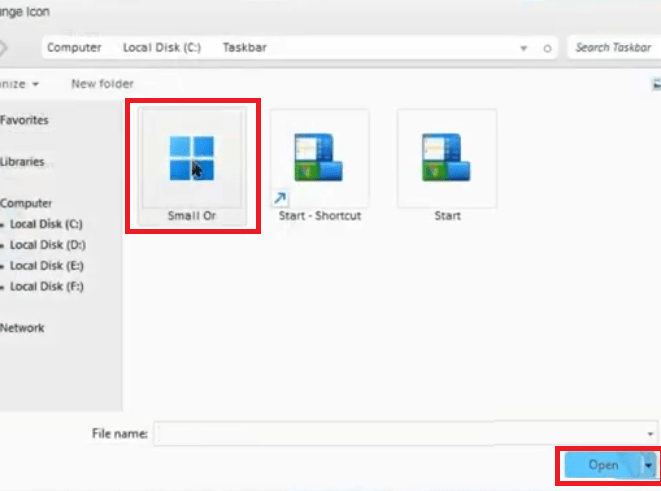
- Click on the ‘OK’ button to proceed.

- In the Properties window, click on the ‘OK’ button to apply the changes.
- Now, you can see that the Start icon logo has changed to Windows 11 Start logo. Next, you should click, hold and drag the ‘Start – Shortcut’ to the middle of the Quick Launch on your Windows Taskbar.
- Right click the Windows Taskbar and choose ‘Show title’ from the options. Doing this will remove ‘Links’ tag from your Taskbar.
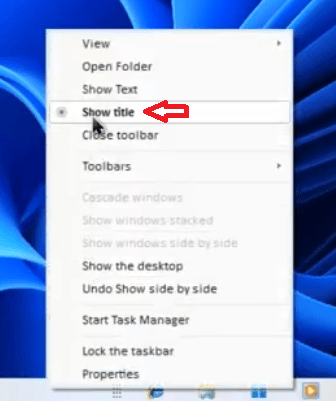
- Again right click the Windows Taskbar and choose ‘Lock the taskbar’ from the options.

- You will now see the Windows Start logo is right in the middle of the Windows Taskbar just as in Windows 11.
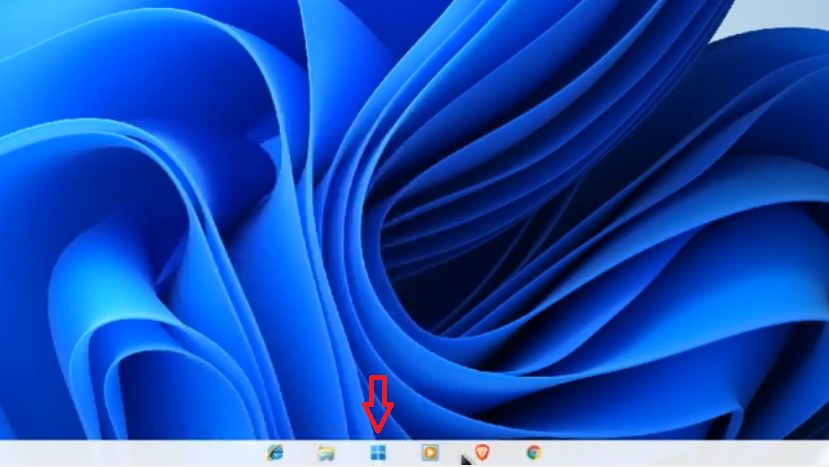


That’s it, you have completely transformed your Windows 7 theme to Windows 11 theme.
If you want to set a Windows 10 theme on your Windows 7 computer then you can download Windows 10 theme for Windows 7 here.
There are many users who want to experience the GUI of Windows 11 without installing it on their computer. For all such users,, we have shared the complete process to download Windows 11 theme for Windows 10, 8, 7 operating systems. Although the steps mentioned above may seem complicated and lengthy, if you perform them in the order they have been mentioned, then you will get the desired results.