
Installing fonts in Windows 10 is almost the same as the previous versions of Windows. If you are confused with the new interface then this tutorial will guide you on ‘how to install font in Windows 10’.
How to install fonts in Windows10?
Below are the methods by which you can add new fonts to the windows.
Method 1 : By copying font files to ‘Fonts’ folder in Windows
You can simply copy and paste the font files (.ttf files) to Fonts folder of your windows.
Where is the Fonts folder in Windows 10?
Normally you can find fonts folder in the Windows folder where it stores all the fonts. Look for the windows folder in the drive where you have installed your Windows. It should be like “C:/Windows/Fonts”.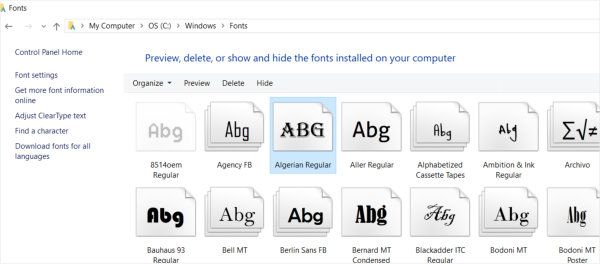
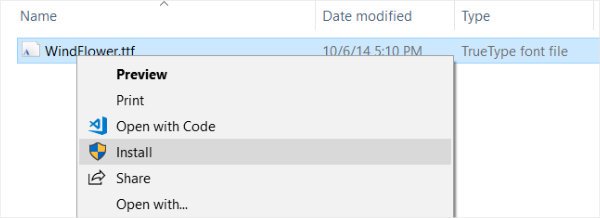
Method 2: By right clicking on the font file
Directly right click on the font file (which you want to install. Usually its extension should be .ttf) and click on the ‘Install‘ option. It will automatically install the new fonts to the system.
Method 3 : Install fonts directly from Microsoft Store
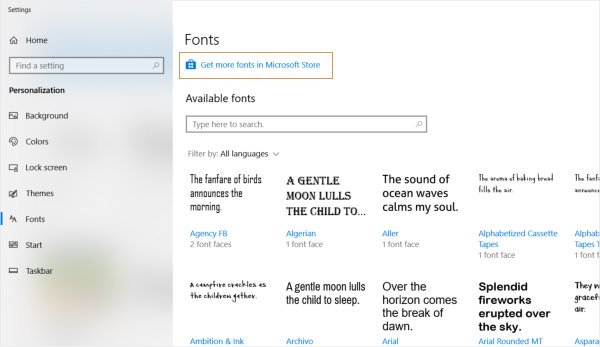
- Go to the Settings -> Personalization
- Click on the Fonts Menu. Here you can find all the installed fonts. You can search fonts by the name or by the language. Click on a font to see more details of the font. You can also change the settings of the font.
- Microsoft have also give option to get more fonts from the Microsoft Store. Click on the Get more fonts in the Microsoft Store option. It will bring up another window of Microsoft Store with a list of fonts. Here you will find paid and free fonts.
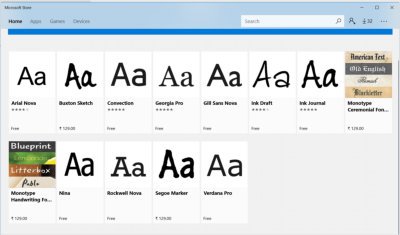
- To install a free font, click on the desired font and then click on the Get button.
- It will start downloading and installing fonts. Upon completion of the process, the Launch button will appear in place of Get.
- The font has been installed successfully and you can use the font in your applications. See the screenshots below for your reference.

How To Uninstall / Remove Fonts From Windows 10
You can also uninstall or remove a font from the system using the method below.
- Go to Settings -> Personalization -> Fonts
- Click on the desired font you want to uninstall.
- in font detail you can see the path of the font file and an ‘Uninstall‘ button. Click on Uninstall to remove the font from Windows 10.
For more information you can refer to how to install or remove a font in windows. If you can’t install the font then please share your experience in the comments section.
