
After shutting down internet explorer, Microsoft added Edge as the new lightweight and fast web browser. Based on Windows 10’s other features and application, Edge is also designed as a smart and easy to use browser. The Tab Preview is one of the cool features of Microsoft Edge and it can be enabled or disabled according to user’s needs. Enabling the Tab Preview, you can see a small preview of other opened tabs without clicking or navigating to that tab. It is enabled by default but some people don’t feel comfortable with this new tabbed preview feature. If you are one of them then this tutorial can help you to disable this option.
There are two types of Tab Preview you can use.
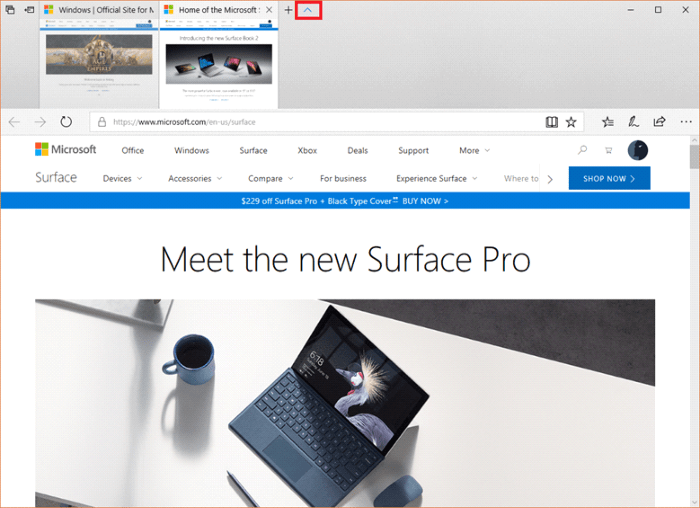
1. One of them is by clicking on the ^ icon on the top of the Edge browser. It will allow you to see the other opened tabs and stay pinned on the top of the browser. For some user, this method might be annoying, especially who uses monitors with fewer resolution.
2. Another method is by hovering the mouse on the desired tab. When you hover your mouse icon to the expected tab, Edge will show you a small preview of that tab. This method can be useful as well as pretty cool.

Enabling the Tab Preview on Edge:
To enable the first type of Tab Preview mentioned above, you can simply click on that icon. However, the second method can be little tricky, but following the steps below will assist you to successfully enable the Tab Preview on Microsoft Edge.
- Step 1: Click on Search / Cortana icon and type regedit.
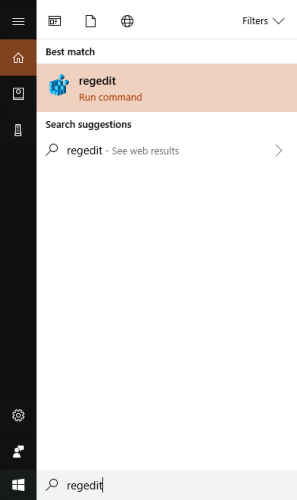
- Step 2: Open the registry editor / regedit as Administrator by right-clicking on the searched result.
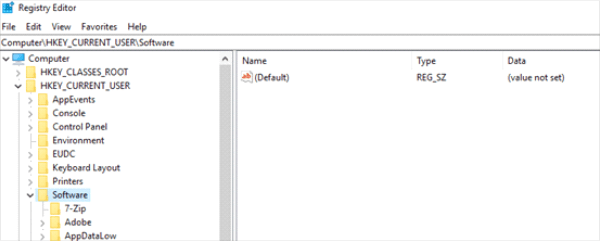
- Step 3: A new Registry Editor window will appear. Find the HKEY_CURRENT_USER and click to expand its subfolders.
- Step 4: Click the Software folder under the HKEY_CURRENT_USER and expand it.
- Step 5: Find the TabbedBrowsing folder all the way navigating this sequence:
HKEY_CURRENT_USER\SOFTWARE\Classes\Local Settings\Software\Microsoft\Windows\CurrentVersion\AppContainer\Storage\microsoft.microsoftedge_8wekyb3d8bbwe\MicrosoftEdge\TabbedBrowsing
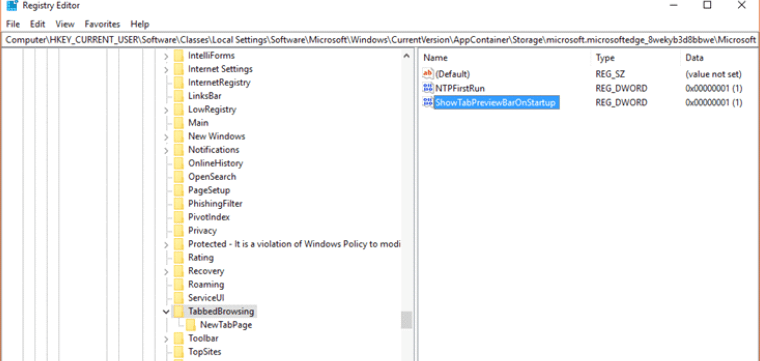
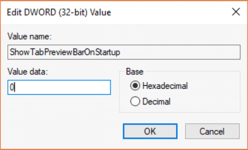
- Step 6: double click on the ShowTabPreviewBarOnStartup and edit the DWORD value. Enter 1 and click OK to enable the Tab Preview and close the Registry Editor. Restart Edge browser and visit any website. By hovering the cursor, you will be able to see the Tab Preview afterward.
Disabling the Tab Preview on Edge:
Open Registry Editor, follow above steps and navigate all the way to:
HKEY_CURRENT_USER\SOFTWARE\Classes\Local Settings\Software\Microsoft\Windows\CurrentVersion\AppContainer\Storage\microsoft.microsoftedge_8wekyb3d8bbwe\MicrosoftEdge\TabbedBrowsing
- Edit the DWORD and enter 0 and press OK to disable Tab Preview on Edge.
Warning:
Registry files are the sensitive part of an Operating System. So, editing values from the registry can damage your system, so be cautious while changing the values. Don’t input anything anywhere randomly and follow the above steps carefully to successfully enable or disable Tab Preview on Microsoft Edge browser.

Your program, Adware Removal Tool, is outstanding. Thank you.