

Bing is Microsoft’s bet to beat Google in the field of search engines. It is certainly not an easy task. For that reason, the company uses some controversial actions. For example, using the potential of the thousands of computers that have Windows 10. Indeed, Bing is integrated into the search bar of Windows 10. However, some users may find this useful and some don’t like this approach. For that reason, today we will see how to disable Bing Windows 10 Start Menu Search.


How to Disable Bing Search from Start Menu using Windows Registry
Microsoft often has very aggressive policies regarding its products. For this reason, there is no change in the configuration that allows you to remove Bing from the search bar. In fact, previously it was possible to remove Bing by editing the BingSearchEnabled registry. However, since the update May 2020 it is no longer possible. But don’t worry, the procedure is more or less the same. Since you have to edit or create a registry key called DisableSearchBoxSuggestions. Let’s follow the steps on how to do it.
Video:

Steps:
- Well, the first thing you have to do is press the Win+R combination and run the following command:
regedit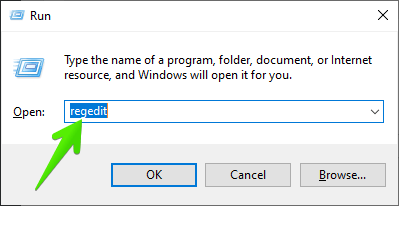
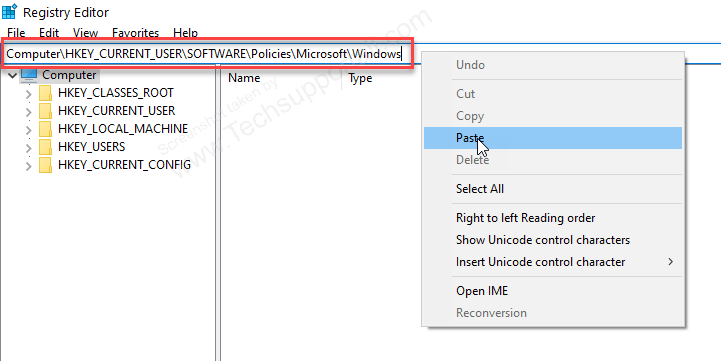
- The Windows 10 Registry Editor will be immediately displayed. Then paste the following path into the bar:
Computer\HKEY_CURRENT_USER\SOFTWARE\Policies\Microsoft\Windows
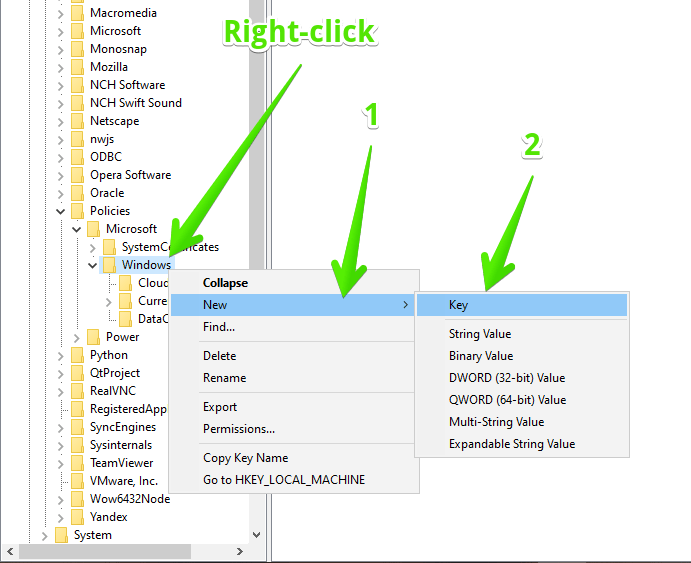
- Once there, you must click on the Explorer key. If it does not exist, then you must create it. With this in mind, right-click on the Windows value. Next, New>Key
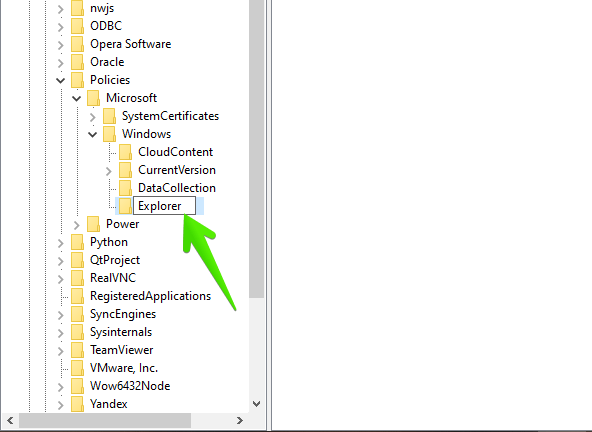
- Then it assigns the name Explorer.
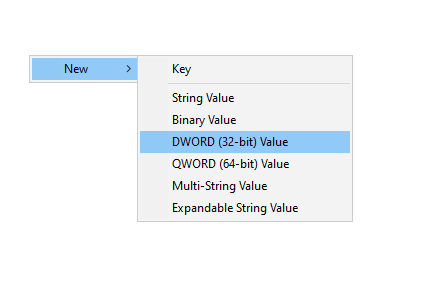
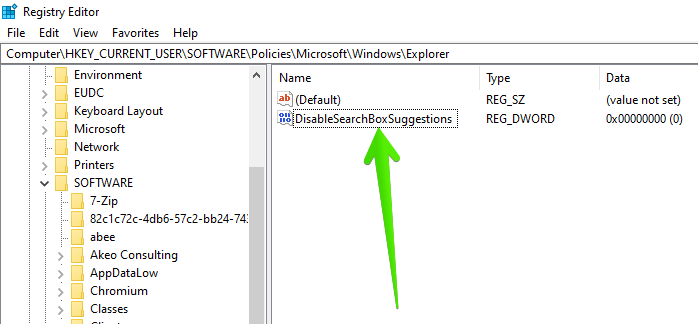
- Then, you have to create a new DWORD value (32 bits) called DisableSearchBoxSuggestions to which we are going to give the value 1. With this intention, right-click on a blank space. Then, New>DWORD value (32 bits).
- Name it to: DisableSearchBoxSuggestions.
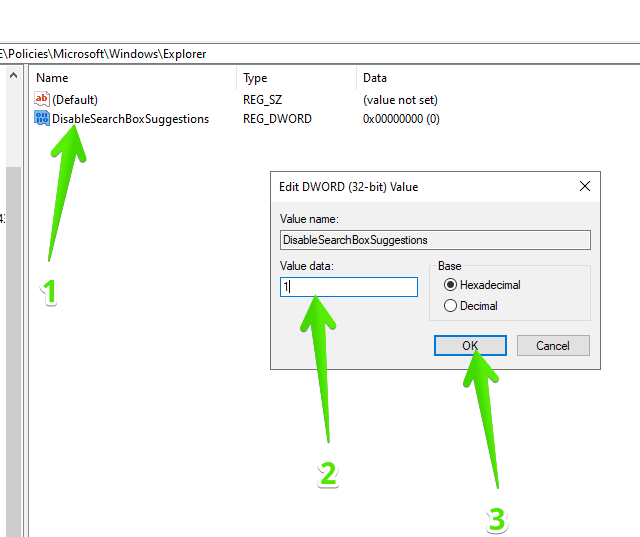
- Now, double-click on the newly created value. Please modify the value and change it to 1.
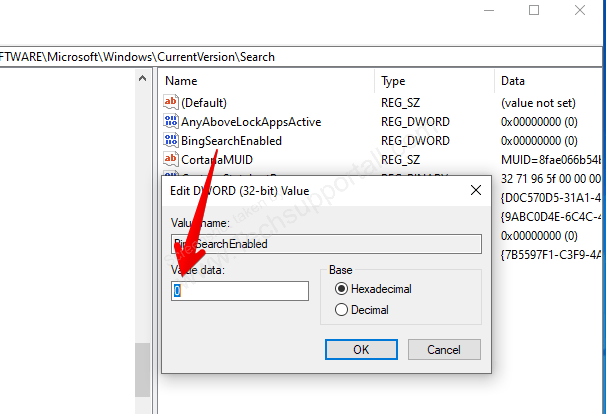
- That’s it, but if you have an older version of Windows 10 version-1909 (how to check the version of Windows 10) then you need to go to the following registry key and change its value to “0” of “BingSearchEnabled“.
If you don’t get “BingSearchEnabled” key, then you can create this registry value as we have made above.HKEY_CURRENT_USER\SOFTWARE\Microsoft\Windows\CurrentVersion\Search
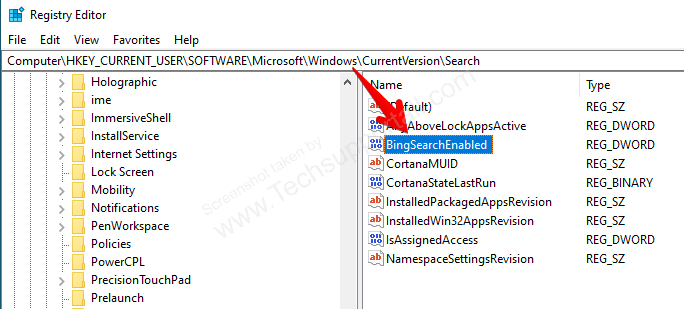
- Double-click on the “BingSearchEnabled” registry value and set it to “0“.
- Restart your computer. Note: Without restarting, it will not take effect.
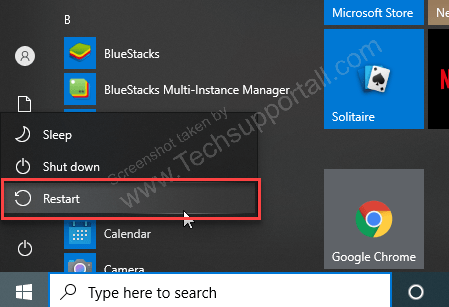
- After restarting, the Bing search is completely disabled from the Windows 10 start menu. Go and search for mindcraft in the Start menu search. At this time, your computer should not show the bing search result.


Finally, close the registry editor and restart the computer to set the changes.
You can do the same using the following default registry files, please look them if you want to automate the above process.
Download the file and double-click on the file to enable or disable the bing search. Restarting the computer must be required after running the following registry files.
Download: Bing Search Disabler
Download: Bing Search Enabler
This way Bing will not appear in the results of the Windows start menu. Now, to reverse the changes, please delete the previously created value and restart the computer again.