
We’ll guide you on how to Create a local user account in windows 10. We have prepared a complete step-by-step guide with all the screenshots and we have also made a video of it. Just follow the steps below to create an offline account in windows10.
Steps to create a local account in Windows 10
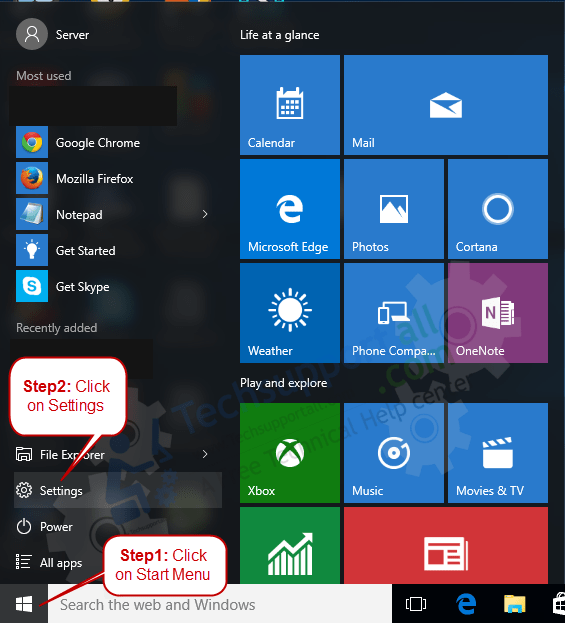
Step1: Click on Start Menu Button
Step2: Click on Settings
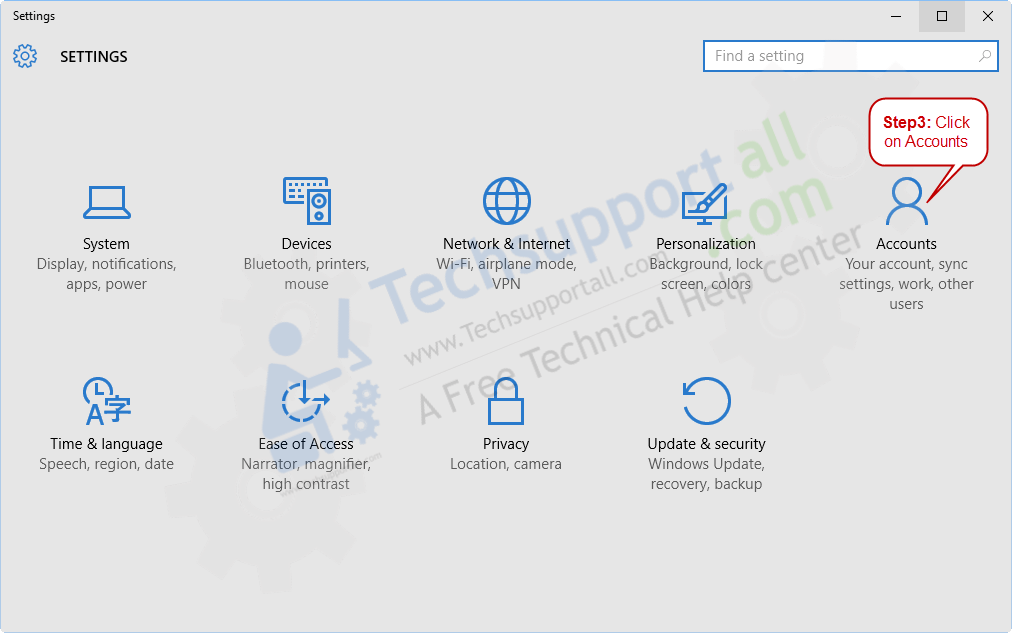
Step3: Click on Accounts
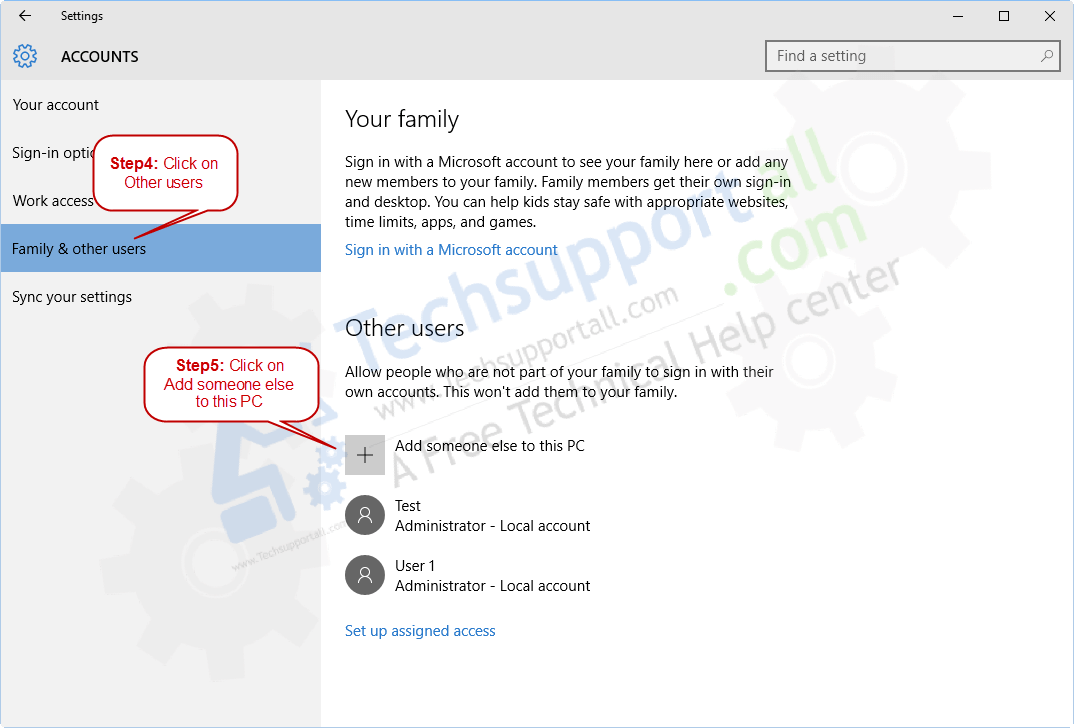
Step4: Click on Family & Other users
Step5: Click on “Add someone else to this PC“
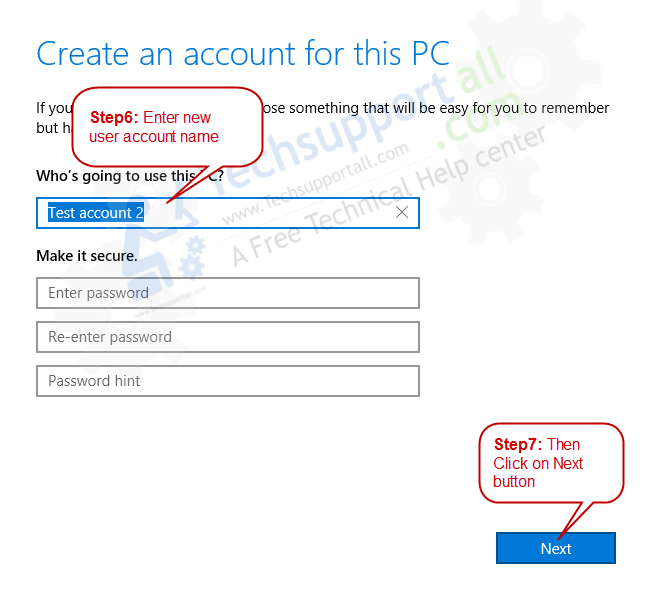
Step6: Enter the new user name in the name field
Step7: Click on Next. Your account will be created after you click on the Next button.
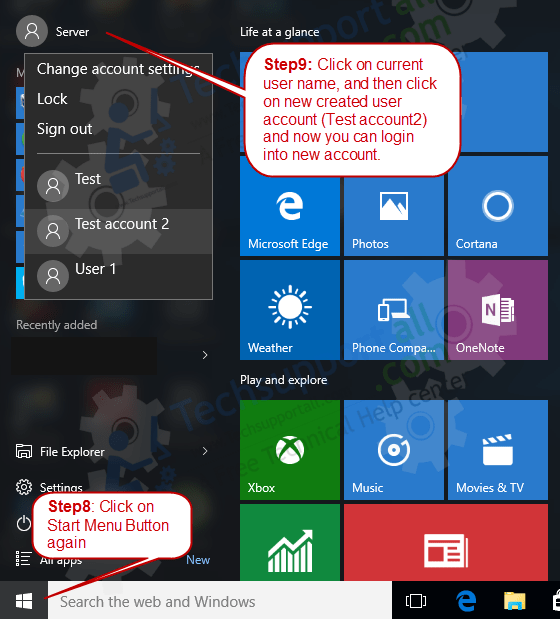
Step8: Click on start menu button again
Step9: And then click on the current user account name and click on the new user account to switch the account.
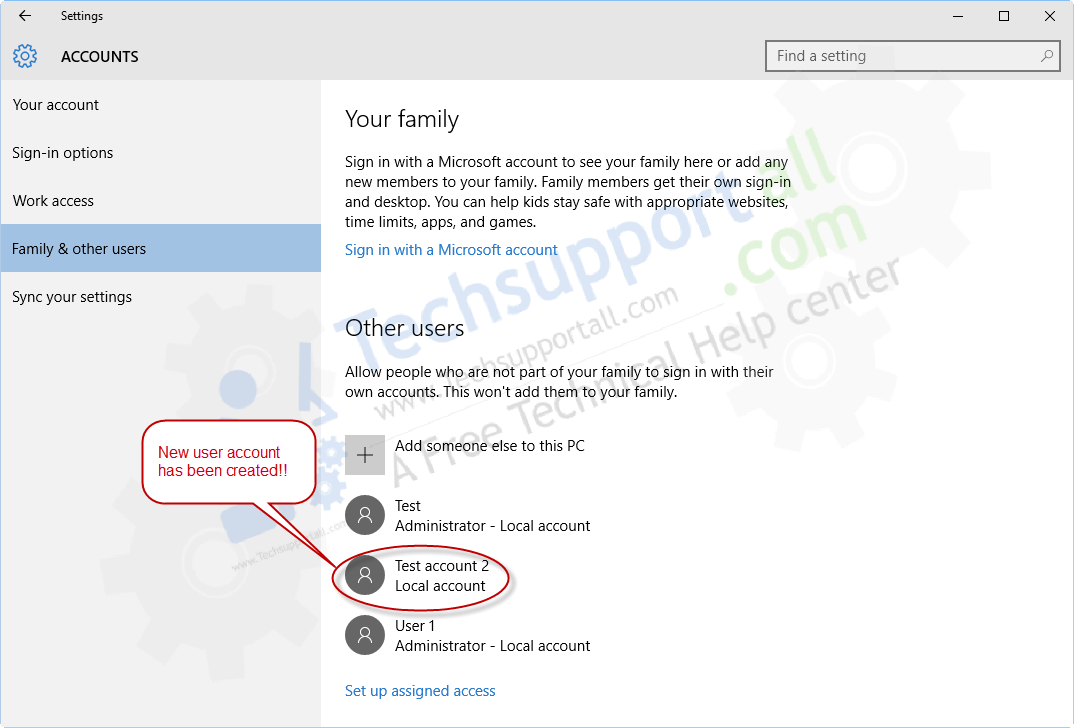
That’s it. A new user account has been created locally. If that doesn’t work then you can try out Microsoft’s official guide on this.
What is a User Profile?
A user profile is an account that can be used to log into Windows 10.
Users can have multiple user profiles on the same machine and each one can be set up with different account settings, preferences, and apps.
A user profile stores all the information necessary for a user to sign in on a Windows 10 device such as name, password, email address, settings and preferences.
How to Manage Your New Account in Windows 10
Windows 10 has been out for a few years now, so it’s about time for you to explore its new features. This article will go over some of the most important things you need to know in order to manage your new account.
The first step is creating an account and choosing a user name. The user name should be something unique and easy to remember, but it can’t be one that someone else is already using. You also have the option of using a nickname instead of your full name if you don’t want people knowing who you are.
In the next step, Windows 10 allows individual users to decide what information they want to share with Microsoft, such as their location and usage data. However, if this information is not shared then some features might not work properly such as Cortana or OneDrive. To learn more about it in detail, check out this link on how to manage user account settings in Windows 10.
Difference Between Administrator and Standard User Accounts
Windows 10 is a fantastic operating system. It’s intuitive, fast and adaptable. You can customize the desktop interface in many ways to suit your personal needs and preferences. One feature that stands out is the ability to create multiple user accounts with different access privileges.
A standard user account has limited functionality, but it is perfect for when you want to share your PC with other people like family members or roommates. This account type doesn’t have administrative privileges so it can’t make changes to system settings, install new programs or change important settings on the device such as parental controls and more. Learn more about the main differences between local and online accounts.
User profiles are similar to standard accounts unless they have access to more features like device encryption, advanced network configuration, remote log-in, etc. These are good for when you want one.
Well, in this article you have learned how to create a new user profile account in Windows 10. Let us know in the comments section down below for details.
