

Some Windows 10 users don’t like this auto-arrange feature. Here in this page, we are going to show you how to manually arrange files in a folder in Windows 10 (Disable auto arrange).
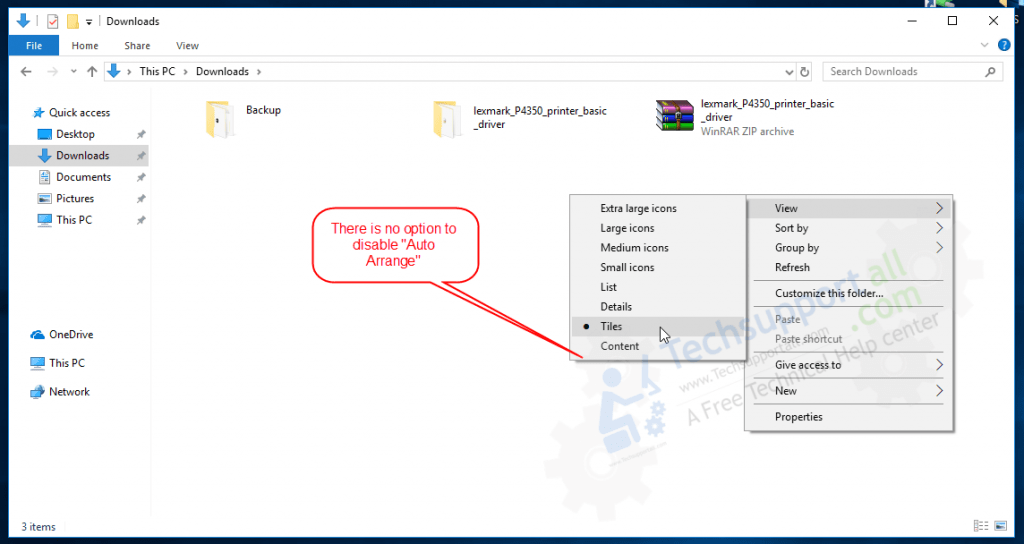
In Windows 10, all the files & folders in a folder get auto arranged automatically by default. This auto arrange feature starts from Windows Vista but there was a option to enable or disable this option in Vista/XP. Now this feature also comes with Windows 7, 8, 8.1, 10 operating system, but this auto arrange turn on / off option is vanished. 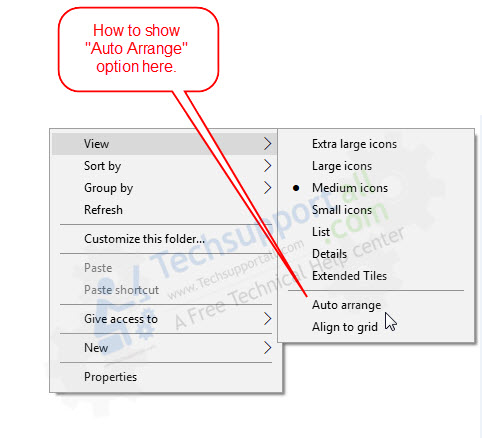

Although this is an enhanced feature for windows, but some peoples don’t like it and want to arrange files in a folder manually (disable auto arrange). Before this feature, you could easily arrange or move the files and folders in a folder. Some peoples missed this freedom in windows 10. If you want to get your freedom back, you can easily get back that option to disable auto arrange feature in Windows 10 / 8 / 7. You have to follow the following step by step how to do guide.
Please note, we are not talking about desktop icon’s auto arrange feature. This was only for “in folder” auto arrange feature. So don’t get confused.
How to disable Auto Arrange in Folders.
Follow the following instruction to disable the auto arrange option in folders.
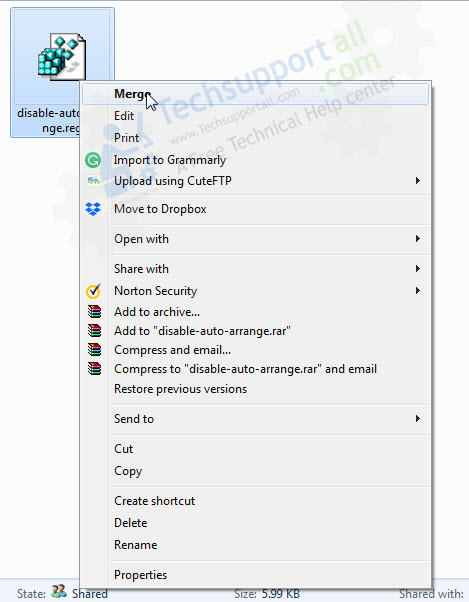
Step 2: Double-click on downloaded “.reg” file to merge into Windows registry.


Step 3: Reboot or log off your computer.
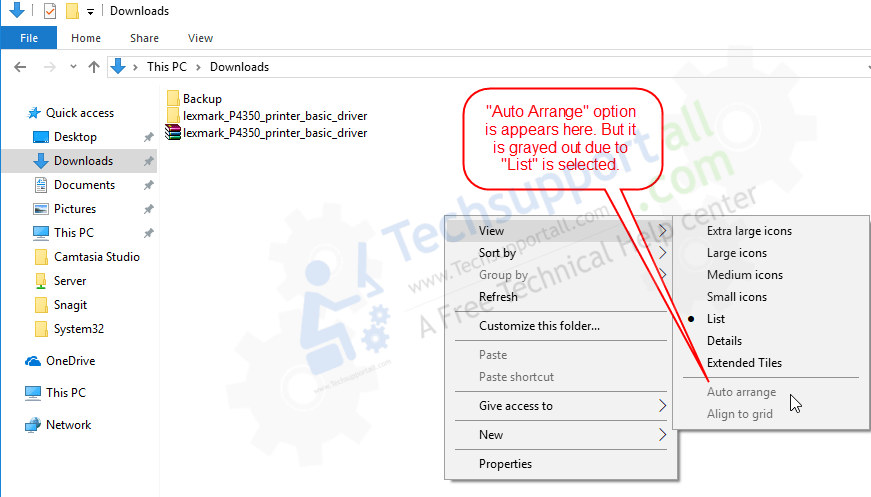
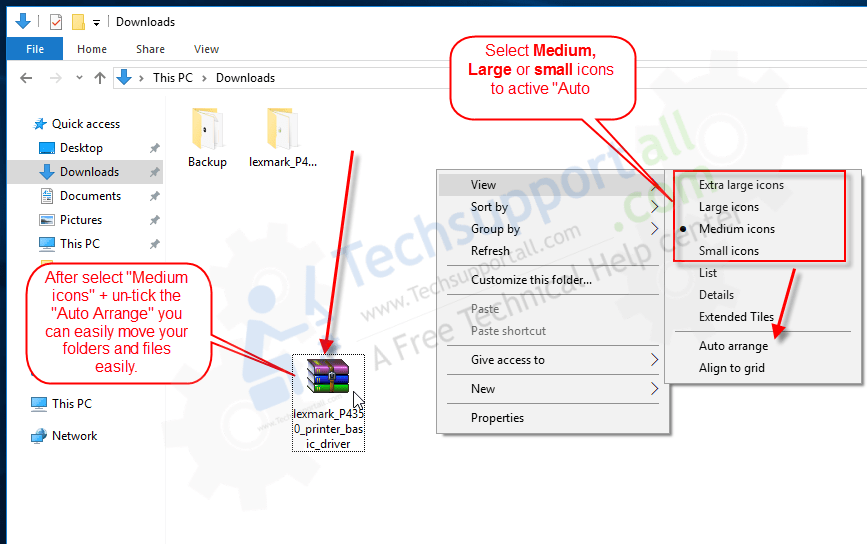
Step 4: Right-click on a folder’s empty area to open up the right-click menu and then move the mouse pointer to “view” You’ll get two new options there “Auto Arrange” and “Align to Grid“. If these both options are greyed out then its means you have to select the “Medium icons” first then these two options are active for action.

Step 4: Go to a folder and check auto arrange option should be turn off.

How to re-enable Auto-arrange in Folders.
Follow the following instruction to re-enable the auto arrange option in folders.
Step 1: Download the default registry file of Windows to re-enable auto arrange (re-enable-auto-arrange-in-folders.reg).
Step 2: Double-click on downloaded .reg file to merge into Windows registry
Step 3: Reboot your computer.
After reboot, both the options (“Auto Arrange” and “Align to Grid“) will be disappeared again.
Watch a video tutorial: How to turn off / on auto arrange in folder.

The issue should be fixed after followed the steps. If the issue doesn’t fix, please leave your message in the comment section below, we’ll discover more about it and will share with you.