

In this article, we’ll show here how to change computer name in Windows. Don’t get confused with the computer name and login name that shows on the login screen. These two are different. Login name is the user profile name on the other hand the computer name is that shows on the network. This tutorial is to rename the computer name. If you need to change the Windows user name then refer to this article.

Other devices on the same network, LAN, Wi-Fi, or Bluetooth connection know your computer by its name. Sometimes, you may wish to alter the name of your PC. Perhaps you purchased a new Windows PC with a generic name like PC-SPODETC. Perhaps your computer technician installed Windows 11 without consulting you. In either case, you despise the name of your Windows PC and wish to alter it.
How to change computer name in Windows
Follow the steps to change your default computer name in Windows 10 to any desired custom name to display in the netwrok.
Rename PC in Windows 10
Let’s get started


Steps to change computer name in Windows:

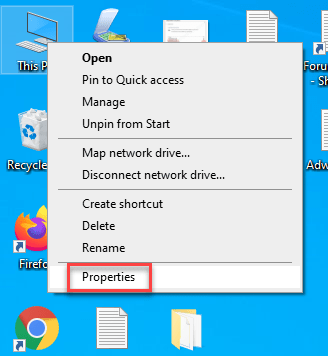
1. Right-click on the “ThisPC” and click on “properties“
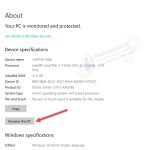
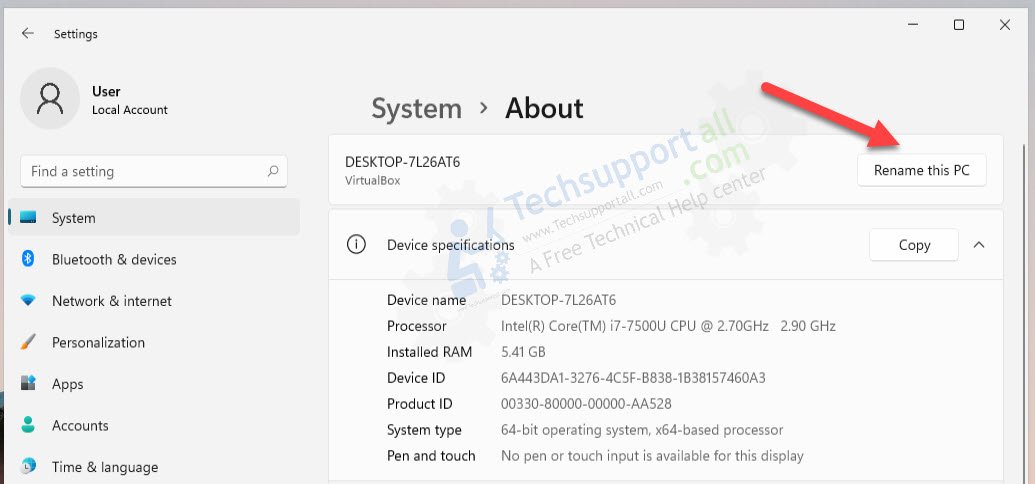
Right click on the my computer or This PC icon to open the context menu and click on properties or open the settings in Windows 10 / 11 and open up the about tab.
2. Click on “Rename this PC“
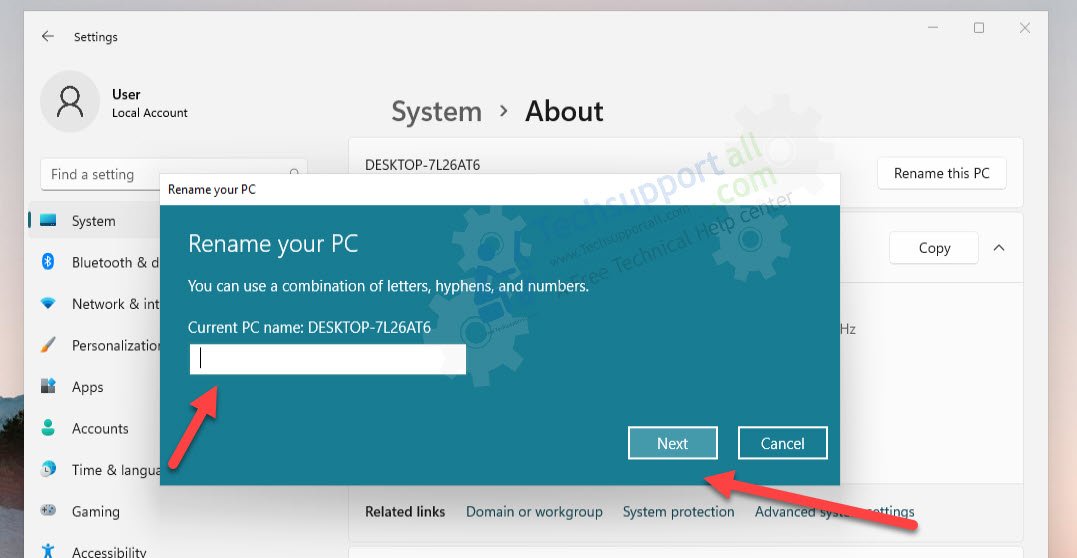
Click on the rename this PC button. Or to open up interface similar to Windows 7, click on the Rename this PC (advanced) link on the right pane. By selecting the first option you can simply enter the new name in the dialogue and click on the next. On the next restart, PC name will be changed. Otherwise with advanced options follow the next steps.
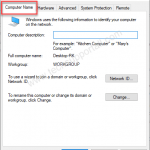
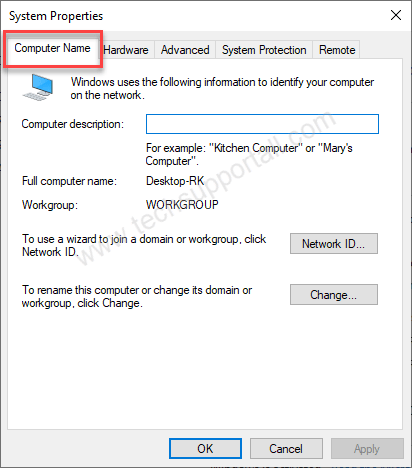
3. Select the “Computer Name” tab
A new windows will open up with the computer Name tab already selected. if not then select the computer Name Tab.
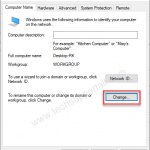
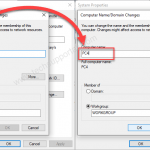
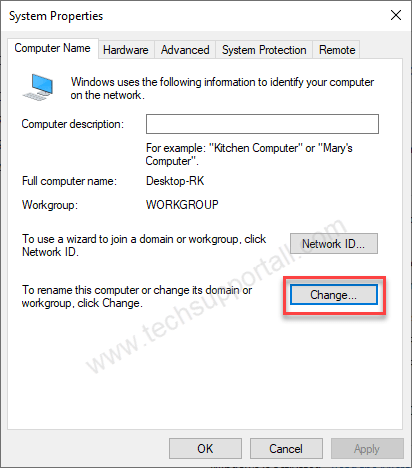
4. Click on the change button
Click on the change button here to change the computer name. Please notice that first field is for computer description you need to click on the
Changing PC Name in Windows 11
- Right click on “This PC” icon on the desktop. If there is no “This PC” icon then you can open setting -> System -> About.
- Now click on the “Rename this PC” button. A pop up will open to type new computer name. type new name click on the next button. It will change the computer but will not take effect after restarting the PC.
- Restart the PC and its done.


Steps to Change Computer name in Windows 10 older version and Windows 7
Step 1: Right-click on the “ThisPC” / “MyComputer” and click on properties.

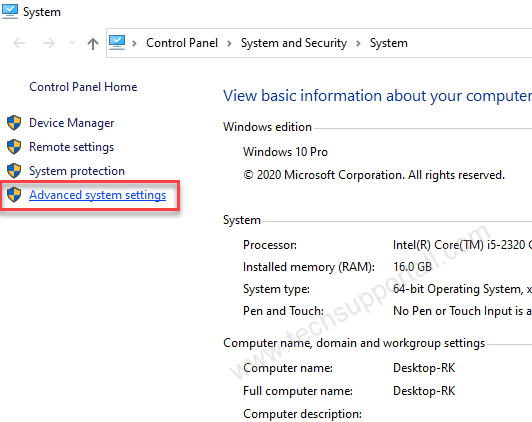
Step 2: Click on “Advanced system settings” from the left side pane.

Step 3: Select the “Computer Name” tab.

Step 4: Click on the change button.
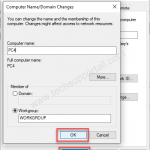
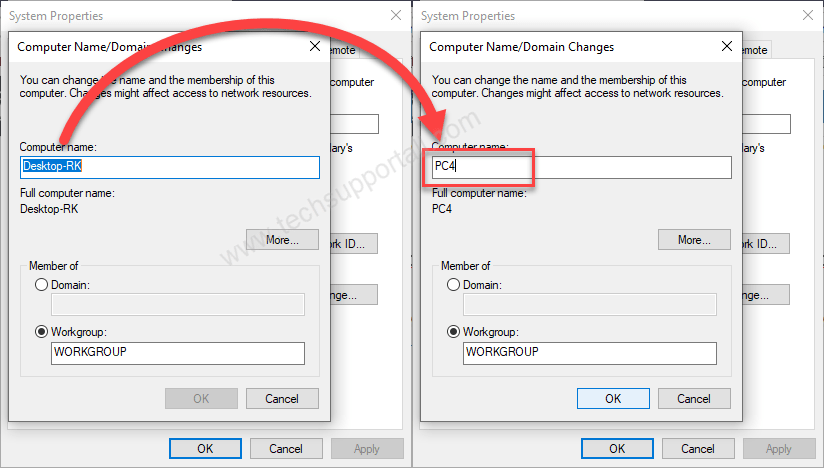
Step 5: Type the new name of the computer in the computer field.

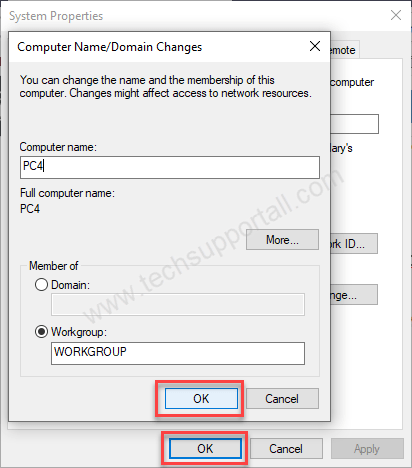
Step 6: Click on OK and then OK again.
Step 7: That’s it.
In this guide, you have learned how to change your computer name in Windows 10. Then the same steps will work with Windows 7, 8, 8.1, Vista and XP computers.
Why Rename Your Windows PC?
- Here are a few reasons why Windows users may choose to rename their computer.
- It was given an unpronounceable name consisting of random alphabets and numerals.
- It has a generic name, making it difficult to distinguish from other computers on the same network.
- You dislike your given name and want it to represent your personality, ideas, or profile.
- You want others to be able to simply identify and connect remotely to your machine.