

BING is a search engine by the Microsoft which it has integrated into almost all its products, like Windows 11, MS Edge browser, etc. Microsoft wants to market this search engine to its users, but there are many users which find this search engine not up to their standard and prefer other search engines over it. Since, BING is integrated into several Microsoft products, it can be difficult to remove it. Therefore, I have prepared this guide to describe in simple to follow steps, how to remove BING search from Windows 11 & Edge.


Why Remove BING Search from Windows 11 & Edge?
Most times users want to get rid of BING search from Windows 11 & Edge just because they are accustomed to some other search engine. Although this is a valid reason, but there can be several other reasons which can encourage users to remove BING search engine from Windows 11.
- Improved Personalization: Many search engines offer customization features which users can use to personalize their search results. This can help users to further improve their browsing experience and get search results that are more in-line with their expectations.
- Better Familiarity: Like said before, this is the most common reason for removing BING search from Windows products. Most users are accustomed to a search engine and its algorithm. They are familiar with the search string they should use to get their desired search results. Therefore, they are able to enhance their productivity and efficiency by using their favorite search engine, because they are familiar with it.
- Additional Features: There are certain search engines which offer advanced features which you won’t find with the BING search engine. Features like, history synchronization, knowledge graph, contextual information cards, etc. are absent in the BING search engine. There are some users who prefer other search engines over BING, due to this reason.
- Privacy Issues: There are many users who are highly concerned about the privacy of their search data. On this front, the BING search engine is highly unreliable. Therefore, users may prefer search engines, like DuckDuckGo over BING, because the DuckDuckGo search is well-known for privacy-focused approach.
- Special Requirements: There are some users who may have additional requirements due to their academic or professional background. They may need specialized search engines which have been designed to deliver search results which are relevant to their professional or academic needs. Such users would also want to change BING search from Windows 11 & Edge.
Although Microsoft offers BING search engine as the default search engine in most of its products, but you have the option to remove this search engine from Windows 11 and MS Edge browser. By giving you this option, the Microsoft has given you the power to personalize your internet browsing experience. Therefore, you should read the benefits given above to fully understand the potential of choosing an alternative search engine to BING search, so that you maximize your productivity, efficiency and privacy while working with Windows 11 and MS Edge.
How to Remove BING Search from Windows 11 & Edge?
In the above section, I discussed the benefits of removing BING search from Windows 11 & Edge. So, now its time to describe you how to complete this task. I have divided this task into three stages and you should complete these stages in the order they have been mentioned. All the steps are easy to follow, but for your convenience, I have provided an image file with each step so that there is no room for confusion.
1) Remove BING Search from the Windows 11 Search Box
First, you should remove BING search from the search box of Windows 11. When you open the search box, you will find BING icon on the top-right corner, lets get rid of it. Follow the steps given below to complete this stage:
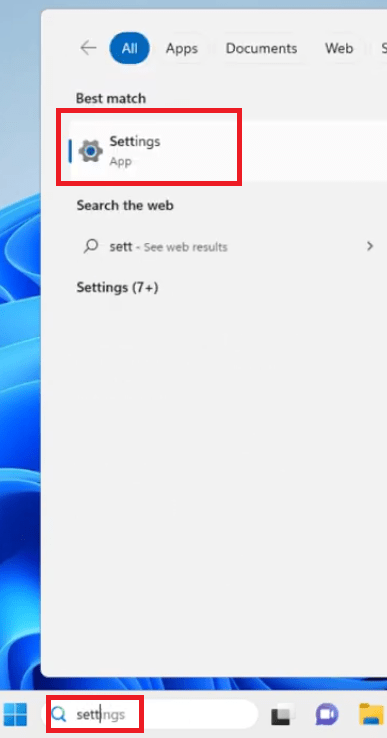
- In the Windows search box, type ‘settings’ and click on the ‘Settings’ option in the search results.
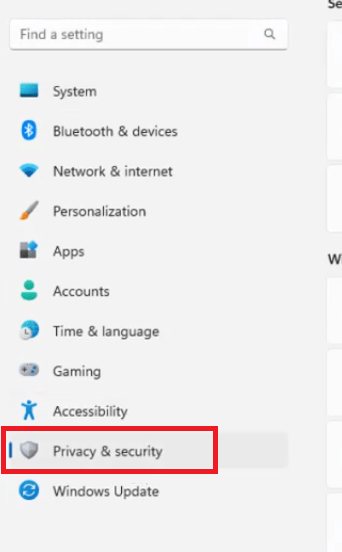
- In the Settings window, click on the ‘Privacy & security’ option in the left pane.
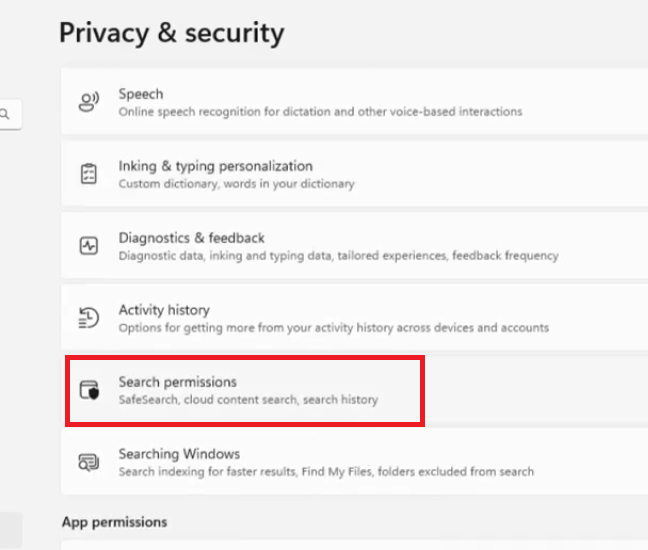
- Under Privacy & security section, scroll down to find ‘Search permissions’ option, then click on it.
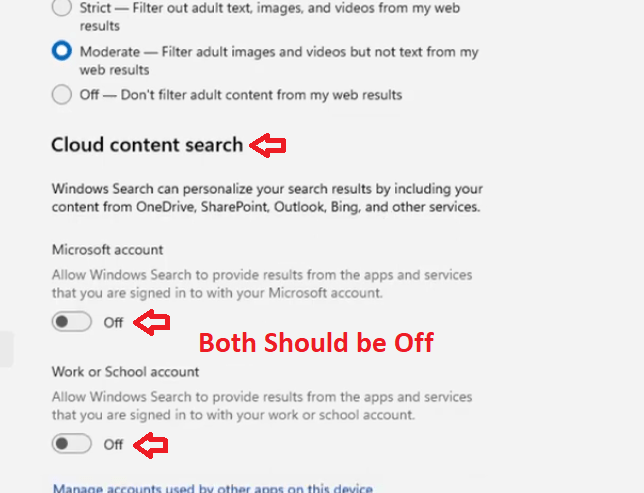
- In the Search permission page, scroll down to find ‘Cloud content search’ section. Under this section, you will find ‘Microsoft account’ and ‘Work or school account’ options, click to turn these options ‘Off’.
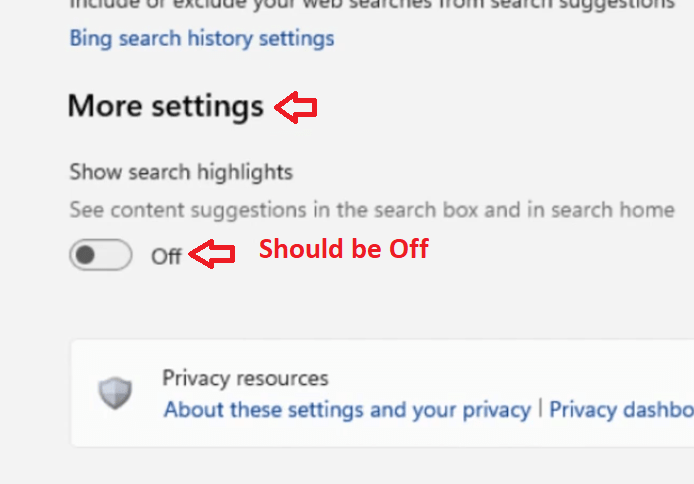
- Further scroll down in the Search permission page to locate ‘More settings’ section, then click to turn ‘Off’ the ‘Show search highlights’ option.
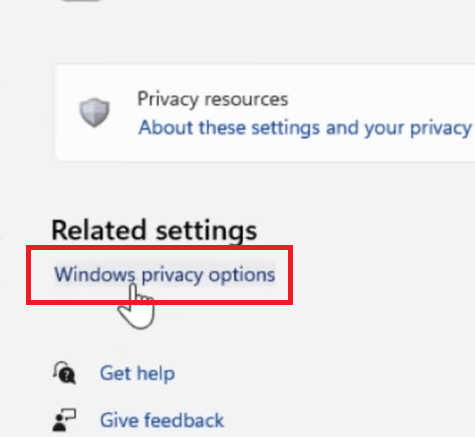
- Scroll down further to locate ‘Related settings’ section, then click on the ‘Windows privacy options’ link below it.
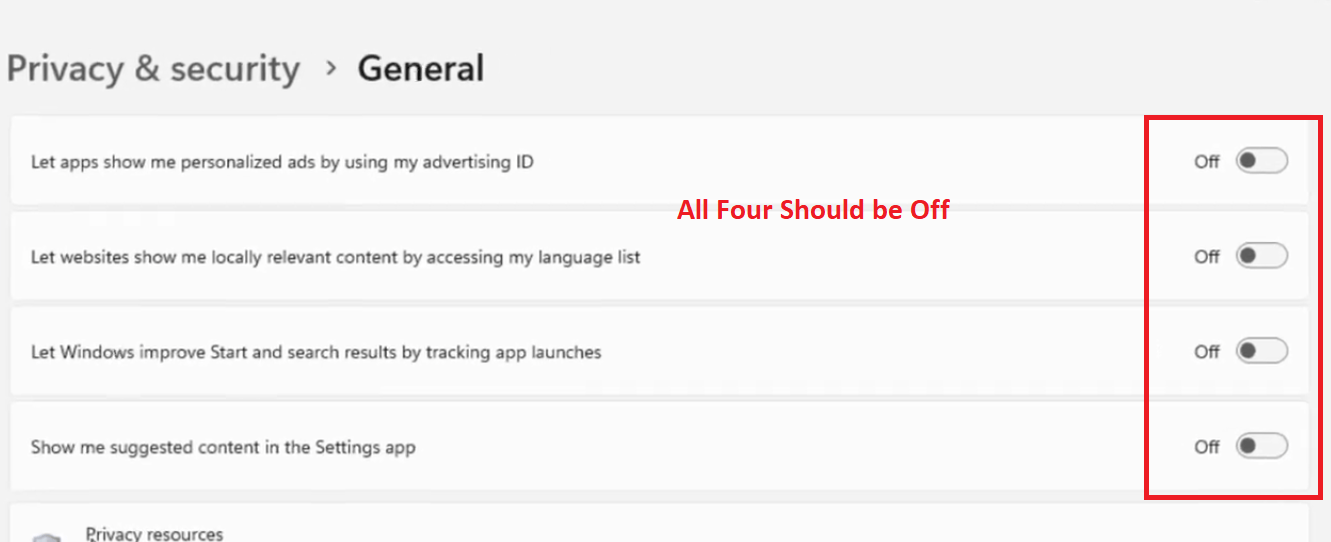
- Under General section, there will be four options, namely ‘Let apps show me personalized ads by using my advertising ID’, ‘Let websites show me locally relevant content by accessing my language list’, ‘Let Windows improve Start and search results by tracking app launches’ and ‘Show me suggested content in the Settings app’. Click to turn ‘Off’ all these four options, as shown in the image below.
- Click on the ‘Close’ button to close the Settings window.


Now, go back and launch the Windows search box and you will find that the BING icon is missing from its usual place.
2) Remove BING as MS Edge Default Search Engine
The default search engine of MS Edge is BING search and here I will describe the steps which can help you set your preferred search engine as the default search engine on your MS Edge browser. Follow the steps given below in the exact order they have been mentioned:
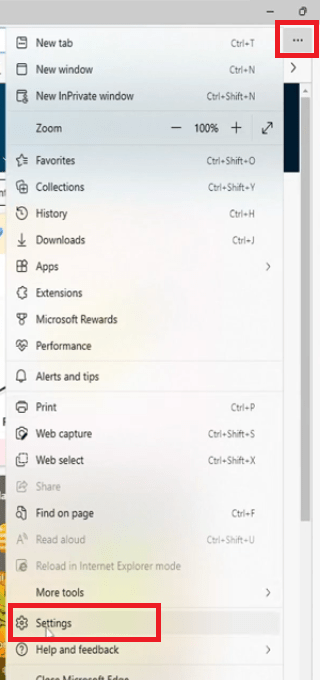
- Open MS Edge, click on the ‘three dots’ menu button and select ‘Settings’ from the menu.
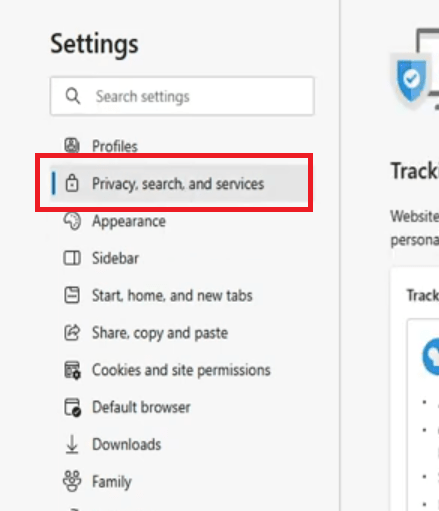
- In the Settings page, click on the ‘Privacy, search and services’ option in the left pane.
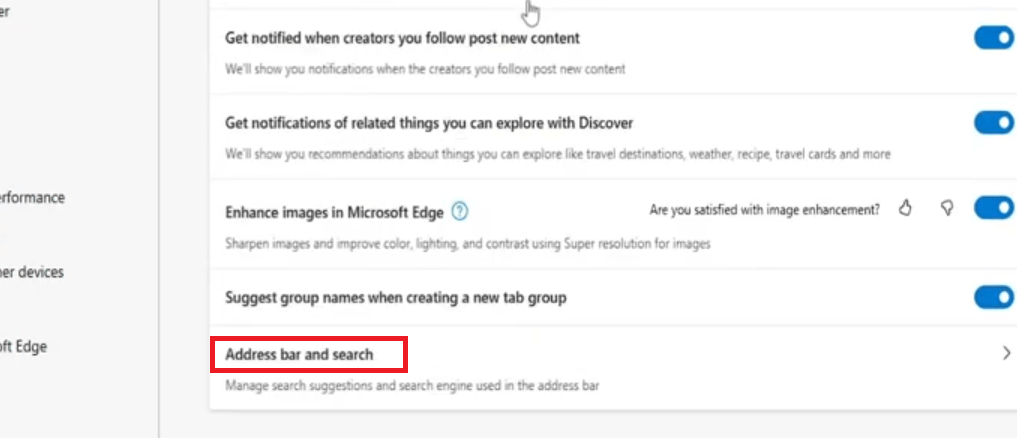
- Scroll down to locate the ‘Address bar and search’ option, then click on it.
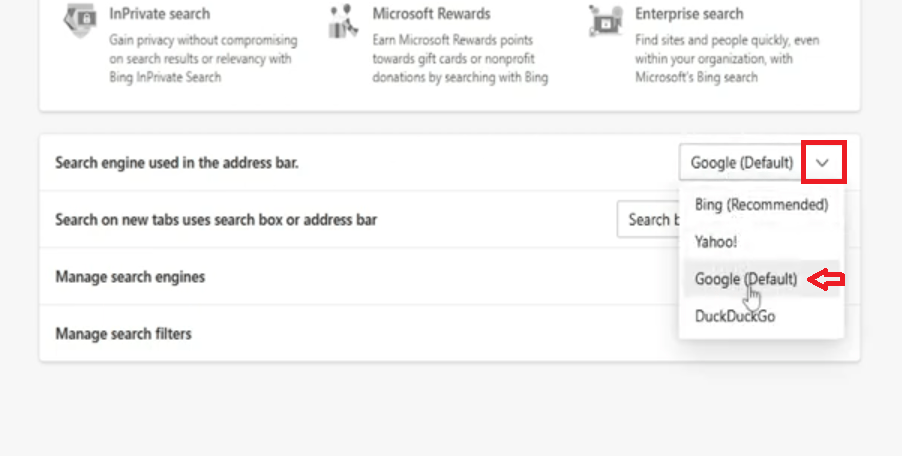
- Scroll down to locate the ‘Search engine using in the address bar’ option, then click on the drop-down button and select your preferred search engine. I chose the ‘Google’ search engine.


Now, if you open a new page in MS Edge browser and search via the search box, then you will find that your search results are being displayed in the search engine chosen by you. In my case, I am getting search results from Google.
3) Remove BING Chat Icon from MS Edge
The last stage is to remove the BING chat icon on the top-right corner of the MS Edge browser. However, you need to carefully follow the steps given below as you will have to work with the Registry Editor for your Windows.
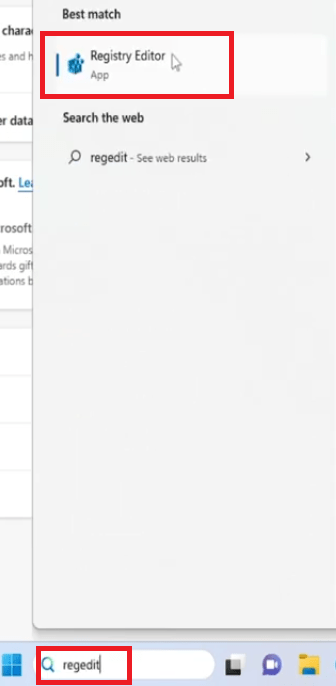
- Type ‘regedit’ in the Windows search box, then click on the ‘Registry Editor’ in the search results.
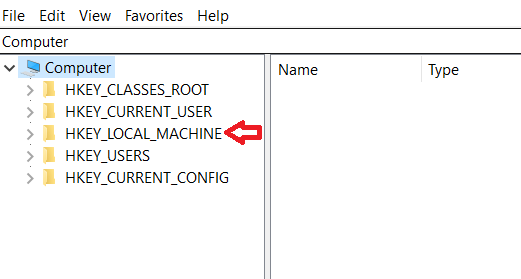
- In the Registry Editor window, click to expand the ‘HKEY_LOCAL_MACHINE’ folder.
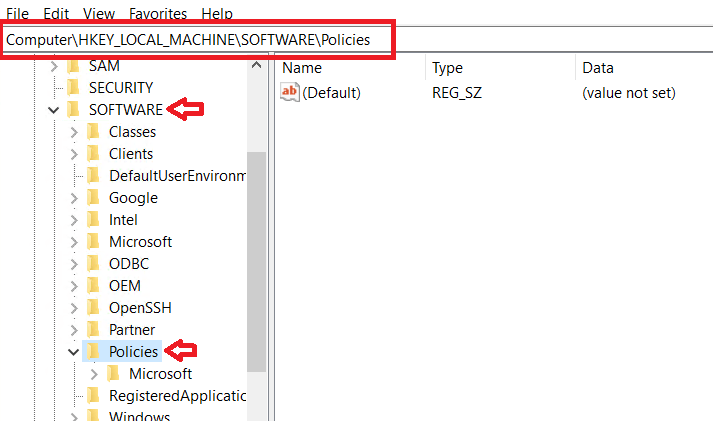
- Under the HKEY_LOCAL_MACHINE’ folder, click to expand ‘SOFTWARE’ folder, then click on the ‘Policies’ folder. You should reach the ‘Computer\HKEY_LOCAL_MACHINE\SOFTWARE\Policies’ address, as shown in the image below.
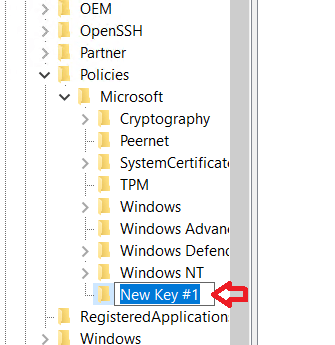
- Under Policies, right click on the ‘Microsoft’ folder, then go to ‘New’ in the menu options and choose ‘Key’ from the options.

- Type new name for the key as ‘Edge’, then press the ‘Enter’ key on your keyboard.
- Select the newly created Edge folder, then right click on the empty space and under ‘New’, click on the ‘DWORD (32-bit) Value’ option.
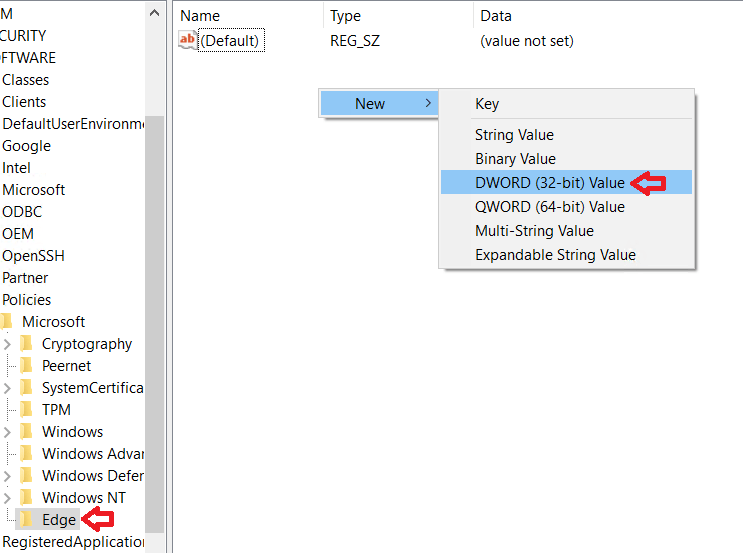
- Type ‘HubsSidebarEnabled’ as the new name for the value created by you.
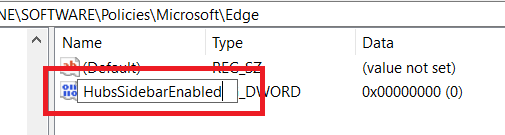
- Double click on the HubsSidebarEnabled value to check the details. Make sure that the Value data is ‘0’, then click on the ‘OK’ button.

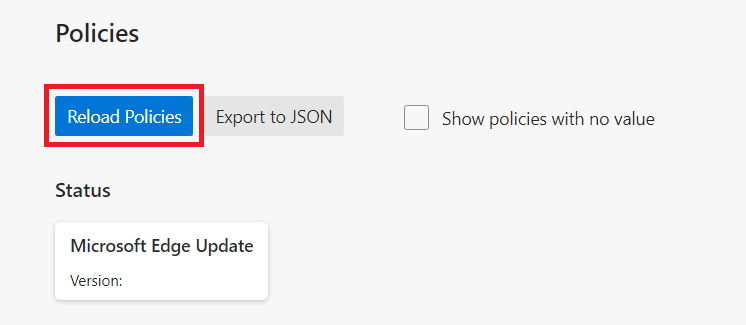
- Open the MS Edge browser, in the address bar type ‘edge://policy’, then press the ‘Enter’ key on your keyboard.

- Under the Policies section, click on the ‘Reload Policies’ button.


Now, open a new web page in your MS Edge browser and you will see that there is no BING chat icon on the top-right corner of the browser. That’s it, you have successfully removed BING search from Windows 11 & Edge browser. Enjoy a completely new web surfing experience on your Windows 11.
What are Drawbacks of Removing BING Search from Windows 11 & Edge?
In the above sections, you have learned why and how you should remove BING search engine from Windows 11 and MS Edge, but its equally essential to know about the potential drawbacks which may arise by removing this search engine from Microsoft products. Understanding of these drawbacks is important as it will allow you to make an informed decision regarding this issue.
- Limited Integration: BING search engine is deeply integrated into the functioning of Windows 11. There are several other features of Windows 11 which depend on BING search engine to perform properly. For example, the Cortona digital assistant relies on the BING search to deliver personalized recommendations, news updates, etc. If you decide to get rid of BING search engine from Windows 11, then you may have to compromise on the performance of certain other features of this OS, because your preferred search engine will not be fully integrated with Windows 11.
- Less Stability: Windows 11 has been designed to work with BING search engine. If you try to integrate some other search engine with this OS, then it may create performance issues. Also, all the Windows updates are optimized for default configuration of the Windows. Therefore, you may experience problems with certain Windows updates as well.
- Poor Search Results: Although the search engine that you want to use must have been tested by you and you must be satisfied with its performance, but Microsoft is always working on to improve the performance of the BING search engine and also BING has access to your computer usage data which allows it to deliver more personalized search results. Maybe after using BING search engine for a few more days you may find its search results superior to your preferred search engine.
- Loss of Services: BING search is integrated with many other Microsoft products, like MS Office. If you decide to install any other Microsoft product in the future, then you may miss the services provided by that product which are related to BING search engine.
- Lack of Support: Microsoft provides support and documentation for the BING search engine as it’s the creator of this search engine. If you decide to remove BING search engine from Windows 11, then you will lose the ability to seek assistance for troubleshooting problems related to this specific service. Also, any other search engine will not be able to provide same level of support for their service.
You have the ability to change BING search engine in your Windows 11 and MS Edge browser, but before taking this decision you should consider the drawbacks mentioned above so that you can make an informed decision that is aligned with your browsing requirements and overall user experience.
In this how to remove BING search from Windows 11 & Edge guide, I have described all the steps which you will have to follow to complete this task. Despite being the integrated search engine in Windows 11 and MS Edge, you can remove BING from these software products, but it’s better to weigh the benefits and drawbacks of implementing this decision before proceeding with it. Follow the steps outlined above in their exact order to get desired results.