

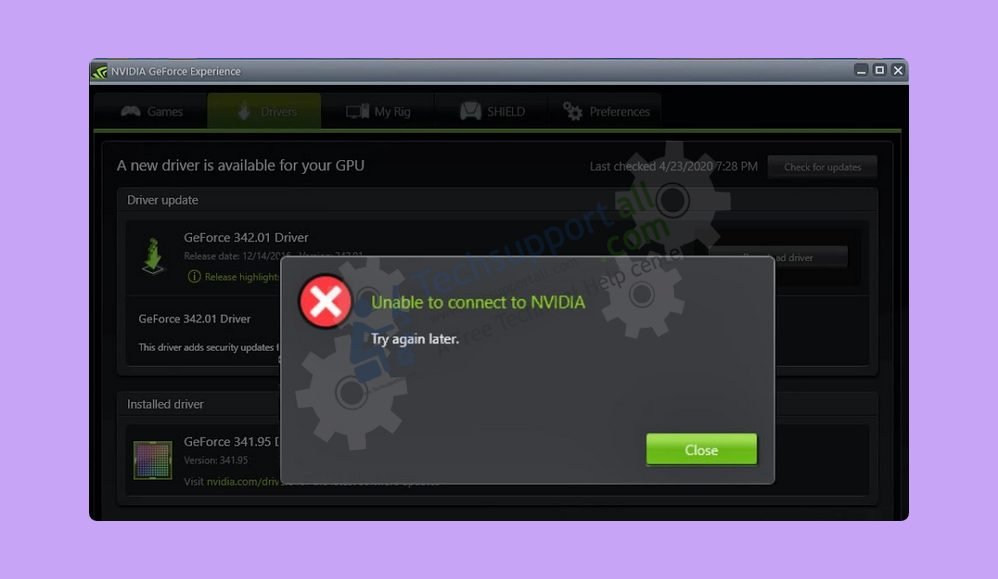
The GeForce Experience software is provided by Nvidia to improve the performance of its graphics card. Of the many tasks that GeForce Experience is supposed to perform is the task of automatically updating the Nvidia drivers on your computer. However, sometimes when users try to update their Nvidia drivers through GeForce Experience they end-up seeing ‘Unable to connect to NVIDIA’ error message. Although you have the option to manually update your Nvidia drivers, but using the GeForce software is a much simpler option. Therefore, in this guide, we will describe how to fix the error ‘Unable to connect to Nvidia’ in a Windows computer.

What Causes Unable to Connect to Nvidia Error?
This error only occurs in the GeForce Experience application of the Nvidia. Therefore, the cause of this error is related to this application, but sometimes this error is caused due to the malfunctioning of some additional services which are required for the efficient functioning of the GeForce Experience program.
- Outdated Software: Nvidia regularly releases new versions of their GeForce Experience program. However, many users don’t update their application with its latest version. In such cases, they may experience this GeForce Experience error on their computer.
- Nvidia Services Problem: This is the primary cause behind this error. Most users who are experiencing this error must have this problem in their computer. Actually, automatic updation of the Nvidia drivers requires proper functioning of the Nvidia Network Service. However, when this service is unable to run itself, then you will encounter the ‘Unable to connect to Nvidia’ error in your GeForce Experience program.
As you can see there can be two scenarios in which you can encounter this Nvidia error on your computer. We will describe the solution for both these scenarios in the next section.
How to Fix Error: Unable to Connect to Nvidia Error?
Fixing this error is easy if you follow its right solution. We have provided two probable solutions for this error and you must follow the steps in the solutions given below in their correct order to get the desired results.
Solution 1: Reinstall Latest GeForce Experience Program
Sometimes this Nvidia error occurs because the GeForce Experience program installed on your computer is an outdated version of this application. The simplest solution is to uninstall the existing program from your computer, then install its latest version downloaded from the official Nvidia website.
If the GeForce Experience installed on your computer is its latest version, then you can skip this solution and directly try the solution 2.
Before starting to uninstall the GeForce Experience program from your computer you should download its latest version from the official Nvidia website. After downloading the GeForce Experience installer file you should save it on your desktop.
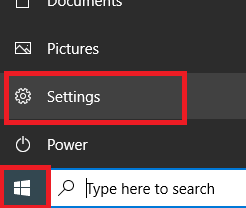
- Click on ‘Start’ and choose ‘Settings’ from the options.
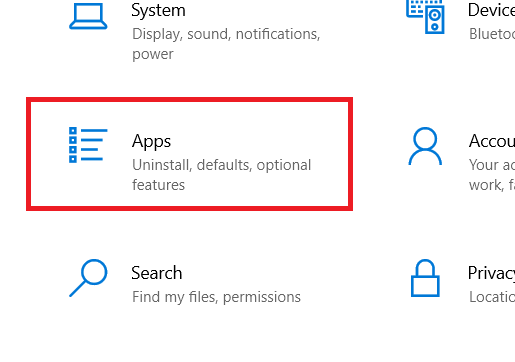
- In the Settings page, click on the ‘Apps’ option.
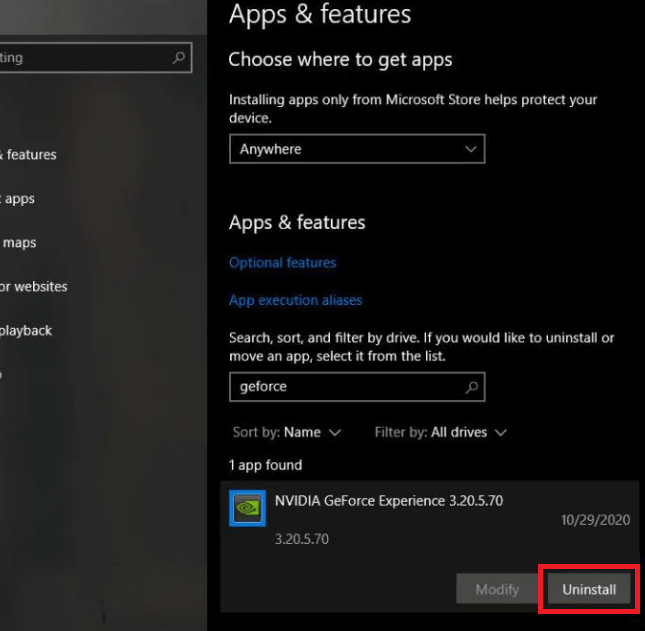
- In the Apps page, locate and choose ‘GeForce Experience’ in the Apps list and click on the ‘Uninstall’ button, then follow the prompts to complete the uninstall process. Finally, restart your computer.
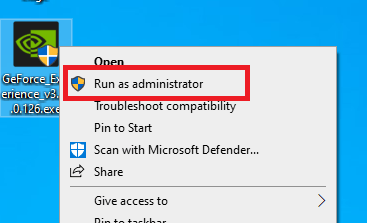
- After the reboot, right click the recently downloaded GeForce Experience installer file on your desktop and choose ‘Run as administrator’ from the options.
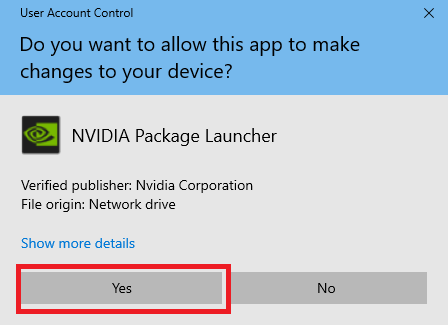
- Click ‘Yes’ in the User Account Control window to proceed.
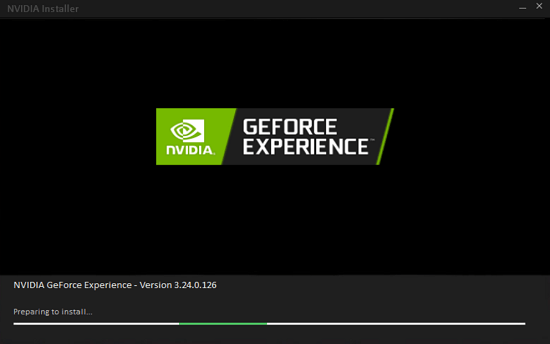
- Wait for the GeForce Experience installer to load itself.
- Wait for the installer to prepare your computer for the installation.
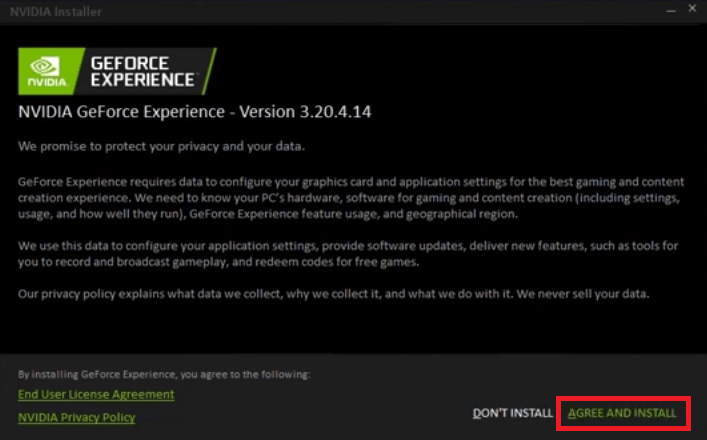
- Click on ‘Agree and Install’ button to accept the Nvidia license agreement.
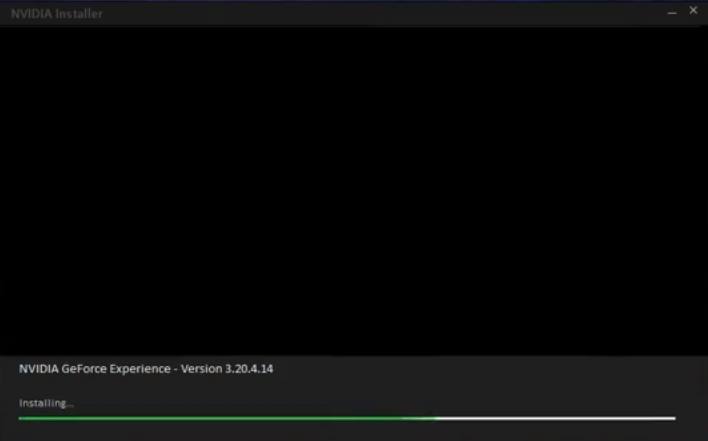
- Wait for the installation of the program to complete, then restart your computer.


After restart check if the ‘Unable to connect to Nvidia’ error has been resolved or not. If this error still exists, then try the next solution.
Solution 2: Change Status of NVIDIA Services
As we have mentioned before that the primary cause of this error is the inability of the Nvidia Network Service to run itself on your computer. However, you can easily resolve this issue by following the steps given below. Although the steps given below are for the Windows 7 OS, but you should follow the same process for the other Windows OS as well.
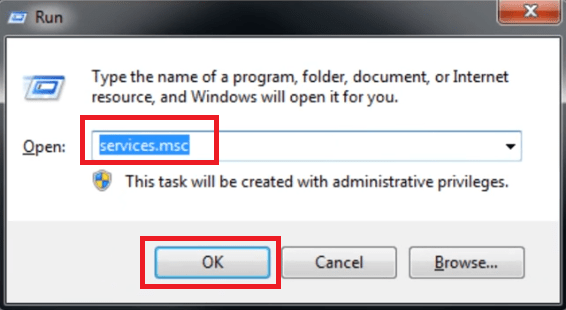
- Press ‘Win + R’ keys together to open the Run dialog box, then type ‘services.msc’ and click on the ‘OK’ button.
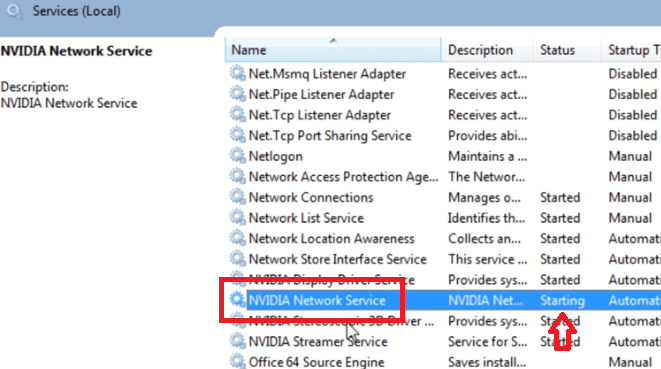
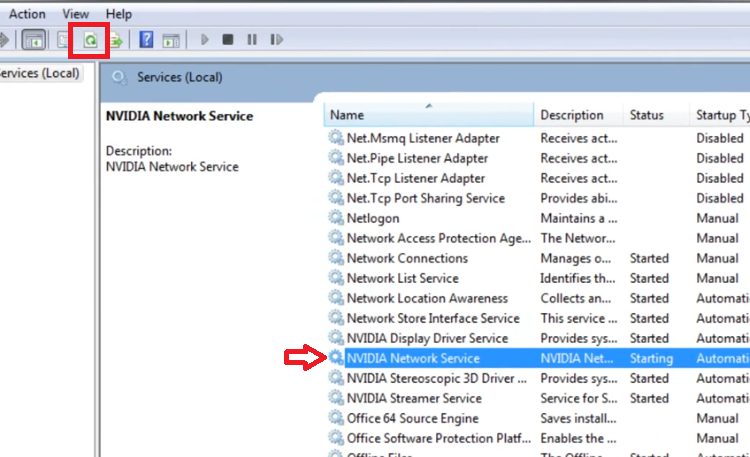
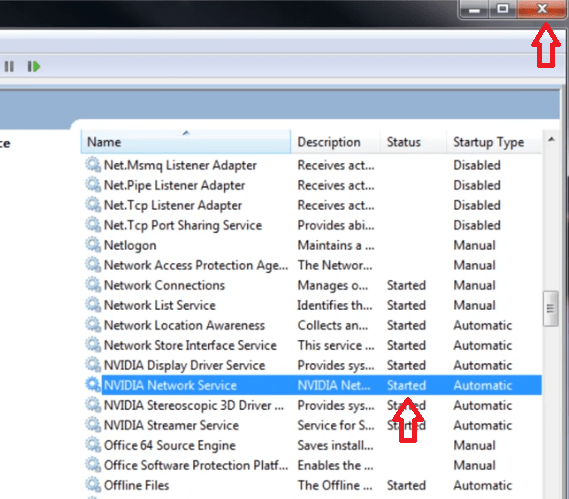
- In the Services page, locate ‘NVIDIA Network Service’ and you will find ‘Starting’ under the Status column. It means this service is unable to start itself. We will get back to this page later.
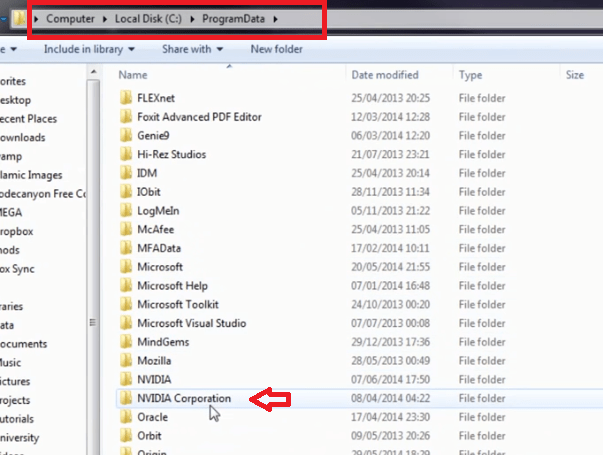
- Open Windows Explorer, go to ‘ProgramData’ folder inside the ‘C Drive’ and locate to open ‘NVIDIA Corporation’ folder. If you don’t find ProgramData folder in your C Drive, then use Step 4 and 5.
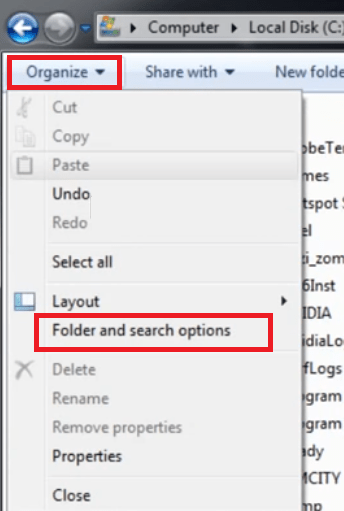
- If you don’t find ProgramData folder, then it must be hidden. Click on the ‘Organize’ button and select ‘Folder and search options’ from the menu.
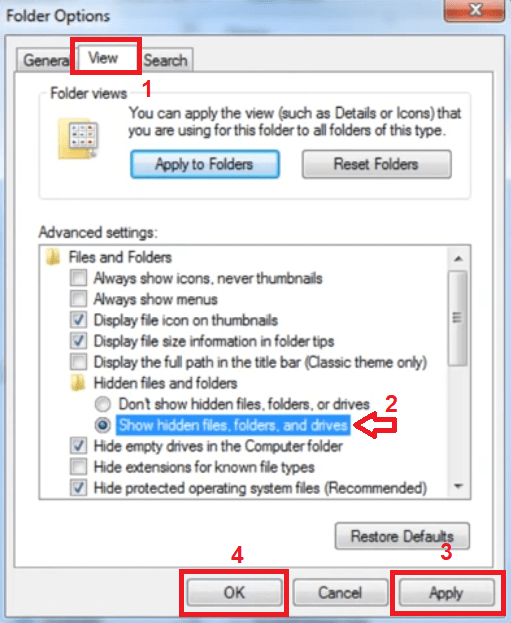
- In the Folder Options window, choose ‘View’ tab, then under ‘Advanced settings’, select ‘Show hidden files, folders, and drives’ option. Finally, click on the ‘Apply’ and ‘OK’ buttons respectively. Now, the ProgramData folder will be visible and you can execute the Step 3.
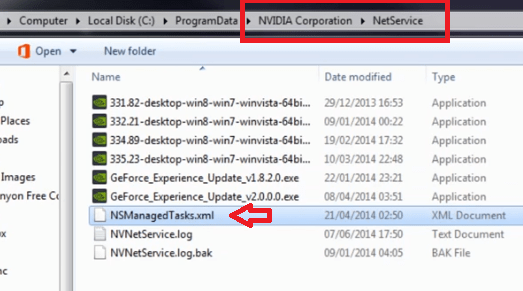
- Inside NVIDIA Corporation folder, enter ‘NetService’ folder and locate ‘NSManagedTasks.xml’ file. You should either delete this file or move it outside this folder.
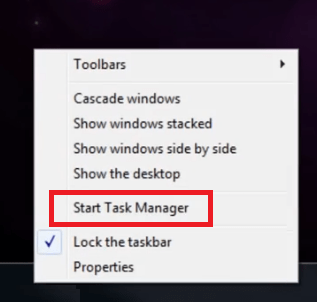
- Right click the Windows Taskbar and select ‘Start Task Manager’ from the options.
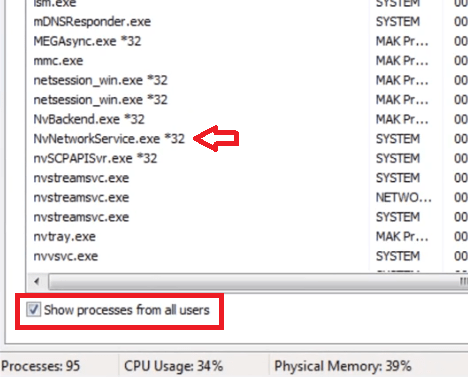
- In the Task Manager, select ‘Show processes from all users’ option and locate ‘NvNetworkService.exe’ process.
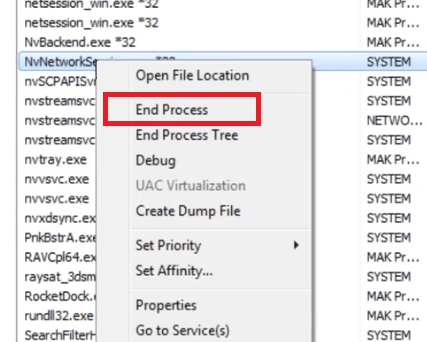
- Right click the ‘NvNetworkService.exe’ process and select ‘End Process’ option.
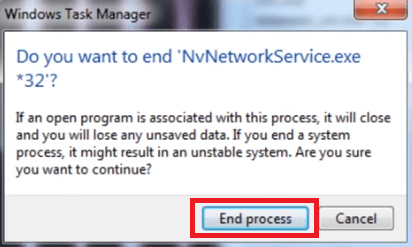
- In the pop-up, click on ‘End process’ button.
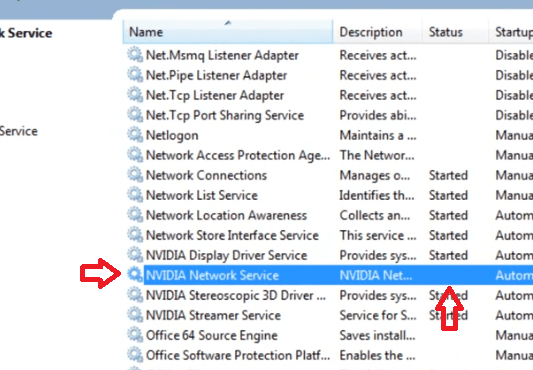
- Go back to the Services page and click on the ‘Refresh’ button.
- Now you can see the Status of ‘NVIDIA Network Service’ is blank.
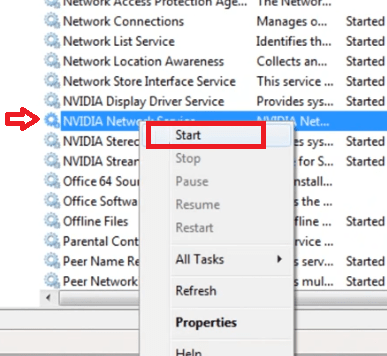
- Right click the ‘NVIDIA Network Service’ and choose ‘Start’ from the options.
- Wait for the service to start.
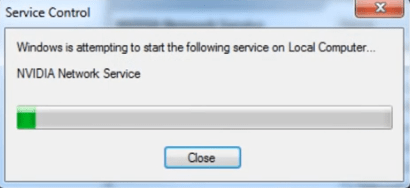
- When you see NVIDIA Network Service displaying ‘Started’ under the Status column, then you can ‘Close’ the Services window.


That’s it, you should try to update your Nvidia drivers by using the GeForce Experience and the ‘Unable to connect to NVIDIA’ error would have been fixed.
Now you how to fix error ‘Unable to connect to Nvidia’ in a Windows computer. The solutions we have shared above are simple, but they are highly effective in solving this problem.