- How to Fix Logitech G Hub Community downloading failed
 jit
jit
How do I fix this when I go to logitech g hub community and try to install something but it keeps on saying download failed how do i fix it?
Reply - CreatorTopic
- AuthorReplies
-
Amit
| #33951
When you are experiencing the ‘download failed’ or ‘Cannot reach G HUB community, please check your internet connection’ messages with relation to Logitech G HUB community, then try the solution described below.
How to Fix Logitech G Hub Community ‘Download Failed’ Error?
To permanently fix this error you will have to create new rules in your Windows Firewall. The Inbound rules of your Windows Firewall monitor and protect your computer from the incoming internet traffic, while the Outbound rules of your Windows Firewall limits the access of the internet from installed programs. You will have to delete some existing Inbound and Outbound rules, then create some new Inbound and Outbound rules on your Windows Firewall.
Follow the steps given below in their correct order so that you can solve the ‘download failed’ error permanently on your Windows computer:
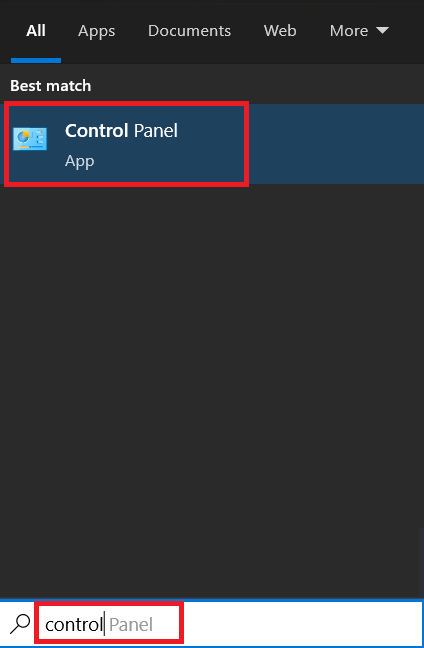
- Type ‘control’ in the search box and click on the ‘Control Panel’ option in the search results.

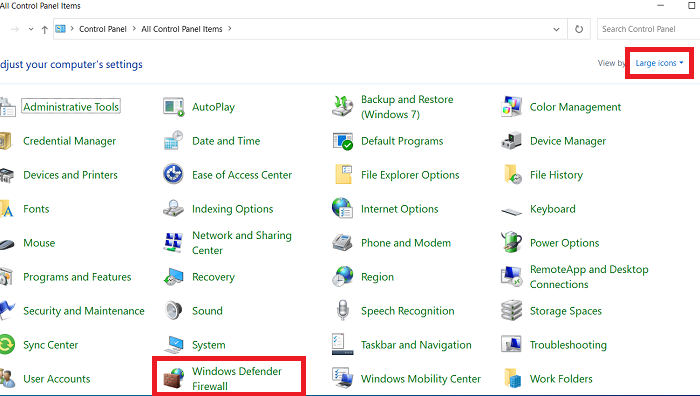
- In the Control Panel window, view by ‘Large icons’, then click on the ‘Windows Defender Firewall’ option.

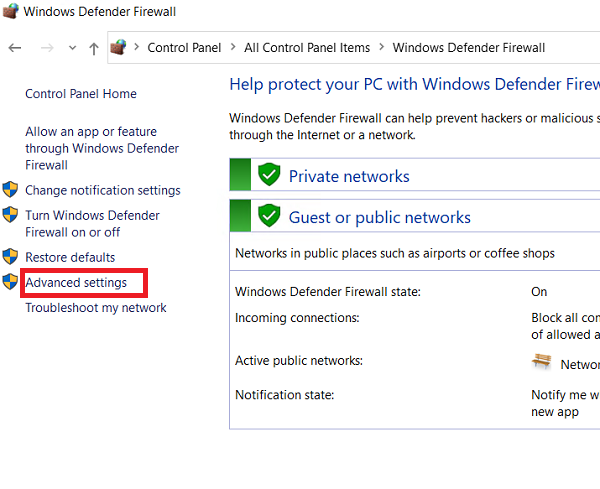
- In the Windows Defender Firewall window, click on the ‘Advanced settings’ option.

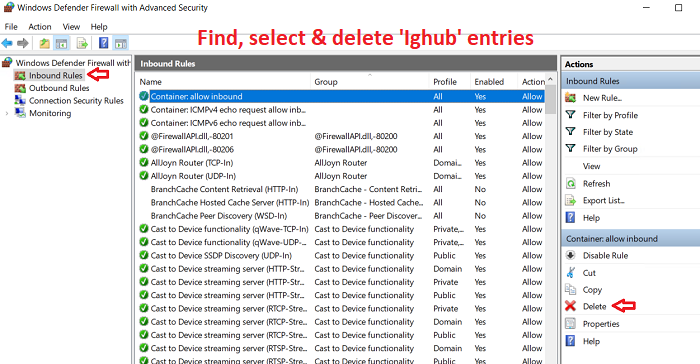
Delete and Create Inbound Rules
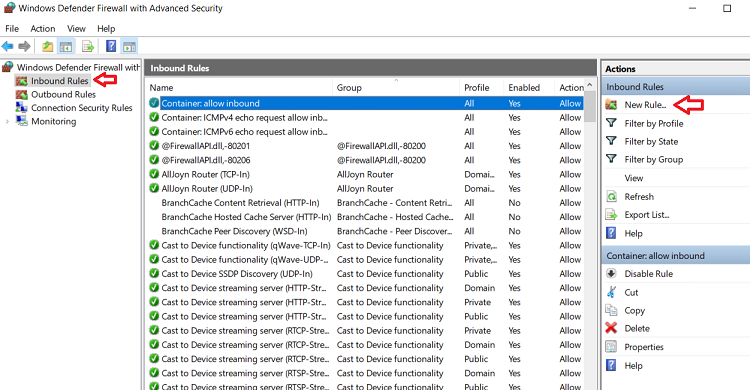
- Choose the ‘Inbound Rules’ option in the right pane, then try to find and select ‘Ighub’ entry in the center pane. If you find any Ighub rules, then click on the ‘Delete’ option in the left pane to delete the ‘Ighub’ entry.

- After deleting the Ighub Inbound rules, click on the ‘New Rule’ link in the left pane.

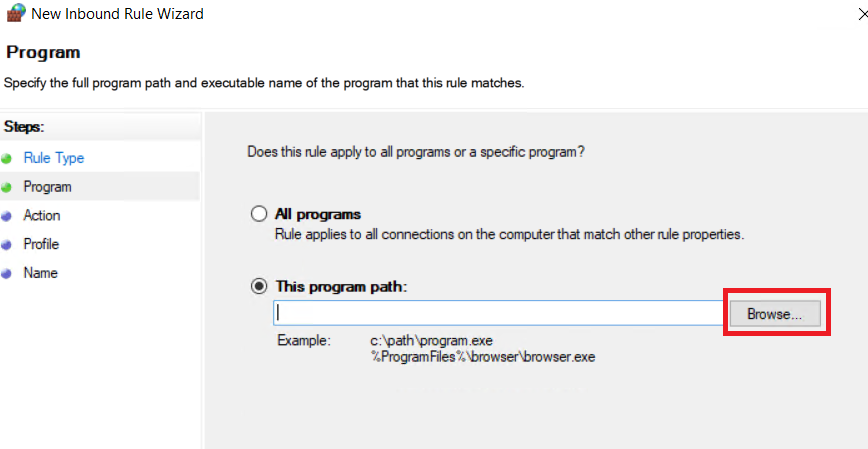
- In the Rule Type window, choose the ‘Program’ option, then click on the ‘Next’ button.

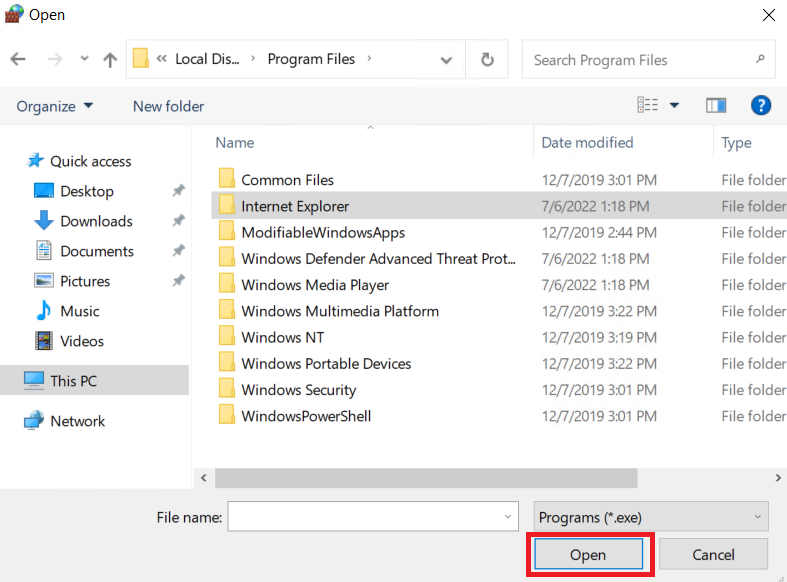
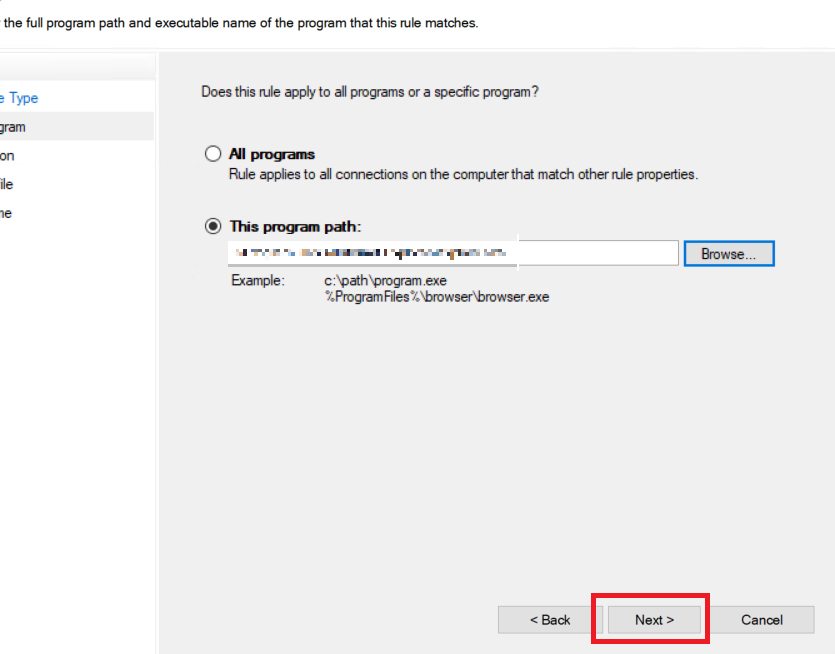
- Click on the ‘Browse’ button in front of the ‘This program path’ field.

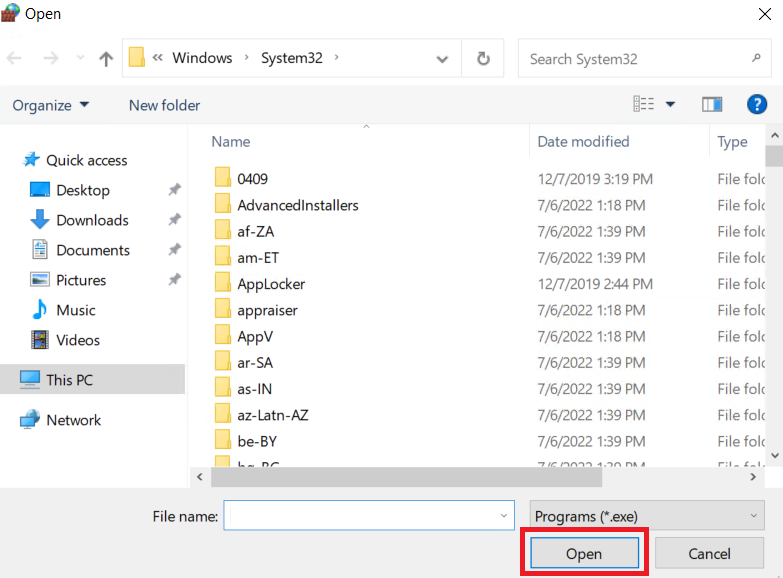
- In the Browse window, locate and select the ‘Ighub.exe’ file, then click on the ‘Open’ button.

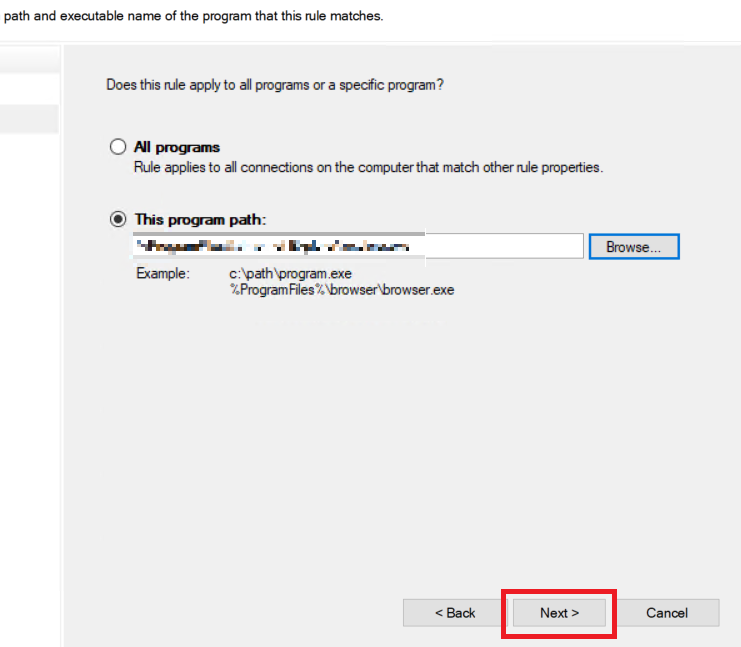
- Click on the ‘Next’ button to proceed.

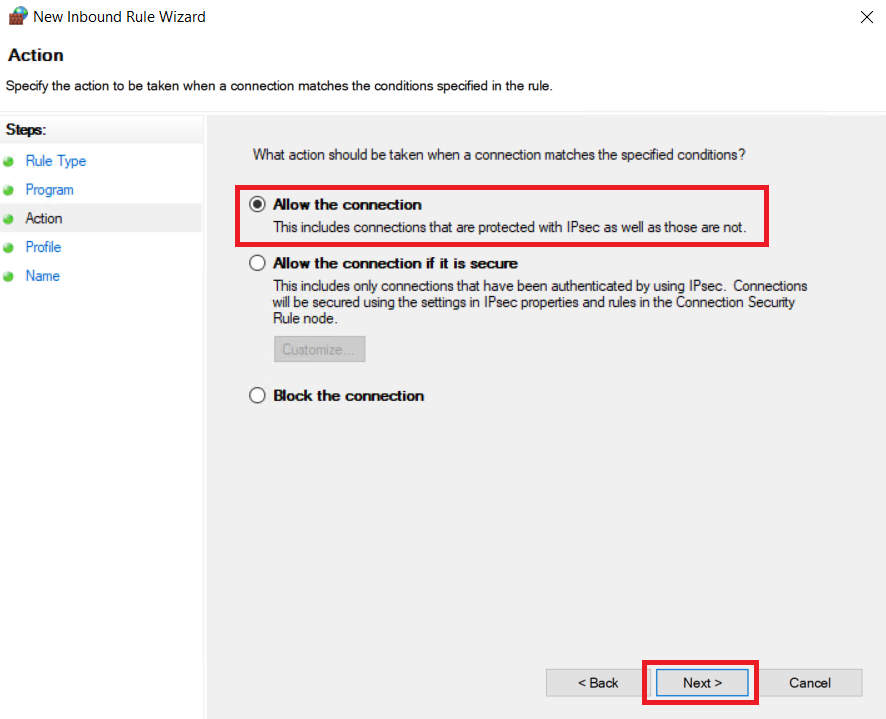
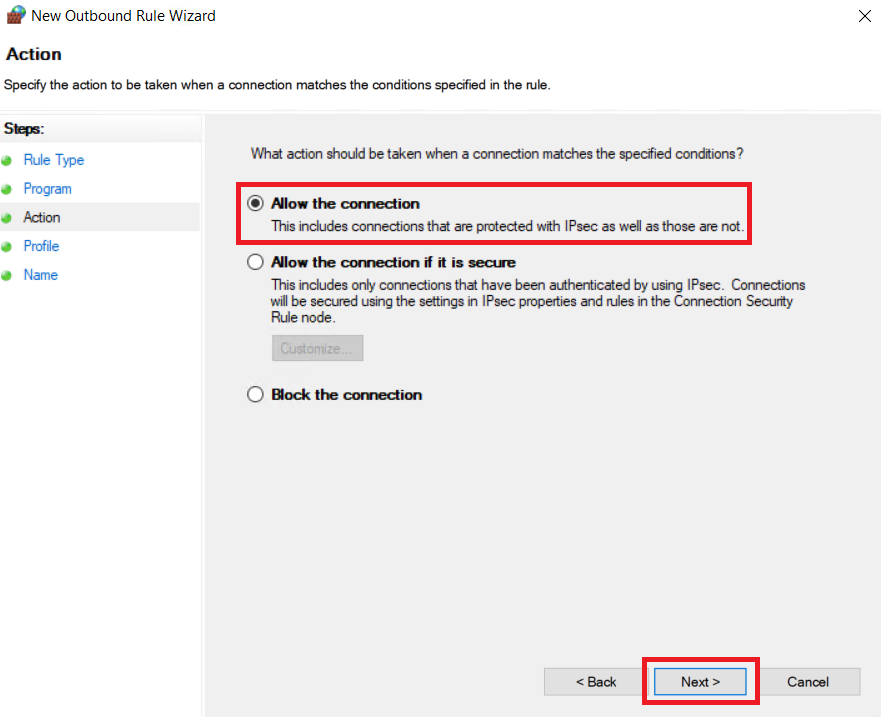
- In the Action window, choose the ‘Allow the connection’ option, then click on the ‘Next’ button.

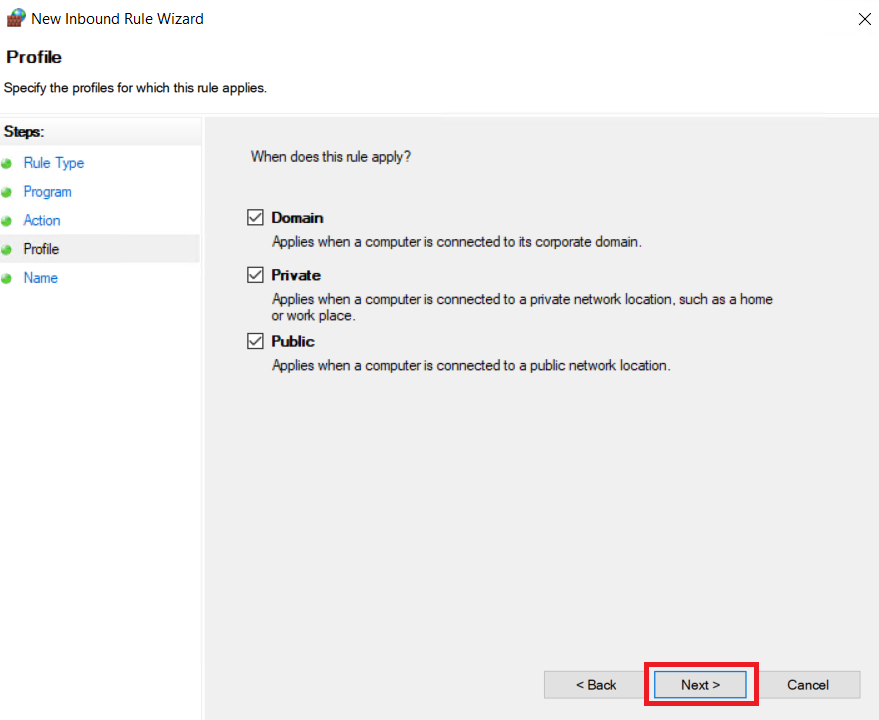
- Make sure that all the options are selected in the Profile window, then click on the ‘Next’ button.

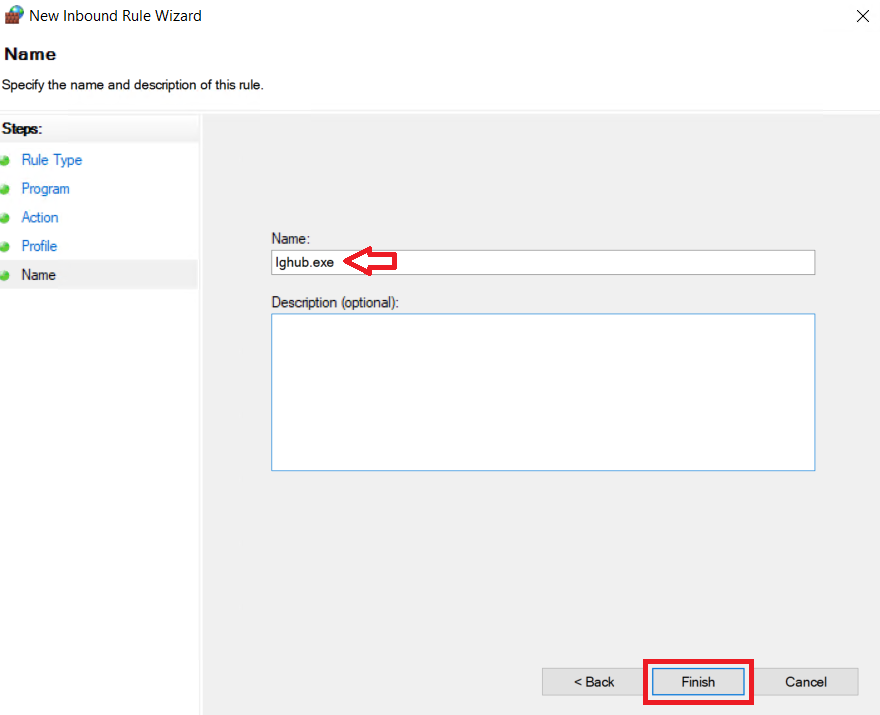
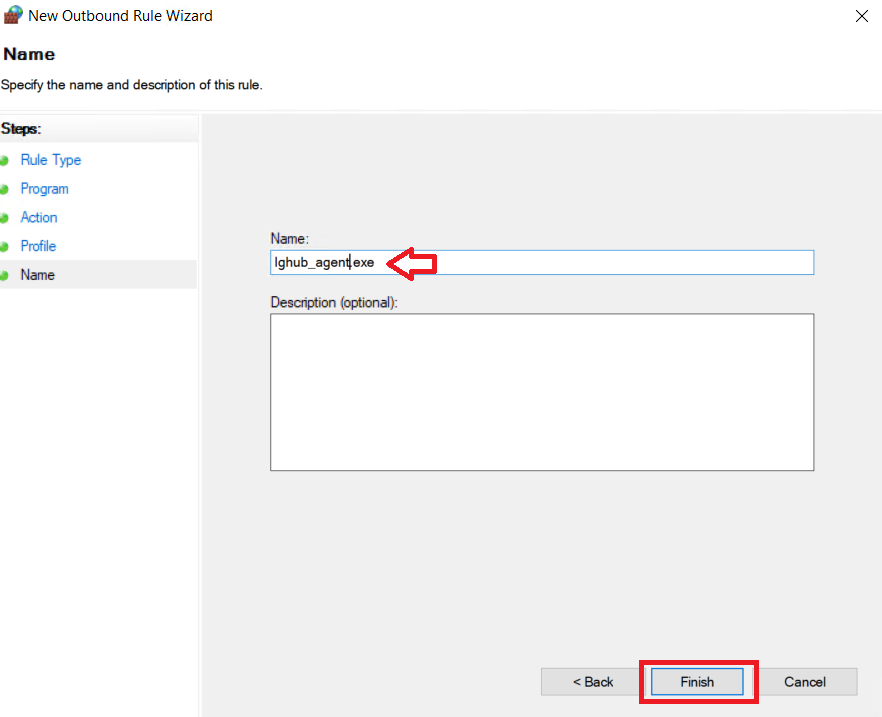
- In the Name field, type ‘Ighub.exe’, then click on the ‘Finish’ button to create the new Inbound rule.

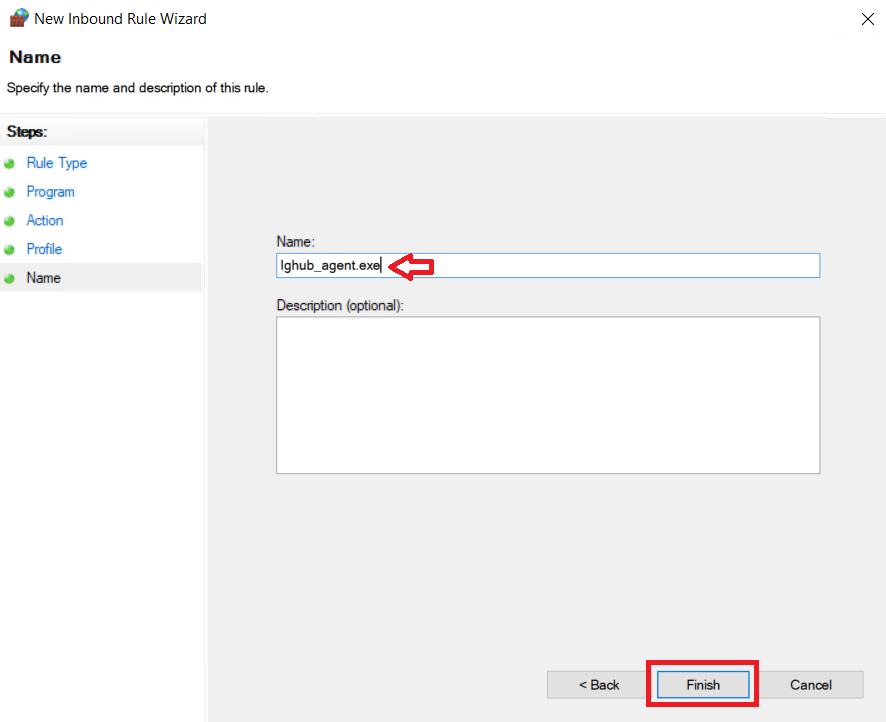
- Once the Ighub.exe rule has been created, then follow the Steps 5 to 11 again to create another Inbound rule for the ‘Ighub_agent.exe’ file. Finally, click on the ‘Finish’ button.

Delete and Create Outbound Rules
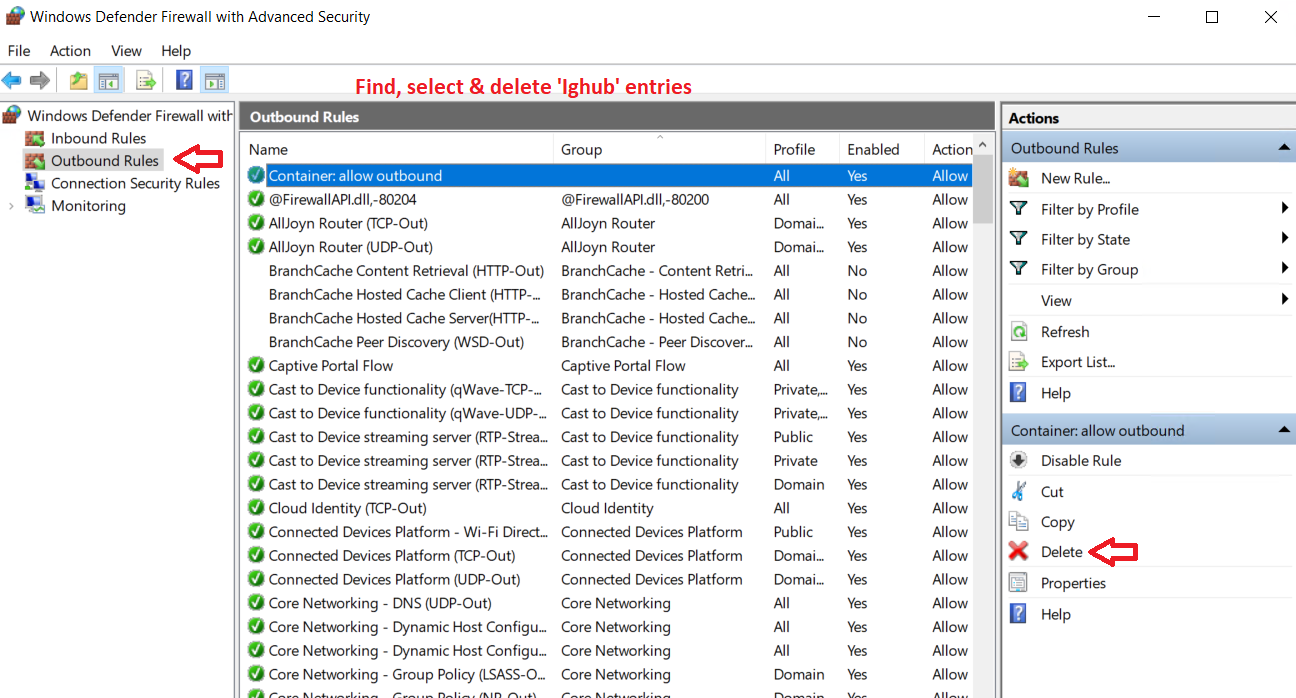
- Choose the ‘Outbound Rules’ option in the right pane, then try to locate and choose ‘Ighub’ entry in the center pane. If there is any Ighub entry in the Outbound Rules of the Windows Firewall, then click on the ‘Delete’ option in the left pane to delete the ‘Ighub’ rules.

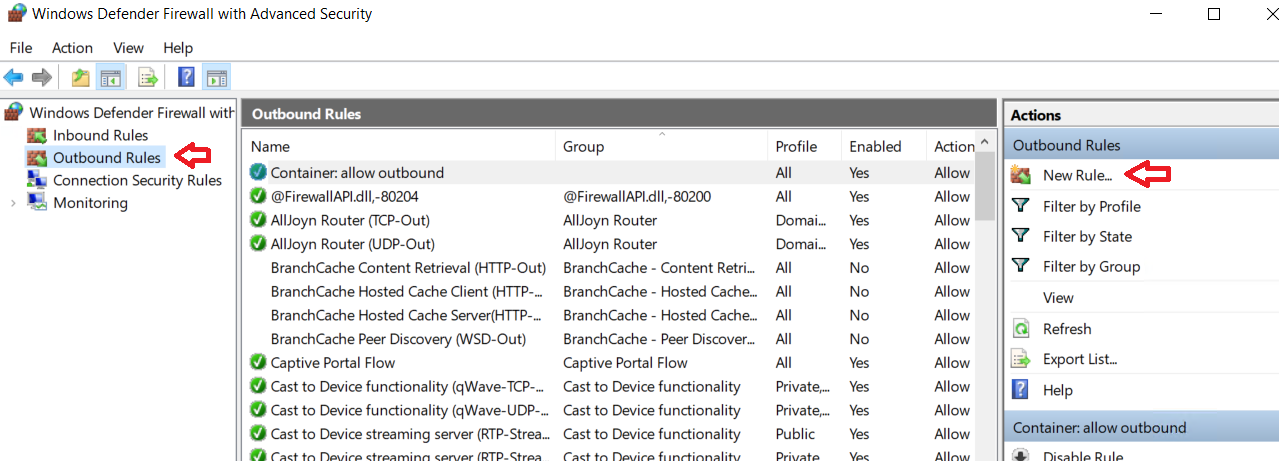
- After deleting the existing Ighub Outbound rules, click on the ‘New Rule’ option in the left pane.

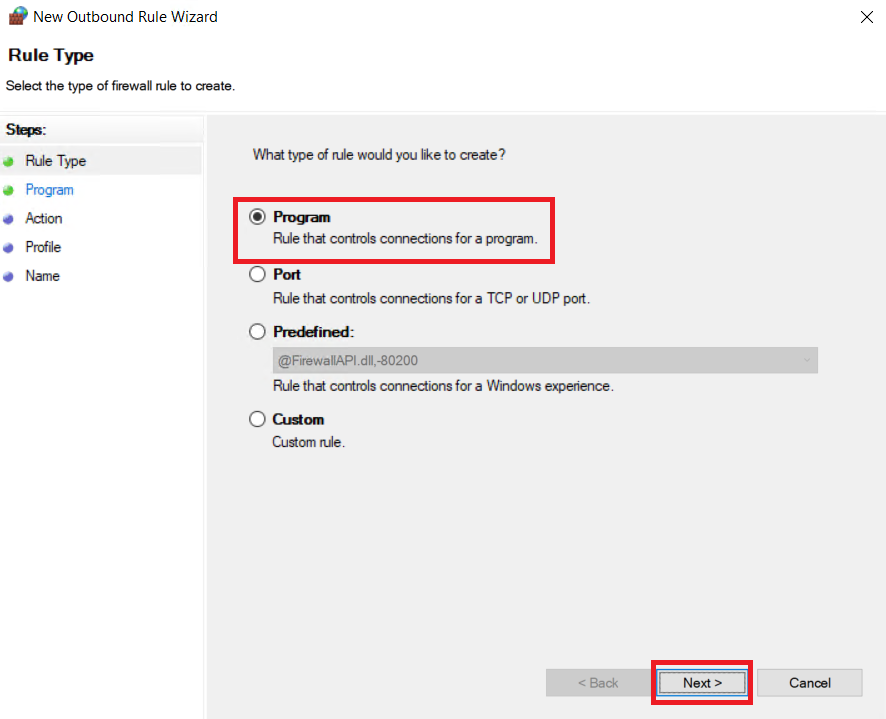
- In the Rule Type window, select the ‘Program’ option, then click on the ‘Next’ button.
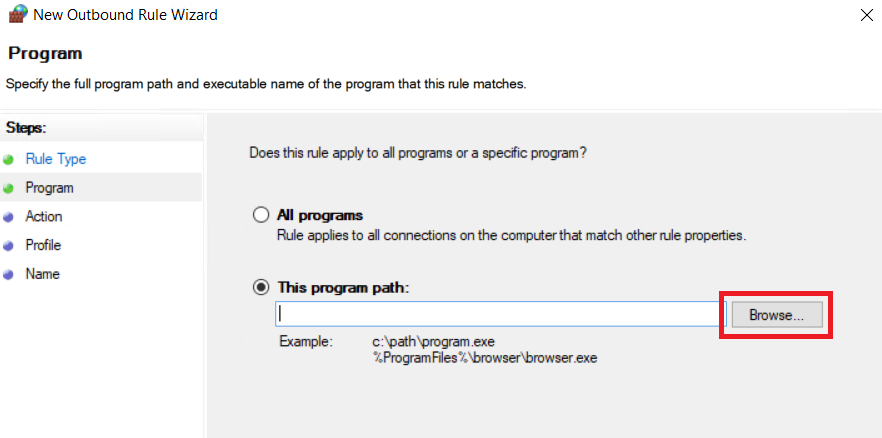
- In front of the ‘This program path’ field, click on the ‘Browse’ button.

- In the Browse window, find and select the ‘Ighub.exe’ file, then click on the ‘Open’ button.

- Click on the ‘Next’ button to proceed.

- In the Action window, select the ‘Allow the connection’ option, then click on the ‘Next’ button.

- In the Profile window, verify that all the options are checked, then click on the ‘Next’ button.
- In the Name window, type ‘Ighub.exe’ in the Name field, then click on the ‘Finish’ button to create the new Outbound rule.

- Once the new Ighub.exe Outbound rule has been created, then follow the Steps 15 to 21 again to create another Outbound rule for the ‘Ighub_agent.exe’ file. Finally, click on the ‘Finish’ button.

That’s it, now close all the opened windows on your computer and try to access the features of the Logitech G HUB community. You will find that your problem has been resolved.
+ 0Reply - Type ‘control’ in the search box and click on the ‘Control Panel’ option in the search results.
- AuthorReplies