In case you didn’t know yet, Windows has its own built-in tools, which helps its users, to take care of their computer needs. Windows 10 has improved upon such tools to make it a lot easier to take care of the business. One of the uses and the little-known tool is Automatic Maintenance.
What is Automatic Maintenance?
Automatic Maintenance runs in the background anytime you are idle, which includes the time you sleep. It automatically checks for errors to solve, running optimization services to enhance the overall performance of the computer and even defragging the hard drive as well. It pause the operation automatically when user starts working and resume again when again system become idle.
How to Enable / Run / Schedule Automatic Maintenance in Windows 10
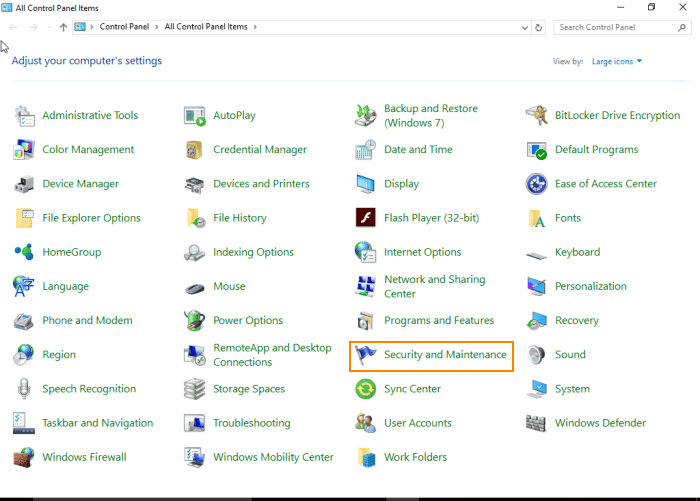
1. Go to control panel and click on Security and Maintenance tab.
2. Now click on Maintenance tab to expend its more options. Here you will find the Automatic maintenance with 2 buttons on it Start Maintenance and Change maintenance Settings. Refer to below screenshot.
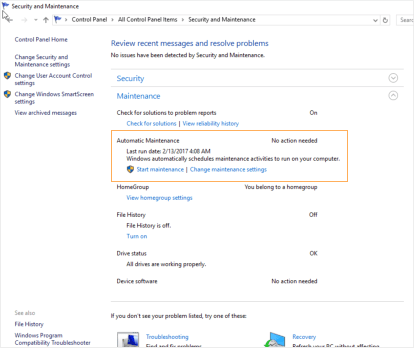
Click on Change maintenance setting which bring up the screen as in the below screenshot. Select the best time to schedule automatic maintenance when your PC have free time.

And by clicking on the Start Maintenance button, it will start the process immediately in the background Now clicking again on the button will stop the process. Alternatively you can use the below command line to run it directly. Type the following command in Run windows.
mschedexe.exe start
Automatic Maintenance is a good feature but some user it can be troublesome like it starts when user is doing some important task. So see the below steps that how you can disable to run this feature automatically.
How to Disable Automatic Maintenance in Windows 10
1. Start the Registry Editor by pressing the Win + R keys and Typing regedit into the Run box and hit OK
2. In the Registry Editor go to
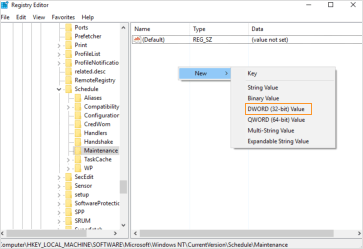
HKEY_LOCAL_MACHINE\ SOFTWARE\ Microsoft\ Windows NT\ CurrentVersion\ Schedule\ Maintenance
3. Make a DWORD value MaintenanceDisabled if it does not exist already. Right Click and in New and click on DWORD value as like in below screenshot.
4. Double-click the MaintenanceDisabled and set the data value to 1 as seen in below screenshot.

5. You can now click OK and exit the Registry Editor. Now if you even click on Start maintenance button in Control Panel to run maintenance manually it will not work.
Automatic maintenance in your Windows 10 is meant to improve the performance of your computer, So it is better to leave it on.